WoodenuKnow.com is a participant in the Amazon Services LLC Associates Program, an affiliate advertising program designed to provide a means for sites to earn advertising fees by advertising and linking to Amazon.com and may earn from qualifying purchases.
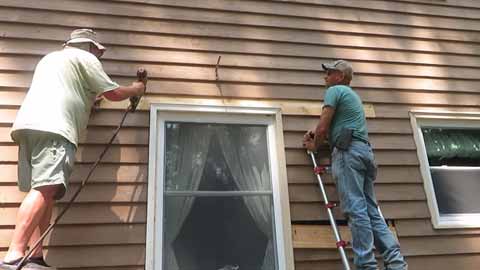
When it comes to installing cedar siding, nails are an integral part of the process. The main purpose of nails for cedar siding is to keep the siding in place and prevent it from falling off.
However, you can’t use any type of nail when installing cedar siding. There are specific nails designed specifically for this purpose.
Using the wrong type of nails can damage your wooden cladding and decrease its lifespan. As a result, your entire project will be rendered ineffective.
To ensure that your cedar siding lasts for a long time, you must use the best nails for cedar siding.
However, how can you determine which nails are the best? We have compiled a list of the top six ideal nails for installing cedar cladding for your convenience. As a result, your hard work will not be ruined due to the choice of nails you make.

Findmall Galvanized Nails Cedar Siding


BOSTITCH Cedar Shake Siding Nails

Simpson Strong Tie Stainless Steel Nails
Best 6 Nails for Cedar Siding
Cedar siding is a popular option for homeowners to improve the appearance of their homes. But choosing the proper nails for wooden cladding can be a daunting task.
There are many types of nails on the market, and not all of them are suitable for wooden cladding. Ideally, you should choose nails that are specifically designed for wood siding.
The following are the 6 best nails for cedar siding that are explicitly designed for this type of siding.
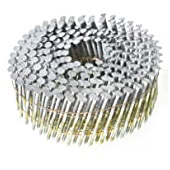
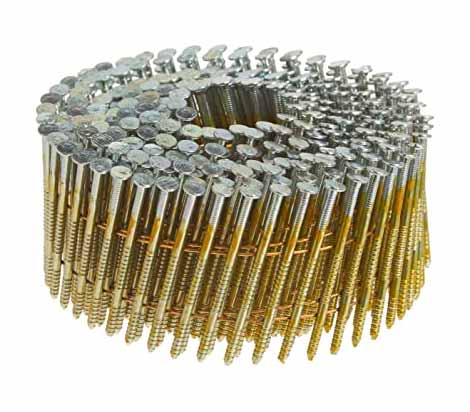
1. Findmall Galvanized Nails Cedar Siding
If you’re looking for robust and durable nails to use with cedar siding, then look no further than these galvanized nails from Findmall.
These galvanized nails are perfect for rough nailing of lathing and sheathing materials. The full roundhead ring-type shank of these nails provides extra holding power, and the hot-dip galvanizing ensures that these types of nails will be corrosion and rust resistant.
As these nails are 1-1/4 inches in length and have a diameter of 0.092 inches, they are ideal for bevel siding.
Made from HDG steel, these nails are corrosion-resistant and perfect for use with pressure-treated lumber.
Whether you’re installing wooden siding or another decorative facade, these types of nails can be a good choice for a seamless, professional look.
The weight of these nails package is 9.2 pounds, the dimensions of the package are 13.35 x 9.13 x 3.5 inches.
Their 15-degree collated wire coil ensures that they will be secure in the material you’re nailing them into.
With 3600 galvanized nails for wooden siding included in these nail packs, this set has everything you need to get the job done.
Highlighted Features:
- Hot-dipped galvanizing ensures that the nails will be corrosion and rust resistant.
- The 15-degree collated wire coil ensures a secure hold.
- 3600 nails per pack for a complete job.
- Made from HDG steel for maximum strength and durability.
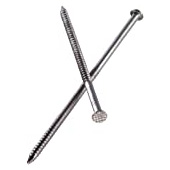
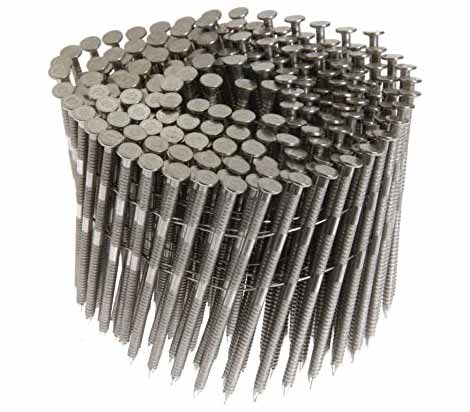
2. Simpson Strong Tie Stainless Steel Nails for Cedar Siding
If you’re looking for ideal nails to use with cedar siding, then these nails from Simpson can be a great option. Made from 304 SS steel, these nails are corrosion-resistant and will hold up well against the elements.
They are available in most sizes, and they come in both 1 and 5-pound boxes. This makes the nails perfect for any project, big or small.
The checker head pattern on these types of nails is designed to blend in with the timber grain of wooden siding, making them less noticeable. This can be a helpful feature if you want your cladding to look as natural as possible.
An annular ring-type shank on these stainless steel nails increases their hold and stability, making them ideal for use on wooden sidings.
The sharp point of these nails also makes it easy to drive into the timber, and the smooth shank ensures a clean finish. These types of nails are also ideal for use in redwood cladding projects.
These stainless nails have a diamond-shaped point that makes them easy to drive, and they are designed for easy driving.
They are imported nails that are made with high-quality materials, so you can be sure that they will hold up under pressure.
Whether you’re searching for ideal nails, the Simpson strong tie stainless nails can be a great choice for wood siding.
One pound is the weight of this item, which is very light. This makes it easy to carry around and use. And the product dimensions‎ are 2 x 5 x 4 inches.
Highlighted Features:
- Made from 304 stainless steel for corrosion resistance.
- Checker head pattern.
- An annular ring-type shank increases hold and stability.
- Diamond point makes it easy to drive.
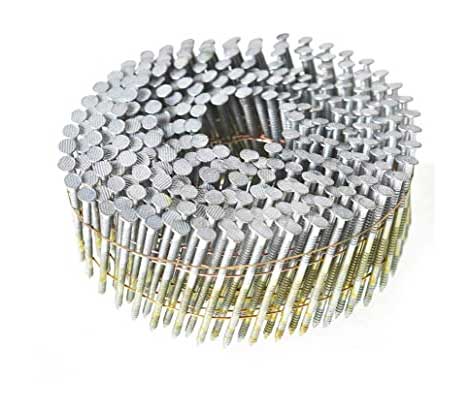
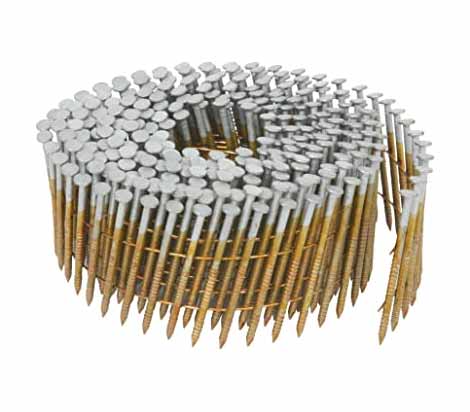
3. BOSTITCH Cedar Shake Siding Nails
BOSTITCH nails are wire-collated nails that are made for use with cedar siding. These nails provide a secure, long-lasting grip for your wood siding.
Since these nails are made from thick-coated galvanized steel, they are corrosion and rust resistant. They have a sharp point that makes them easy to install.
These galvanized nails have a flat head style, which makes them easy to use and helps to ensure a secure hold.
A ring-type shank on each galvanized nail helps keep it in place, ensuring that the cladding will not become loose over time.
These wooden cladding nails have a 15-degree angle, making them ideal for this purpose. The angle of these nails makes them easier to drive into the timber and helps keep them secure.
To ensure the nails last a long time, they are made of durable, high-quality materials. 3600 nails are enclosed within the package, so you have plenty of them to use.
The item weight is 14.62 pounds. The package length of these nails is 13.72 inches; width is 24.38 inches, and height is 35.05 inches.
Highlighted Features:
- Made with thick coated galvanized steel material.
- The flat-head style is easy to use and helps keep nails in place.
- Ring-type shank for a tight grip.
- 15 Degree angle for easy installation.
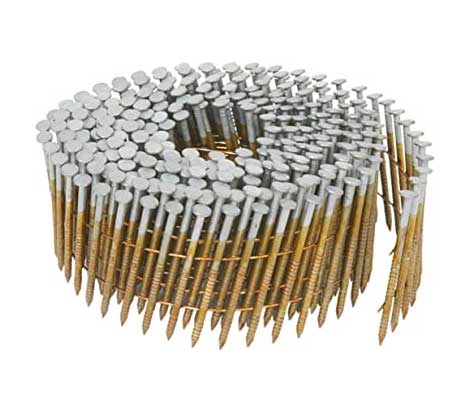
4. Hitachi Hot-Dip Galvanized Cedar Shake Siding Nails
Hitachi nails can be a great choice for use with cedar shake sidings. The hot-dip galvanized coating can protect the nails from rusting over time and retain a shiny appearance.
They are wire-collated, meaning that they are easy to install. It is ideal for rough nailing of lathing and sheathing materials.
These galvanized nails are designed specifically for use with the Hitachi coil siding nail gun models NV65AH and NV75AG.
The nails measure 2-1/4 inches in length and have a diameter of 0.092 inches. They come in a pack of 3,600 nails, making them ideal for installing siding projects.
There are 4.36 pounds in weight for this item. These hot-dip galvanized cedar shingles cladding nails have an inch measurement system.
The ring-type shank on these nails helps to keep them in place, ensuring that your project stays looking great for a long time.
These nails have a full round-head, which gives them a clean, finished look. You may select these nails for cedar shingles projects that require extra strength and durability.
Highlighted Features:
- Wire collated for easier installation.
- Hot-dip galvanized coating to protect from rusting.
- Full round nail head with a clean, finished look.
- The ring-type shank helps keep nails in place.
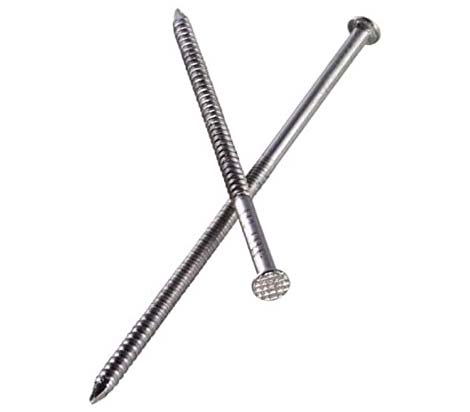
5. Grip Rite Ring Shank Stainless Cedar Siding Nails
When it comes to cedar siding, you need a product that can provide a stronger hold. Grip Rite nails can be a perfect solution.
These nails from Grip Rite are a high-quality product that offers a secure grip on your cedar siding. A 15-degree angle on the nails facilitates easier insertion into the lumber.
The ring-type shank of these nails provides greater holding power. And the SS steel construction ensures that these nails will not rust, even in the harshest environments. It measures 1-1/4 inches by .09 inches, making it the perfect size for wooden cladding applications.
Grip Rite stainless cedar siding ring shank nails come in boxes containing 1200 nails. The weight of the item is 1.0 lb.
On these stainless ring-type shank cedar shingles nails, inch measurements are used. The dimensions of this item are 10.0″L x 6.0″W x 4.0″H.
These stainless nails are long-lasting and durable to ensure that they won’t bend or break while you’re working on your cedar shingles task.
With all these features, the Grip Rite ring shank nails can be an ideal choice for anyone looking to complete a cedar shingles project.
Highlighted Features:
- Stainless steel nails prevent rusting in any environment.
- Ring-type shank provides greater holding power.
- 15-degree angle for easier insertion.
- Boxes containing 1200 nails.
6. Metabo HPT Nails for Cedar Siding Ring Shank Coil
If you’re looking for an impressive finish on your cedar siding, you need to check out these Metabo HPT nails.
They have a ring-type shank coil that helps to prevent them from slipping out, making them ideal for this type of application.
Their full round head gives you a nice, finished look. These ring shank nails are 15 degrees, which is the perfect angle for installing siding.
They provide excellent holding power, ensuring that your cladding remains securely in place. Furthermore, these ring shank nails may also be utilized for sheathing, decking, and fencing purposes. This package contains 3,600 nails, so you can easily finish your large wooden cladding project.
In order to withstand wear and tear, these nails are constructed carefully. These nails are hot-dipped galvanized which provides a natural finish that is stain resistant and can also fight corrosion. It’s a simple lightweight design that doesn’t require a lot of installation time or effort.
These nails are compatible with the METABO HPT NV65AH2 nail gun. The weight of this item is 12.43 pounds and the product dimensions are ‎0.09 x 0.09 x 1.75 inches.
The size of this ring shank nail is 1-3/4-Inch x 0.092-Inch which is ideal for wood sidings. This product has a metric measurement system.
Therefore, you may choose this ring shank nail for the wooden cladding and complete your project successfully.
Highlighted Features:
- The full round head gives a nice finished look.
- 15 degrees angle for perfect installation.
- Hot-dip galvanized finish for resistance to corrosion and staining.
- Excellent holding power to keep your cladding in place.
Factors to Consider When Choosing Nails for Cedar Siding
You should use the appropriate nails when installing siding on your home. Although this seems like a simple job, choosing the wrong type of nails can lead to problems with the wood. Here are some factors to consider when choosing the best nails for cedar siding.
1. The Material of the Nail
When installing cedar siding, you’ll want to use nails that are made specifically for timber. Different materials can be used for nails, such as stainless steel, aluminum, etc.
However, stainless steel nails are the best option. The stainless steel nails are corrosion and rust resistant, which means they will stay in good condition no matter what the weather is like.
2. The Size of the Nail
It is important to consider the size of the nail when selecting the best nails for cedar siding. You should use the right size nails for the job.
If the nails are too small, they may not be strong enough to hold the wood in place. On the other hand, if the nails are too large, they may damage the wood and cause it to break.
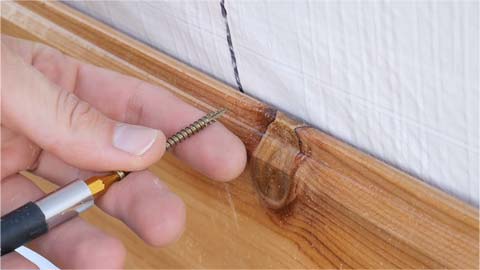
3. The Shank of the Nail
You should also consider the shank when choosing the best nails for cedar siding. The shank is the part of the nail that helps it to stay in place.
A ring shank nail provides more holding power than a standard shank, so it’s a good option for wooden cladding.
4. Angle of the Nail
The nail’s angle can affect how well it holds the wood in place. During red cedar shingles installation, it is essential to use regular nails that are inserted at the correct angle.
A 15-degree angle is ideal, as it makes the nail easier to insert and helps to prevent damage to the wood.
5. The Head of the Nail
Another important factor to consider is the head of the nail. A full round head is the most appropriate choice, as it provides a nice finished appearance and is more secure than other types of heads.
6. The Coating of the Nail
When choosing proper nails for cedar siding, you should also consider the coating. A hot-dip galvanized finish is a good option, as it’s resistant to rust and corrosion.
It also provides a natural finish that’s stain-resistant and can fight against corrosion. Thus, you should consider all of these factors when selecting regular nails for wooden cladding.
Consequently, you will be able to choose the correct nails for cedar siding, and you will be able to install your wooden cladding with ease.
How to Insert Nails Into Cedar Siding?
After choosing the correct nails for wooden cladding, you can begin your installation. If you’ve never installed wooden cladding before, it’s helpful to review the installation instructions that came with your nails.
This will give you a better idea of how to use them successfully. Here are the basic steps for installing cedar siding with regular nails:
Step 01: Prepare the Cedar Siding
Before you begin, it’s essential to make sure that the wooden cladding is properly prepared. Remove any debris from the surface and use a damp cloth to clean it to avoid getting in your way as you work.
Step 02: Mark the Location
Next, you’ll need to determine where you want your nails to be. Use a pencil and a carpenter’s level to mark the location where each nail will go. This will ensure that your cladding is installed evenly and that it looks good when you’re finished.
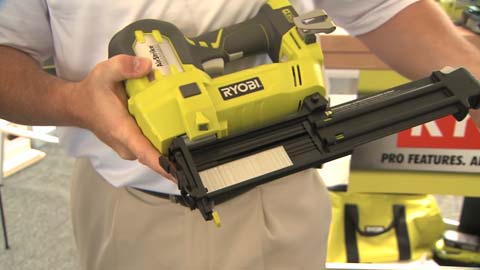
Step 03: Get Your Nail Gun Ready
Now, get your nail gun ready to begin installing the nails. Make sure that the nail gun and nails are compatible and that they’re appropriate for the job.
Step 04: Load the Nails
Let’s load the nails into the nail gun. Be careful not to overload the gun, as this can cause it to jam. If you’re using a pneumatic nail gun, make sure that the air pressure is set correctly before you begin.
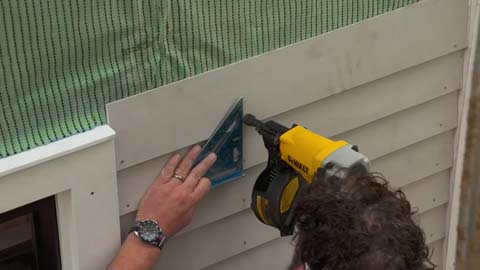
Step 05: Shoot the Nails
Once you’ve loaded the nails, it’s time to shoot them into the wood. Hold the nail gun against the wood and pull the trigger to shoot the nail. Make sure that you hold it firmly against the wood so that the nail goes in straight.
Step 06: Repeat for Each Nail
Once you’ve shot one nail, move on to the next. Keep repeating this process until all of the nails are in place.
Step 07: Finish the Job
Once you’ve installed all of the nails, it’s time to finish the job. Turn off your nail gun and unload the magazine. Give the wooden cladding a final inspection to make sure that all of the nails are in place.
Safety Precaution When Installing Wooden Siding
Before you start to install your wooden cladding, make sure that you have the proper safety equipment.
This includes protective goggles and gloves, which will keep debris out of your eyes and protect your hands.
You should also wear a dust mask while installing the nails to avoid breathing in any dust. If you have a pneumatic nail gun, make sure that the air tank is filled and that there’s no leakage.
When installing wooden cladding, always be aware of your surroundings. Make sure that you have plenty of space to work, and keep children and pets away from the area while you’re working.
It’s also important to wear the appropriate clothing. Avoid loose clothing and wear boots that will give you good traction.
If you’re working at a high elevation, always be sure to use fall protection equipment. This will ensure that you stay safe while you’re working at heights.
Lastly, make sure that you clean up after yourself. Collect the unused nails and debris when you’re finished working to avoid any accidents or injuries.
FAQs:
There are some questions that people may ask when choosing nails for wooden cladding. Before beginning your project, it is important to know the answers to these questions.
Listed below are some of the most frequently asked questions regarding nails for wooden cladding.
What Kind of Nails to Use for Cedar Siding?
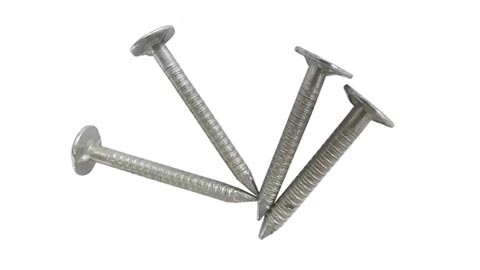
For wooden sidings, you can use aluminum nails, stainless steel nails, and hot-dip galvanized nails. All of these types of nails are resistant to corrosion and staining.
Is Hot Dip Galvanized Nails Ok for Painted Cedar Siding?
For painted wooden cladding, hot-dip galvanized nails are a good choice. They have a natural finish that is resistant to corrosion and staining.
Can I Use a Finish Nailer for Cedar Siding?
A finish nailer can be used for wooden cladding, but it’s not the best option. Using a siding nailer is a better choice, as they are designed specifically for wooden cladding.
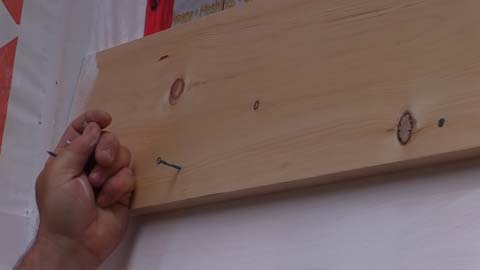
Where Do You Place Nails on Cedar Siding?
When installing wooden cladding, you should place the nails above the overlap. This will help to keep the wooden cladding in place and prevent it from falling off.
Conclusion
Choosing the best nails for cedar siding is important if you want your project to be a success. By using the appropriate nails, you can ensure that your wooden sidings are installed correctly and that they look great.
All of the nails listed above are of excellent quality. Feel free to select any one of them for your wooden cladding project. Hopefully, you will be satisfied with the nails we recommend.