WoodenuKnow.com is a participant in the Amazon Services LLC Associates Program, an affiliate advertising program designed to provide a means for sites to earn advertising fees by advertising and linking to Amazon.com and may earn from qualifying purchases.
Building a doorway is an excellent DIY project. It can be just as satisfying as building a deck or installing plumbing fixtures. Doorways can create a beautiful entryway. They are also the most important part of your home security plan. If you want to keep unwanted guests out, then building an exterior door jamb is a key!
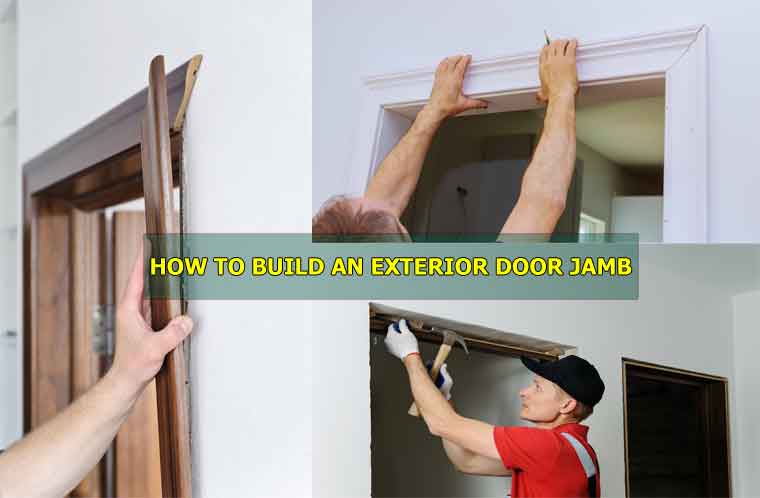
Step-By-Step Guide to Building an Exterior Door Jamb
The door installation steps are relatively simple and the tools and materials are inexpensive.
Essential Tools:
- Miter saw
- Table saw
- Pneumatic finish nailer or electric brad nail gun with compressor and nails
- Wood shims
- Utility knife
- Tape measure, level, four a square for layout
- Hammer or framing hammer
- Cordless drill/driver kit with staple gun attachment and composite decking screws (or exterior door jamb material)
Note: This is the only tool you will need if building an entry or patio door. If your doorway has sidelights that allow light into the room from either side of the door opening then you’ll also want to attach some wire mesh tape onto each inside edge of where those windows are going to be installed on all three sides of one window frame before attaching it in place.
You Might Also Like: Finishing Nail Removal Instructions
Choosing Door Jamb Material
There are many different types of materials for new door jamb. One thing to keep in mind is the type of material you’ll be using on your exterior wall surrounding the doorway, as this will affect what kind of door jamb would work best. For example, if you want a brick look around your doorway then it might not make sense to use a vinyl door jamb.
You’ll also want to consider the durability of your exterior wall material as well, if you know it’s going to be exposed and susceptible to harsh weather then you’d best find something that can withstand those types of elements like wood or metal which will typically last longer than other materials.
Measuring and Marking Door Frame Size
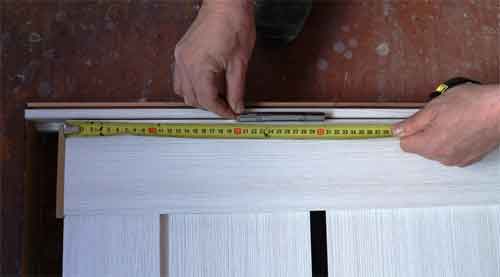
Determine the jamb width of a door frame by measuring from edge to edge. Measure both side jambs where they meet at the top and bottom. Measure and mark where you want to place two vertical lines on opposite sides of your wall, one for each side of the doorway.
Use a masonry chisel or hammer to score a line in between these markings until it is deep enough for an electric saw blade to penetrate. Once again, be sure that both cuts are equal distances from the top and bottom edges of the exterior door frame.
Measuring Wall Space
The most accurate way to determine how much room there will be outside an exterior doorway is to take off its casing or trim and check with a straightedge like a 24″ ruler. Measure the width of the jamb door frame, and then measure how much space will be on either side.
Measure from the edge of your trim and subtract it to find out what that number is. For example a 12″ wide jamb with two inches’ worth of trim (or casing) would have an outside measurement of 11″. This means you can’t get a 36-inch door in without cutting into your walls or flooring.
To avoid this, make sure you purchase a prehung door that comes mounted inside its opening so all you need to do is move it over instead of ripping up floors and carpets for installation like those not already mounted.
Measuring the Top of the Door Jamb
Measure the height of your door jamb by putting a level on top, then measure again from that point to the floor. This will be how high you’ll need to build up the area around your exterior doorway.
Measuring for an Entrance Step
If there’s not enough space and no room in which to set any kind of porch or landing at the front walkway for visitors who want to enter through it, make sure you have some sort of entry steps so they can approach without tripping over exposed ground. Cut out concrete slabs if needed with a power saw and work them into place before pouring new cement where they’re going to cover. This part entirely is vital because people will trip when entering often while carrying objects like groceries.
Cutting out a Section of the Wall
Once you’ve measured the area, it’s time to cut out a section of your wall so that there will be enough room for an exterior door. If you’re using a power saw like a circular or jig saw then make sure you wear goggles and protective gloves before proceeding with this step.
Mark off on framing lumber where walls need to go by cutting them out horizontally first, then remove all interior bits from inside those spaces until they’re left empty. Fill up these gaps with concrete sealant afterward because people won’t only trip over exposed ground but also will enter your home.
If you’re not using a power saw, then there are some other ways to do the same thing:
Cut out and remove any sections of wall that would impede an exterior door frame with a reciprocating saw (wear goggles and gloves before doing this). Use wood screws or construction adhesive on either side of where it needs to go for better adhesion. If you want stairs at the front entrance, make sure they’re installed first so when people step up onto them from ground level, their feet won’t slide off like they often do with door slabs.
Inserting the Door Jamb into the Door Frame
The door jamb needs to be inserted into the frame. The width of your door will determine how much space is needed on either side for a threshold and door sill. Measure these measurements to ensure that you create enough room for them.
Once measured, set the height with two screws in from both sides of the wall studs so it’s sturdy when plumbed up against an adjacent wall or other framing. This should leave at least clearance between the underside of your floor joists and any topside ventilation openings in your subflooring if using wood construction below grade.
Placing shims
Place shims behind until flush when connected against adjoining walls or framing members holding off insulation boards above grade. Insert the door jamb and mark for cutting a ¾-inch notch in one corner of each side, with at least ½ inch on either side.
Trimming off excess shims with knife
Trim off any excess shims with a sharp utility knife. This will ensure that when you are cutting out the doorway on your saw table all of the marks line up evenly and that there is less chance of splitting or breaking wood while it’s being cut.
You should keep an eye out for gaps between boards where stray nails may have penetrated through both pieces. This can be fixed by using small clamps around the board.
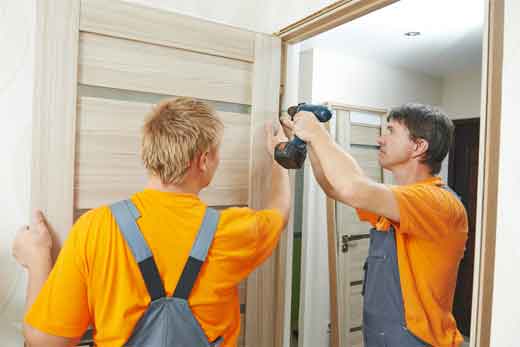
Hanging the Door
The last step is to attach the door. We’ll start by hanging it in its frame on top of the jamb and then work our way down from there. Use your saw to cut the notches out so that you have clearance around the frame when it’s inserted into the rough opening.
Hang exterior door so that door hinge is centered over the edge of the opening. Attach screws at least every four inches all around the perimeter of the door with a drill/driver. If the door bottom doesn’t align with the floor, adjust hinges to make it level.
The top and bottom edges will be flush with the edge of the rough opening. Bevel 45 degrees, or more if desired, on all four sides to provide clearance for your door hardware when closed.
FAQ:
Can I turn my old door into a barn door?
You can turn an old door into a barn door with the right materials and tools. You’ll need hinges, screws for attaching the hinge to your new jamb or wall, brackets that will fit against the wall on either side of where you want to hang your door, two lengths of wood cut at 45 degree angles, and two hooks for the top of your door.
Can I apply the same process to build an interior door jamb?
Yes, you can apply the same process to build an interior door jamb. If you also have a French door, double door, screen door, closet door, the same process you can apply for.
Conclusion:
Building a patio door jamb is a relatively easy job that anyone with the appropriate tools and skills can do. If you have some woodworking experience, you will find this project to be quite straightforward; if not, it might take a little more time for everything to come together. The most important thing about building an exterior door jamb is taking your time so that no mistakes are made. Allow yourself enough space around the area where you’re working and make sure all of your measurements are accurate before cutting anything!