WoodenuKnow.com is a participant in the Amazon Services LLC Associates Program, an affiliate advertising program designed to provide a means for sites to earn advertising fees by advertising and linking to Amazon.com and may earn from qualifying purchases.
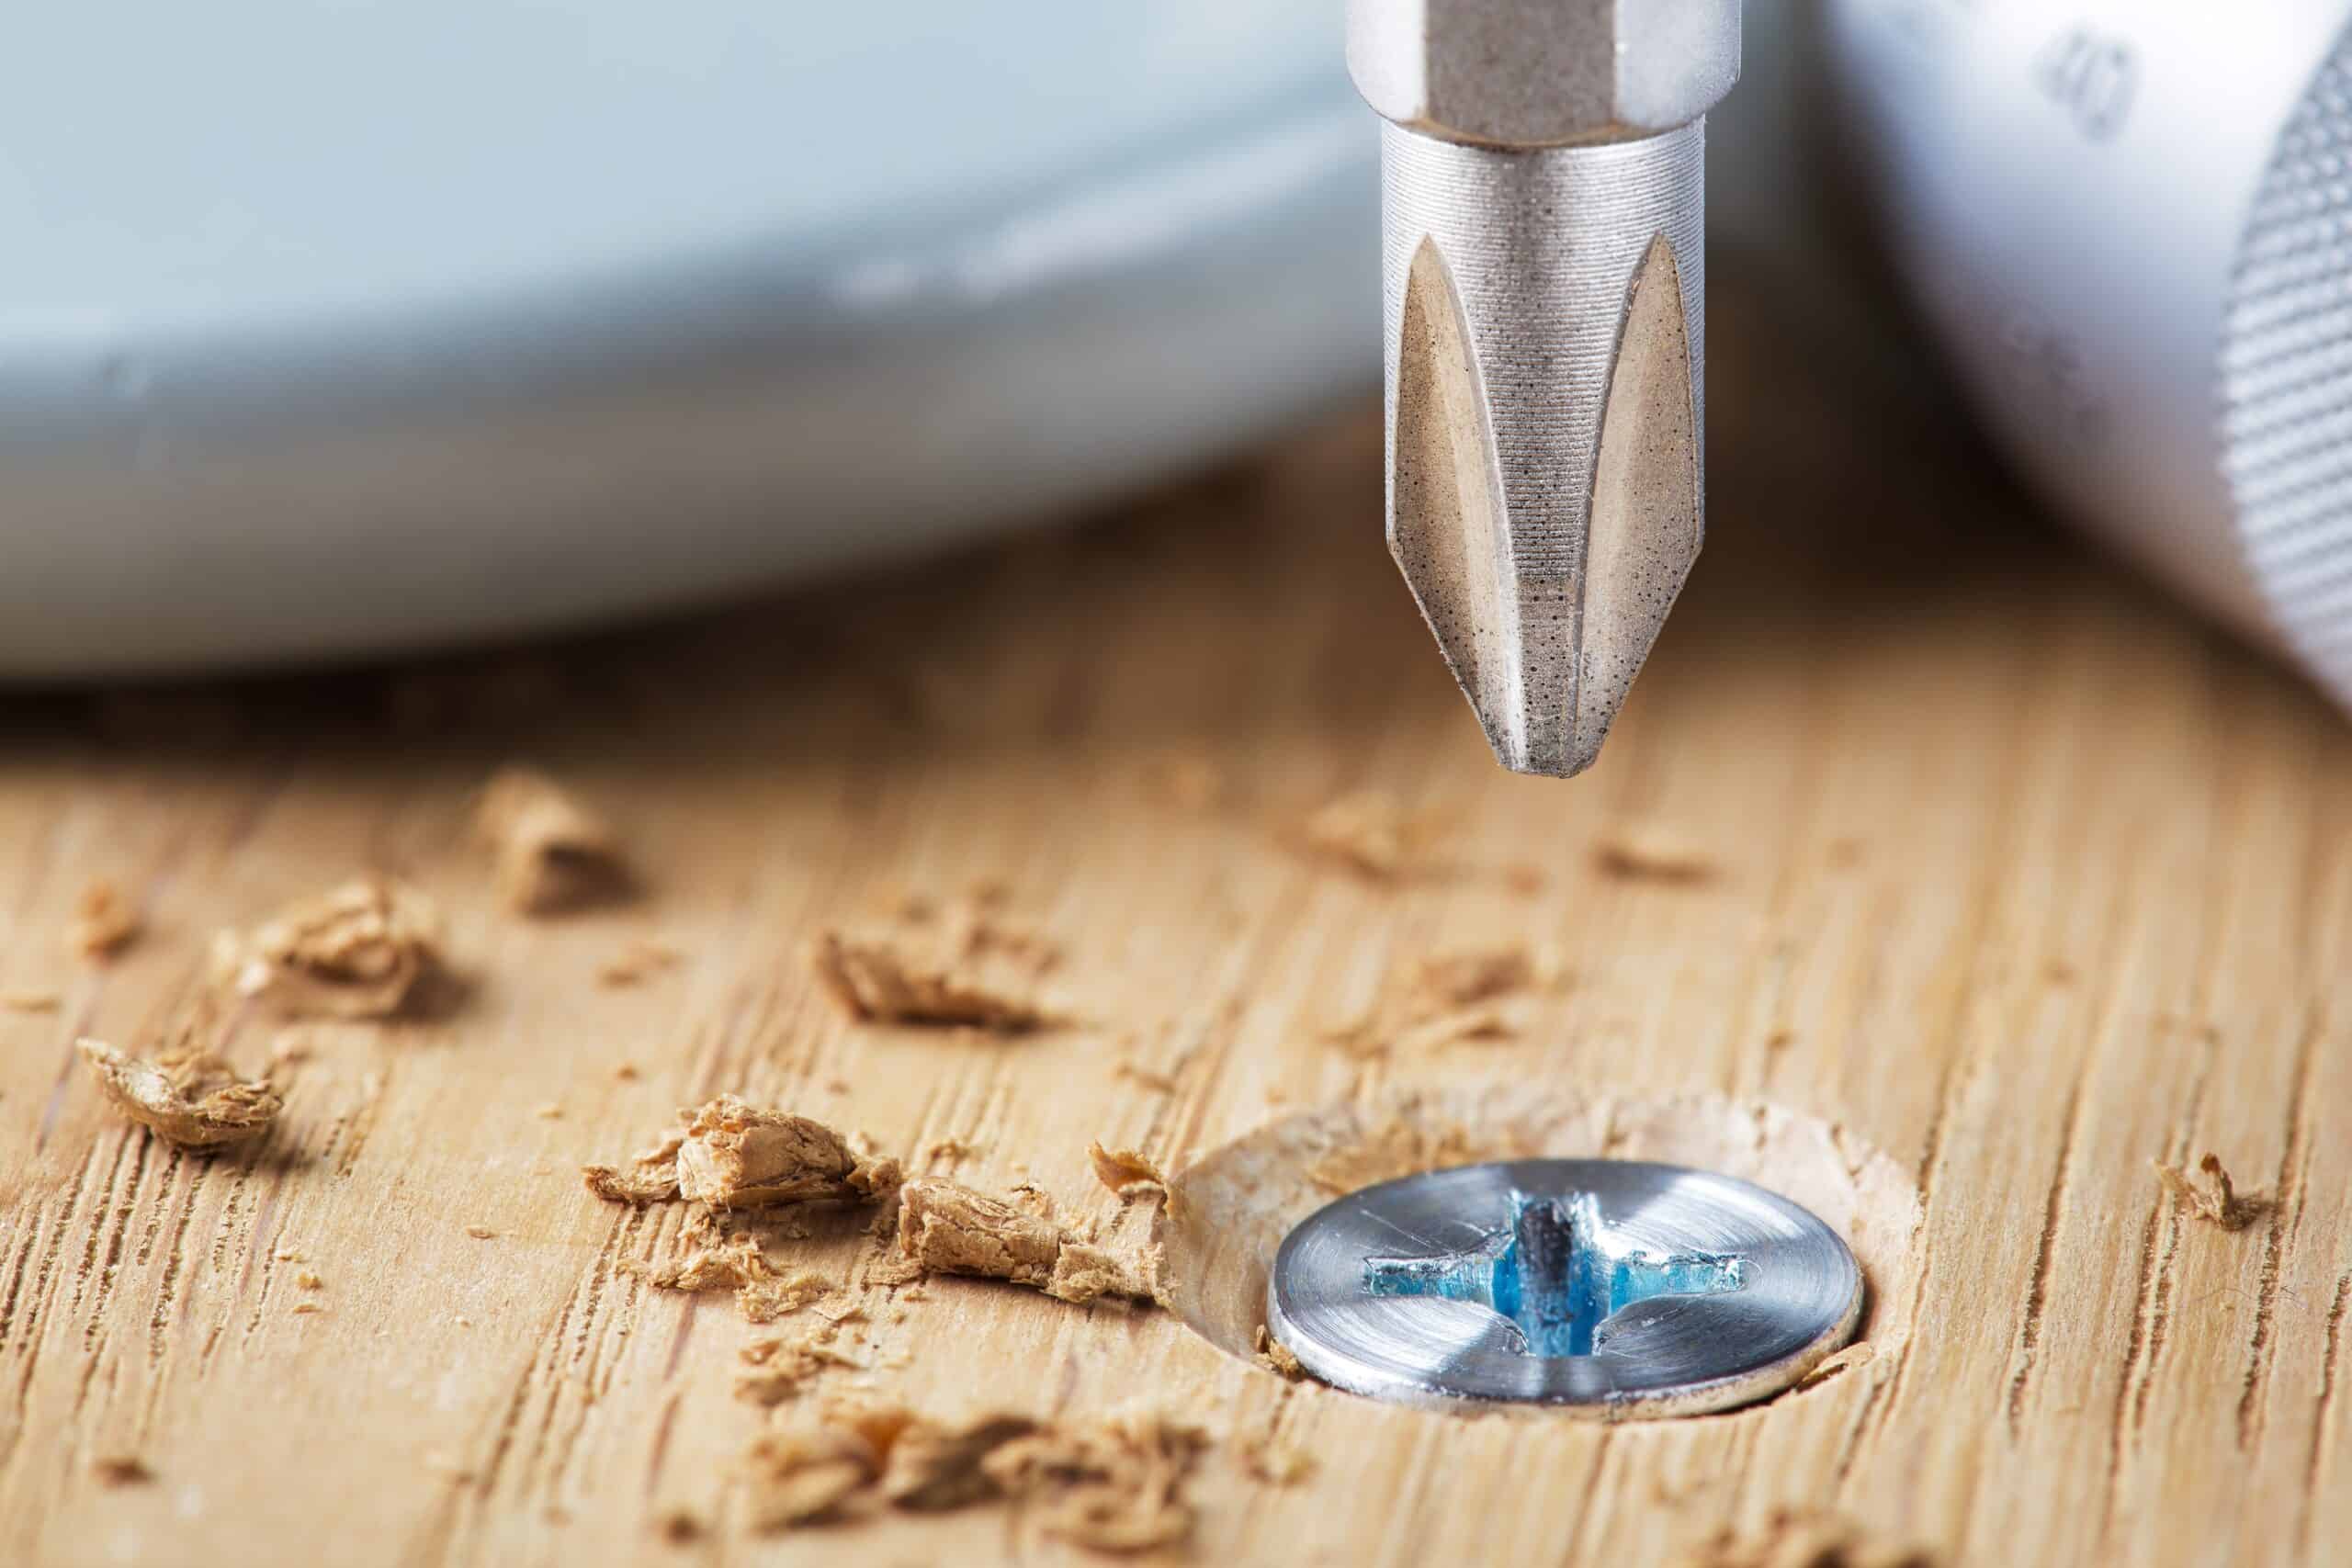
Woodworking is a great hobby, and one of the most challenging areas to start in is cutting channels. A channel in wood is a groove cut into the edge of a board. There are many reasons for cutting channels (rabbeting) in wood, and each one has its own unique purpose.
Cutting channels can help you guide pieces of trim or moldings to make sure they line up with the rest of your project. It can also create an area where you can put nails or screws that will hold your cutting board together better than standard glue alone would have done.
Different Methods on Cutting a Groove in Wood

Cutting a channel in wood can be done with many woodworking tools, from a wood router to a rotary tool. In this blog post, we’ll show you 5 different ways to cut a channel in wood!
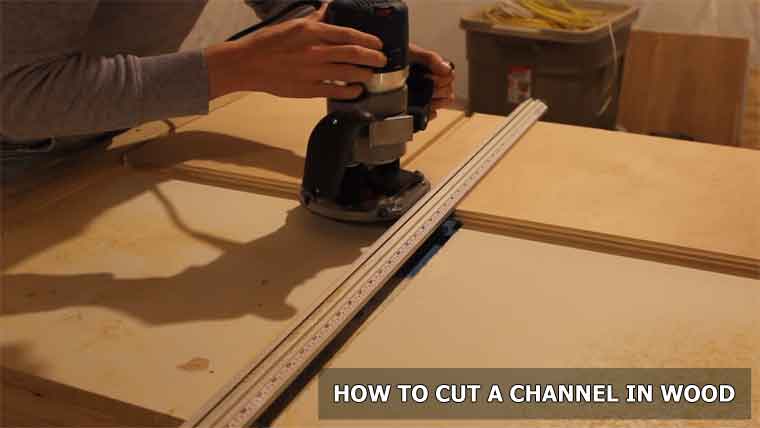
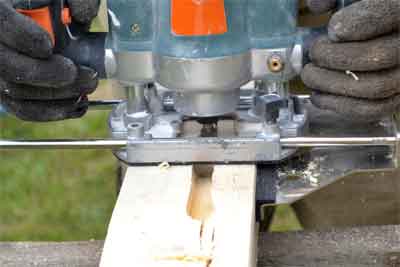
Cutting a Channel in Wood with a Router

A plunge router is an excellent tool for cutting channels and grooves. Most routers cut on the push stroke, which makes them ideal for this task.
The router bit bits can be activated by a trigger release mechanism that attaches to your finger or hand, so you don’t need to apply much pressure at all when pushing the wood past it (which will cause splintering).
The depth of the channel can easily be adjusted by changing how deep the router bit protrudes from its mounting plate. Shallow cuts are best if you want just part of the routed edge exposed while deeper ones make sense where you may want more material removed in order to create steps or other features like door rails.
The width of your groove depends on what type of bit you’re using and how wide the bit protrudes from its mounting plate.
Shallow channels are typically cut with a straight bit, but other profiles like V-bits and round over bits can also do an excellent job.
To avoid splintering while routing wood, it’s important to use sharp blades that stay cool and level during operation (heat will cause expansion). You must wear safety glasses or goggles as well to protect your eyes from sawdust being displaced by the spinning blade.
When cutting deeper grooves for doors you need to hold down. This is usually just some clamps used to hold that section of scrap wood in place so it doesn’t get pulled upwards into the blade when you’re running it through the router table.
You Might be Interested: Tips for Mounting a Router on a Table
Step-by-Step Guide:
- First Step: Load the router with a straight cutter bit.
- Second Step: Adjust your Router’s depth to match the thickness of the material it will be cutting into.
- Third Step: Turn on your power source for your router, and then turn on its speed control dial. The lower you set this, the slower it will cut through wood and vice versa if you increase it. Higher speeds make cleaner cuts but also create more dust so wear eye protection at all times!
- Fourth Step: Clamp down one end of plywood (or other work piece) onto either side of a straight edge guide which has been clamped in place near where you’ll be working. Doing this ensures that when you start routing; only one end of the material will be cut.
- Fifth Step: With your router running, guide it along a straight edge on top of where you want to make the cut. You should feel and hear it cutting into the wood as you go. If not, adjust your depth settings or angle of approach until it does so smoothly.
- Sixth Step: Remove all excess dust from your work area before continuing by sweeping up with a broom or vacuum cleaner attachment connected to an upright vacuum hose (be sure that no one is around this time). The less debris there is in the air surrounding what you’re working on, the better because router bits can fly off and create hazards for those nearby especially if they’ve been wearing eye glass.
Cutting a Channel in Wood with an Orbital Sander
An orbital sander is a power tool that sands surfaces using an orbit or circular motion. The most common use of the sanding pad attachment on this type of machine is for cutting channels in wood.
Step-by-Step Guide:
- Step one: Place the board flat on your work surface and draw guidelines to mark where you want to make the grooves.
- Step two: Use something like masking tape to temporarily place them so that they are easy to see from above while you’re standing at your work table.
- Step Three: Turn the belt sander upside down so it will be easier to access when needed during operation; slide onto its base plate and turn switch on (make sure there’s no dust cover).
- Step Four: Slide into position over one guideline so it is at a right angle to the wooden cutting board and start routing with gentle, constant pressure.
- Step Five: Slide in between guidelines as needed to cut all of them. Turn off sander when done.
Cutting a Channel in Wood with a Saw
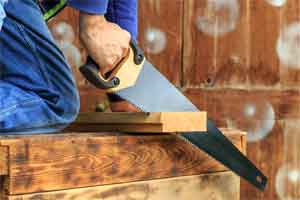
There are different power saws like circular saws, table saw,s and miter saws which are all applicable. You can use all power saws but a table saw is the best for this job because it is larger and has a fence that helps to guide the wood.
If you are using circular saws, use them with care as they require more skill than table top or miter saws or chainsaw. This type of power saw will enable you to cut faster but requires attention to depth and alignment which can lead to mistakes. Here we discuss cutting a channel in wood with a table saw.
You Might Like: Cutting Down a Small Tree with a Chainsaw
Step-by-Step Guide:
Cutting a channel in wood can be done with a table saw. But be careful, it has a dangerous saw blade.
- First Step: Place the wood piece that you want to cut a groove in on your work surface.
- Second Step: Mark the groove at the desired depth and width on one end of your wood piece.
- Third Step: Place a straight edge across the groove to check its alignment and then clamp it in place by screwing down at an angle or using clamps with metal jaws if you want more pressure.
- Fourth Step: Adjust your dado blade height so that it is cutting through the top layer of material without touching the other side. If too much board is being removed when making this cut, make adjustments before completing all cuts for best results.
- Fifth step: Check again to see that everything is aligned correctly and continue adjusting as needed until correct settings are found.
- Sixth step: Make several passes over these lines while holding firmly against pressure from both sides of the table saw.
- Seventh step: Remove the clamps or straightedge and cut these lines free from your work surface.
- Eighth step: If a groove is to be created on one side of the same piece, then you’ll need to create this first groove before starting on any additional grooves. This will save time when comparing each subsequent line with the previous set of cuts as they’re completed.
- Ninth Step: Place new wood in desired position and repeat steps for cutting channels into other sides until finished.
- Tenth Step: Apply finish if needed or leave unfinished if that’s what you want it to look like!
Cutting a Channel in Wood with a Chisel?

Cutting a channel or groove with a chisel is a very precise and careful process. You can make your channel or groove more accurate by using the gauge on both sides of your chisel to mark where you want to cut.
This will decrease any margin for error in cutting out the channel or groove, which is especially important if it’s not just one piece that needs this treatment but several pieces.
Step-by-Step Guide:
- First Step: You need to measure the length of your cutting wood and then mark a line along it. Then you want to drill a hole through that marked line, which will be used as a guide for the chisel.
- Second Step: Next, take your chisel and place it on top of the channel while holding it in both hands at an angle.
- Third Step: You’ll start with one side and make sure that it is flush against the wood before moving over onto the other side so there’s no gap between them when they meet up again.
- Fourth Step: Repeat this process until you finish cutting out your channel all around.
Cutting a Channel in Wood with a Rotary Tool

A rotary tool is a very handy and easy-to-use workbench attachment that can be adjusted to cut channels, slots, grooves, ridges or any other shape in both wood and metal.
It consists of an electric motor with two interlocking shafts which are encased in either wire brushes for cutting metal or diamond tipped burrs for carving tough materials such as hardwoods. A large spindle turns at high speed while the outer cutter head spins independently on the same axis but at lower speeds around it.
Step-by-Step Guide:
- Step One: Identify the length of channel you need.
- Step Two: Decide on a width for your groove and set your Rotary Tool to that width by adjusting the depth wheel depending on how deep you want it cut into the wood.
- Step Three: Identify where to cut (either at an existing edge or in a straight line). This will be one end of the shape, so make sure it’s easy to identify.
- Step four: Start from this point with your rotary tool firmly against the work surface and slowly move towards where you want to create another opening along that side. The more pressure applied, and then deeper into the wood is created. However, too much pressure can cause buckling of material during cutting if there is no support underneath it.
What is the Easiest Method to Cut a Groove in Wood?
The easiest method to cut a Groove in wood is by using the router. Using a straight edge, make marks on your work piece where you want the channel, and then use this as a guide for routing with your router.
You can also clamp these pieces together while routing them at an angle if needed. The result will be two parallel channels that are separated by the depth of the router bit used when making them.
Conclusion
If you are looking for a new woodworking project, cutting a groove in the grain of your piece is an extremely rewarding task. The process can be done with any hand saw or jigsaw and will result in beautiful board ends that look great when stained or painted.
It can be done with a few hand tools and power tools that are commonly found around the home, or at the hardware store. It’s easy to do but takes patience and some time to get it just right so we recommend practicing on scrap wood pieces before tackling something more valuable.