WoodenuKnow.com is a participant in the Amazon Services LLC Associates Program, an affiliate advertising program designed to provide a means for sites to earn advertising fees by advertising and linking to Amazon.com and may earn from qualifying purchases.
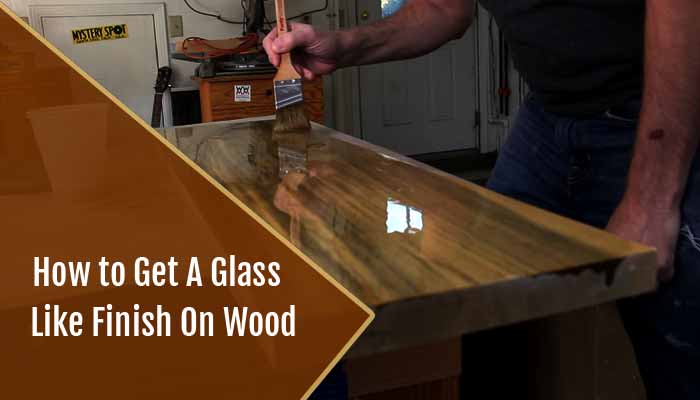
Do you want a glass-like finish on your wood furniture? If so, we have the perfect guide for you. This article will show you how to get that beautiful look and feel without all of the hassle.
Achieving this type of finish on wood can be time-consuming and difficult, but with the proper tools and techniques, it is possible. We’ll explore what it takes to achieve this type of finish on wood, as well as some other items around your home, like cabinets or tables.
What You Need
- Sandpaper (various grits)
- Wiping cloths or paper towels
- Water-based polyurethane varnish (clear, satin, gloss)
- Paintbrushes (various sizes)
- Mineral spirits or turpentine (optional)
- Small foam roller (optional)
- Disposal Plastic cups for keeping The Liquids
- Rubber gloves and painter’s masking tape (optional)
- Rubbing Compound
Guides on How to Get a Glass Like Finish on Wood
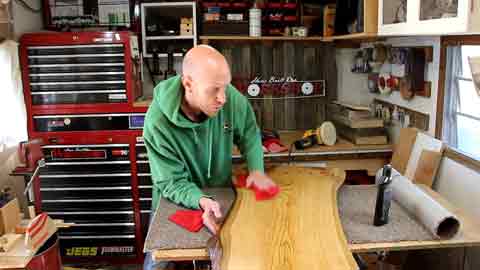
Step 01: Sand The Surface Thoroughly with Grit Sandpaper
When it comes to achieving a glass-like finish on wood, you’ll want to start by sanding your wood pieces down as simply as possible with wet sand-paper. This will help give your finished product that smooth and shiny look.
You can find grit sandpaper easily at any hardware store. Consider using a heavy grit like 120 for really uneven surfaces or an extra-fine grit like 320 grit for more delicate surfaces.
Step 02: Wipe off Any Dust
After sanding, it’s important to wipe away any dust that has accumulated on the surface. This can be done with a paper towel or a clean cloth.
Step 03: Use Mineral Spirits to Wipe off The Sanded Surface
Once you have wiped away the dust, you need to use mineral spirits to further clean the surface. This will help remove any residual sanding dust and give you a clean slate to work with.
When you’re ready to wipe off the ground surface, pour a small number of mineral spirits onto some paper towel and use it to wipe down the entire piece.
Step 04: Wipe off The Remaining Residue with a Damp Cloth Or Paper Towel
After you’ve wiped off the surface to remove any leftover sanding particles, you should wipe down the entire thing one more time to remove all of the mineral spirits from it.
This is easy enough to do with a damp paper towel or cloth, so we recommend using that to do the job.
Step 05: Dry the Surface Completely Before Proceeding
Once you’ve wiped down the piece to remove any residue, it’s important to make sure that the surface is completely dry before continuing. If there are any damp spots, they could affect the finish of your product later on.
The best way to ensure that the surface is completely dry is to let it sit for at least an hour, or until it is no longer damp to the touch.
Step 06: Vacuum Off Any Dust from the Surface
After the piece has had time to dry, you should vacuum off any remaining dust particles. This will help ensure that your final product has a smooth finish.
Step 07: Apply a Water-Based Polyurethane Varnish
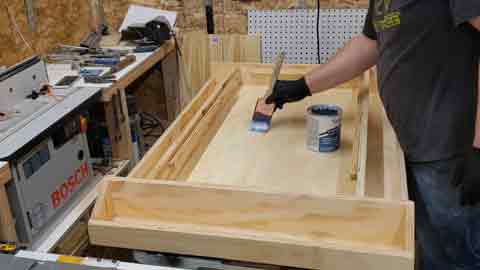
Water-based varnish is recommended for this type of task because it will dry more quickly than the more common oil-based varnish.
You can use a clear, or gloss finish depending on your preference. To apply the varnish, start by pouring a small amount into a plastic cup. Then, use a brush to spread an even coat over the entire surface.
Be sure to work in long strokes and to avoid going over any areas more than once as this could cause streaks in the final product.
Step 08: Apply a Second Coat of Varnish
When the first coat of varnish has dried, you may apply a second coat. This will help give your final product a more durable finish.
To apply the second coat, you need to lightly sand down the surface again with fine-grit sandpaper. This will help create a smooth surface for the second coat of varnish to adhere to.
After sanding, wipe off any dust and apply the second coat of varnish in the same way as you did the first.
Step 09: Allow the Second Coat of Varnish to Dry
As with the first coat, you need to allow the second coat of varnish to dry for at least 24 hours before continuing. This will ensure that your final finish is durable and long-lasting.
Step 10: Using Rubbing Compound
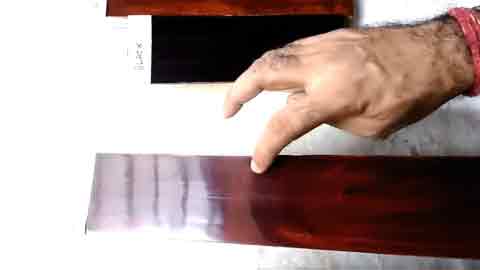
As soon as the varnish has cured, you can start polishing it to give it a high-gloss finish.
In order to accomplish this, you will need a rubbing compound and a soft cloth. Apply the compound to the cloth and then rub it on the surface in a circular motion. Be sure to apply even pressure as you rub to avoid leaving behind any streaks. Allow the compound to dry completely.
Step 11: Apply lacquer to add another layer of shine
Some pieces may look better with another coat of polish. If you want to add a layer of lacquer, you can apply it right over the existing varnish.
Some people wait to apply this until after completing their project, but you can do it any time while your piece is drying.
Step 12: Apply wax for protection and shine
If you’re looking to add some extra shine to your finished project, you can use a high-gloss wax. This will help protect the wood from any environmental hazards while also helping to seal the wood and any overlay in place.
This will leave your finished project with a nice protective layer that can be maintained easily by simply wiping it down every once in a while with mineral spirits or water. The more often you wax, the shinier your piece of furniture will look!
Step 13: Use a soft cloth to remove the excess wax
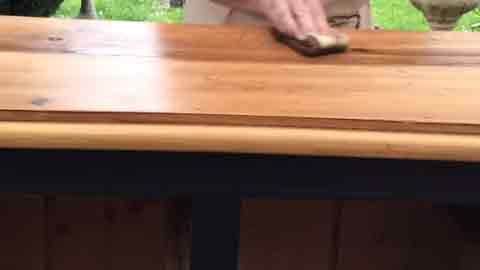
Once you’re done applying your beautiful coat of wax, you’ll want to use a soft cloth to remove the excess that may be sticking to the surface.
This will help give it a more polished appearance and ensure that it will last for as long as possible.
Tips & Warnings:
- Make sure that you wear protective eyewear when sanding or painting.
- Ensure that your workspace is well-ventilated and that you are not working in direct sunlight, which can dry the overlay too quickly and result in lumps.
- Allow your pieces to completely dry between layers, and keep the polyurethane coat at room temperature (or slightly warmer) to ensure a smooth finish best.
- For extra protection, consider using UV protectant spray on your pieces once they are finished drying.
- Wear rubber gloves and use painter’s tape when painting to protect your skin and clothing.
- Make sure that you use a high-gloss polyurethane varnish so that your piece will have the most shine and protection.
- If you want to apply a sealant or wax, make it after the final coat of overlay or lacquer is dry.
- Apply an even amount of pressure when applying color with a brush or roller so that your task will look professional.
FAQs on to Get a Glass-Like Finish on Wood
1. Would a beginner be able to get a glass-like finish on wood?
It depends on their experience level. To do a simple glass-like finish, you have to be experienced in the craft. You can’t get an opaque gloss on wood until you stain or color it.
The more layers of finish you apply, the higher gloss your piece will achieve. Beginners should only use moisten-based finishes for ease and convenience (and because they dry quickly) and should limit the number of layers to avoid shiny spots.
2. How Long the Glass-Like Finish Will Last?
The glass-like finish can last about three to five years if it is properly maintained. Keep in mind that the finish may start to yellow over time due to exposure to sunlight. If this happens, you can simply reapply another coat of varnish to restore the original color.
3. Does the way I paint affect what kind of finish I get?
It depends. If you like a smooth glossy finish, you can apply it using oil-based paint with added thinner. But some people prefer the look of an “eggshell” gloss by applying two layers of latex paint, drying in between layers, and then sanding lightly where needed.
If you want to achieve a more matte or flat finish, go for the sheen effect by dipping your brush in water, adding some semi-gloss acrylic color. Your brush will be loaded with color and water that will create a mottled effect.
Even on your varnish, you can have several finishes: satin, semi-gloss, or high gloss. Satin is flat with a low sheen, semi-gloss has some shine and depth, and high gloss reflects light much like a mirror finish.
4. How do I know if my project has fully dried before applying any lacquer coatings or waxes?
Good question. This can be a tricky one, but the simple answer is to wait eight hours before applying any lacquer coatings or waxes. This way, there’s a good chance you’re not going to get any finish that is still tacky and just ready to stick to your lacquer or wax.
Hobbyists usually choose either one of the two following approaches when it comes down to dealing with lacquer-based finishes. The first is known as the “no sanding” method, also called “damp sanding.”
When done correctly, this method produces excellent results, and the only time you will ever come across a finishing problem is when wood veneers or plies are used.
The second approach calls for all sanding to be done before lacquering. This method can also produce excellent results, although it does require more work. It also involves more clean-up afterward.
5. How many coats of paint should be applied for a glass-like finish on wood?
On average, people have found it takes just two layers of overlay to get that nice high-gloss and glass-like finish on the wood.
For those living in warm climates where the temperature is fairly hot all year round, two layers of overlay may be enough.
However, for some people living in colder climates where the temperature drops below freezing during certain seasons of the year, they suggest it would take around four layers of overlay to get it just right.
Of course, we cannot quite put a specific number of layers on this because it all depends on the quality and brand of paint used.
But if you are only using cheap or lower-quality paints, then 4 layers may be necessary to get this glass finish. If we use higher-quality paints, then 2 to 3 layers would do.
However, do not be fooled into thinking that the more layers you put on a piece of wood, the better it will look. This is just not true at all.
The main thing to watch out for here is how many layers you let dry thoroughly between when they were being painted on. You need to follow the instructions on your overlay can and allow each coat to dry thoroughly before applying the next coat.
6. What’s the difference between oil and water paints?
Oil paint is made from oil, distilled white spirits, and pigment. Water-based paint contains a variety of water-soluble resin materials, such as acrylics.
Oil-based paints usually need to be applied in at least 2 layers. The brush stroke leaves distinct edges with “dry” spots between strokes, and an open coat can allow surface dirt or dust to show through the finish.
7. What Happens If I Get Scratches on the Surface?
If you happen to get scratches on the surface, you can simply sand them out and then reapply the varnish. You may also want to consider applying a layer of lacquer to help protect the finish.
8. Can I Use This Finish on Outdoor Furniture?
Yes, you can use this finish on outdoor furniture. Just make sure that you apply a layer of UV protectant spray to help prevent the color from fading in direct sunlight.
9. How can I get a high gloss finish with water-based products?
Water-based varnishes are often used for their ease in application and drying time. They also offer a nice “wet” look without the harsh smell that oil varnishes can have.
However, it’s important to remember these materials are not as durable as other types of sealant and require more layers to provide solid coverage.
Also, because moisten-based products have a lower viscosity than other varnish types, the surface of your project may not dry with a high gloss. Here are some tips for getting that wet look:
Using two coats can help provide more solid coverage on porous wood surfaces. Use in a well-ventilated area to avoid irritation from the fumes. A paintbrush can be used for more even distribution of the liquid on large surfaces.
Using a soft rag to wipe down the wood after applying will allow some of the excess finish to evaporate and give you that high gloss shine. You may also want to apply in a well-ventilated area for this step, especially if using moisten-based stains.
Last Thoughts
We hope you’ve learned quite a bit about how to get your wood furniture to have a glass-like finish.
This article has shown you the key things you need and some pointers on what one needs to know to achieve this look for yourself.
The next step is up to you, so show off your skills and enjoy being creative.