WoodenuKnow.com is a participant in the Amazon Services LLC Associates Program, an affiliate advertising program designed to provide a means for sites to earn advertising fees by advertising and linking to Amazon.com and may earn from qualifying purchases.
A nail gun is often used for home and construction projects, or for jobs where heavy work must be completed quickly. As a result, pneumatic air tools can clog or jam unless you regularly oil them. So you must maintain them periodically to ensure they last a long time. Therefore, you need to know how to oil a nail gun correctly.
How to Oil a Nail Gun: Step-By-Step Guide
If you have a pneumatic nailer, you must choose the proper oil. Otherwise, the nail or stapler won’t work without it. Getting this tool in good condition is relatively easy so long as you follow some simple steps.
Materials needed to oil nail gun:
- Oil
- Towel
- Blow gun
Step 1: Turn off the nail gun
If your pneumatic nail gun is on, you must turn it off.
Step 2: Disconnect the air compressor
Unplug the compressor so that you can access the air nailer better.
Step 3: Disconnect the hose from the nail gun
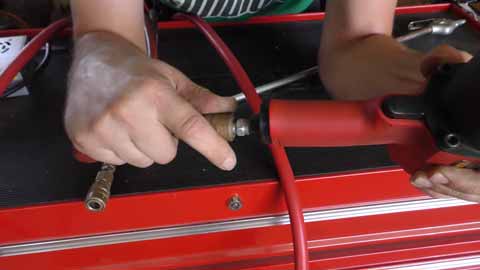
Disconnect the air hose connection by loosening both ends of it and pulling them away from the nail gun.
Step 4: Remove the magazine
Remove the nail or staple magazine from the nail gun. A pin nailer will have a slide latch at the top of its magazine, which you can press to release it.
Step 5: Clean the debris
Next, you should clean the debris from the nailer by using a blow gun or other suitable cleaners.
Step 6: Place your nail gun on a flat surface
Place your nail gun on a flat surface in front of you. Place it in the upright position. After this, remove the air chamber cap.
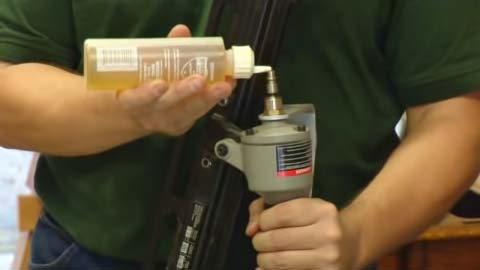
Step 7: Apply oil into the gun’s moving parts
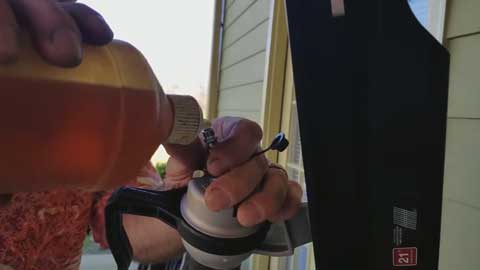
After this, you have to put some air tool oil into the nailer to spread to all sides evenly. It is recommended to use an applicator to get the job done accurately.
Unscrewing this end cap will reveal the piston inside the gun. The oil goes into this part. There are three areas you need to focus on: air fitting, feeding system, and trigger.
Air fitting: Apply air tool oil to lube the o-ring, which is inside the air fitting.
Trigger: Put oil on the trigger sear and trigger mechanism assembly.
Feeding system: Apply oil in the feeder channel after removing two or three nails from it. You can use a silicone spray to do this.
For each part, you will need to add about 5 drops of pneumatic tool oil.
Step 8: Clean up extra oil
Use a lint-free towel to wipe the excess air tool oil from the parts, using one damp towel to remove the remaining oil and another dry one to complete the job.
Step 9: Reassemble the nail gun
Reassemble the nail gun by putting all the parts back into its original position. Plug in the air compressor, hose, and the power cord to your nail gun.
Step 10: Test the nail gun
Turn the power back on to check if oil got into all parts of the gun. If you see oil leaking out, you need to disassemble and clean your tool again.
What Kind of Oil Should You Use on Pneumatic Guns?
Using the proper kind of oil can extend the life of your nail gun. You should use a lightweight, high-quality oil that is not too thin or thick. The most common is a general-purpose oil, which provides proper lubrication and also prevents the tool from rusting.
The wrong kind will only shorten the tool’s usefulness and lead to it breaking down much sooner than expected. Here are some oils that work well:
3 in 1 oil:
DIYers have recommended 3-in-1 multi-purpose oil because it is inexpensive and effective. Use this type of oil only on the parts that are safe to get wet.
Lubricating oil:
You can use this high-quality lubricating oil because it is not very thick and can lower the chances of your gun jamming. It can be the best oil for nail guns that are used often.
Mineral oil:
You can use mineral oil because it is thin and free from detergents. But it is less used because it is not as powerful as other oils. Any non-detergent oil with a low viscosity can also be used.
Hydraulic oil (Nail gun oil substitute):
A nail gun oil substitutes such as hydraulic oil can also be used. You need to clean it thoroughly before using it on your pneumatic gun though.
What Kind of Oil Should not Use on Nailer?
As nailers use oil as a lubricant, it is important not to use the wrong oil. You need to be careful and stay away from these types:
Compressor oil:
It is not the recommended oil because it is too thick. Compressor oil is only for the compressor, not for the nail guns.
Motor oil:
You should never use motor oil because it is too thick. If you use transmission fluid on your nail gun, you might damage your tool and shorten its lifespan.
Synthetic oil:
Synthetic oil is not for use on pneumatic guns because they can make your gun oil-starved and can cause it to seize.
WD-40:
Many people think they can use WD40 to oil their nail guns, but this product is not the right oil. You can’t use aerosol sprays like WD-40.
Petroleum-based oils:
These traditional oils tend to thicken up when they get cold. They can also cause corrosion issues because they are thick oil based fluids. Avoid using them because they will shorten the life of your nail gun.
What are the Benefits of Regular Oiling on Pneumatic Nail Guns?
Oiling pneumatic nail guns regularly to prevent unexpected breakdowns. A little bit of regular nail gun maintenance will help you get the best results from this powered equipment.
Also, you need to oil your nailer on a regular basis even if you don’t use it often because dust particles can collect inside the tool and make it less efficient.
The regular lubrication in pneumatic nail guns prevents fragments from building up inside the gun and causing it to jam. When you oil the moving parts, you help prevent them from seizing up.
How Often Should you Oil your Pneumatic Nail Gun?
The answer depends on how often you use pneumatic nail guns. If you are a woodworker or carpenter, a regular lubrication schedule is essential. That’s why you will need to oil it every day. After each use of your nailer, you should oil it. If you are not using your nail gun regularly, oil it once a week.
Community FAQs:
What is Nail Gun Oil?
Nail Gun Oil is a lubricating oil that can be used to oil a pneumatic gun. It is a versatile product that can be used on a variety of air tools.
Can I use WD40 on my nail gun?
No, absolutely not. You cannot use WD40 on an electric or pneumatic tool. If you use this lubricant, it can damage the moving parts of your nailer.
Can I use vegetable oil in my nail gun?
No, you cannot use vegetable oil in your air compressor nailers because it is not suitable for these air tools. It can damage the moving parts of your unit.
Can I use silicone oil on my nail gun?
A lot of people use silicone oil on their nailers. However, this type of oil is too viscous, which means it may not be suitable for all pneumatic guns. You need to check the manufacturer’s manual first before using it.
What is a good way to store my nail gun after use?
You should wipe the excess oil off your unit with a cloth before putting it away. Depositing too much oil on the tool increases the chances of corrosion taking place.
How much oil should I apply on my nail gun?
You need to be careful about the amount of oil you apply on your nail guns. If you put too much, it can cause the extra oil to drip onto the surface. It is best to put about five to ten drops of oil.
Final Words:
A nail gun is a very useful tool that helps with many different projects, but only if it works properly. You can extend the life of your tool by using the right oil. If you follow this guide on how to oil a nail gun and the correct type of oil, your nail gun will be lubricated and ready to go when you need it next.