WoodenuKnow.com is a participant in the Amazon Services LLC Associates Program, an affiliate advertising program designed to provide a means for sites to earn advertising fees by advertising and linking to Amazon.com and may earn from qualifying purchases.
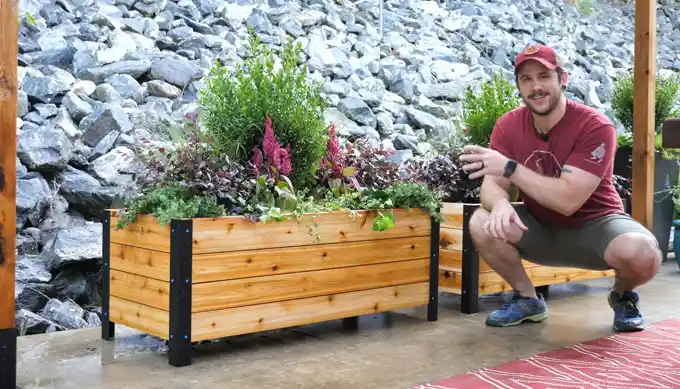
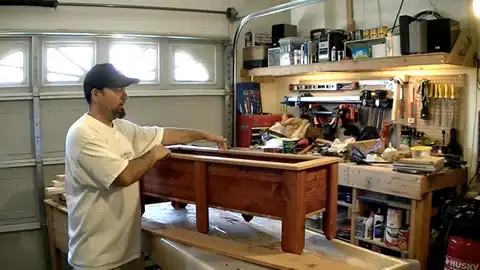
When it comes to gardening in small spaces, using a planter box is often the best way to go. Planter boxes can be placed on patios, decks, and even balconies. They allow you to control the soil, drainage, as well as sunlight that your plants receive.
Cedar is a good material for planter boxes because it is naturally rot and insect-resistant, while most notably they are thermal coefficient.
Water along with soil in contact with the cedar planter box will cause the cedar to turn swollen and crack over time.
This is why you must ensure that your cedar planter box is sealed. Let us now discuss how to seal a cedar planter box.
How to Seal a Cedar Planter Box : Simple Guidelines
A cedar planter box is a wonderful way to display your favorite plants. But did you know that it’s also essential to seal your cedar planter box? Sealing helps to prolong the life of your planter box by preventing moisture and rot.
It also helps protect the wood from UV damage, keeping it looking its best for an extended period of time.
Applying a sealant is quick and easy, and it’s well worth the effort to ensure that your planter box remains attractive for a long time. We will show you the step-by-step process to properly seal your western red cedar planter box.
Step 01: Gather Your Materials and Supplies
One of the most important things to remember when starting any task is to ensure you have all of the necessary materials and supplies on hand.
This may seem like a simple step, but it can save you a lot of time and frustration in the long run. For this project, you will need the following items:
- High-quality sealant
- Paintbrush
- Sandpaper
- Little container
Step 02: Prepare the Planter Box
Before you can start doing the job, you need to do a bit of prep work first. Sealing the planter box is primarily intended to protect it from the elements, and if you do not prepare the surface properly, the sealant will not be able to do its job effectively.
For this reason, you should sand the surface of the wood planter box before you begin. This will help to rough up the area and give the sealant something to grip onto. Wipe away any dust with a brush.
You can also use a vacuum to get rid of any lingering dust particles. In this way, the sealant can be applied smoothly.
Step 03: Apply the Sealant
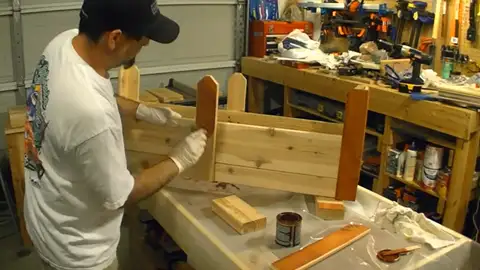
Applying sealant needs to be handled with care. When you do not apply the sealant properly in a planter box, the problem of moisture seeping in and causing the wood to rot can occur.
This is a common issue that many people face when they have cedar planks. If the sealant is not applied correctly, it will not be effective in preventing moisture.
The best way to avoid this problem is to make sure the sealant is applied evenly and thoroughly on all sides of the cedar planters.
One important thing you note is that the planter box must be dry before sealing it. Water will prevent the sealant from adhering properly and will make it less effective.
Start by pouring a small amount of sealant into the container. Then, with a stick or other object, mix the sealant until it is smooth and free of any lumps.
When the sealant is ready, use the paintbrush to evenly coat the wooden planter box. Make sure that you do not miss any spots and that the sealant is applied equally across the surface.
Step 04: Allow the Sealant to Dry
Once you have applied the sealant, you need to give it time to dry. If you do not allow enough time to dry the sealant, you may run into problems such as the sealant not being as effective or flaking off.
The amount of time required will depend on the specific type of sealant that you are using.
You should read the instructions on the sealant label so that you know how long it should take to dry. As a result, you can avoid any issues and ensure that the stain will be effective.
Step 05: Apply a Second Coat
You must include another layer of sealant after the first coat has dried. This will help to ensure that the outdoor planters are properly sealed and protected from the elements.
The process for putting on the subsequent layer is the same as the first. However, you do not have to sand the planter box again in this step.
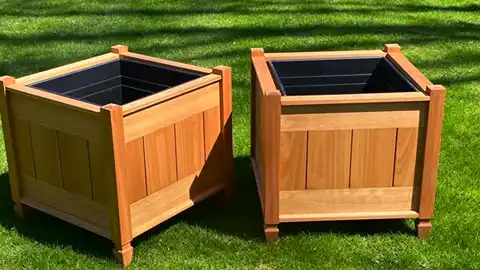
Step 06: Enjoy Your Planter Box
After you have allowed the sealant to dry, it is now ready to use. You can now enjoy the benefits of having a beautiful and protected planter garden box.
Sealing the box is an essential step in maintaining its beauty and longevity. By following these simple steps, you can ensure that your deck planters will look their best for a long time.
Factors to Consider When Choosing Sealant for Cedar Planter Box
The sealing of a planter box appears not to be a difficult process. Not only do you need to learn how to do it, but you also need to choose the right sealant. Because almost maximum credit goes to the sealant that you use.
Using a low-quality sealant, it will wear off quickly and need to be replaced often. This can be expensive and time-consuming.
But if with a top-grade sealant, it will protect your planter box from the elements and extend its lifespan.
There are many different types of sealants on the market, and it can be difficult to know which one is right for your planter box. With keeping the following factors in mind, you can choose the most appropriate sealant for your needs.
1. Non-toxic
As you probably know, plants absorb nutrients and chemicals from the soil. The soil can absorb hazardous chemicals from sealants that contain toxic ingredients.
This can be harmful to both the plants and the people who eat them. That’s why the first and most important factor to consider is whether the sealant is non-toxic.
You should always opt for sealing material that is safe is safe. This way, you can be sure that your plants are getting the nutrients they need and that you’re not exposing yourself or your family to harmful chemicals.
2. UV-resistant
Ultraviolet (UV) light can cause the wood to fade and become brittle over time, so it’s important to use a sealer that will block out UV rays. This will help to keep your planter box in good condition for as long as possible.
3. Waterproof
If you’re looking for a reliable sealant, waterproofing is an important quality to look for. Waterproof sealants help to keep water from seeping into the wood, which can cause the cedar to warp or rot.
In addition, this type of sealant prevents staining and fading, keeping your planter box in good condition.
4. Drying Time
Sealants with a long drying time can be a pain to work with. You have to wait for the sealant to dry before you can use the planter box, and if it’s a sunny day, you may have to wait even longer.
So, you must pay attention to the drying time of the sealant before you make your purchase. Choose a sealant that dries quickly so that you can get back to using your planter box as soon as possible.
5. Ease of Use
You don’t want to spend hours trying to apply the sealant to your planter box. Look for a sealant that is easy to use and that can be applied quickly. This way, you can get the job done without spending a lot of time or energy.
6. Color
If you want your planter box to keep its natural color, you need to choose a clear sealant.
However, if you want to change the color, there are tinted sealants available. These can give the planter box a new look without having to paint it.
After you have considered all of these factors, you are ready to choose the best wood sealant. You can find a high-quality sealant that is suitable for a planter box and extend its lifespan with a little research.
Frequently Asked Questions:
People have many questions regarding the sealing of planter boxes. Here are some of the most commonly asked questions and their answers.
1. What Is a Good Height For a Raised Garden Bed?
The answer to this question depends on what you are going to grow in your raised garden bed. For plants that are taller, a larger pot is necessary.
However, if you are only going to grow shorter plants, then you can have a shorter ones. Generally speaking, it should be at least 10 to 12 inches in height. This will give your plants enough room to grow and thrive.
2. How Long Do Cedar Planter Boxes Last?
Cedar planter boxes are very durable and long-lasting. They can last about 10 to 15 years with proper care and seal.
3. How Often Should I Seal My Cedar Planter Box?
The frequency with which you seal your planter box will depend on the climate and weather conditions in your area. If you live in an area with a lot of sun and heat, you will need to seal the planter box more often. In general, it is a good idea to reseal your planter box every six months.
4. Can I Put a Drainage Hole in My Cedar Planter Box?
Yes, you can include a drainage channel in the container. However, it is important to make sure that the drainage hole is not too big. Otherwise, the soil and plants in the garden box will wash out when it rains.
Conclusion
Sealing a cedar planter box is an important part of maintaining it. By sealing it, you can extend its lifespan and keep it looking new for a long time.
When choosing a sealant for the planter box, be sure to consider the factors mentioned above. With a little research, you can find the best sealant for your needs.
It is our hope that you have fully understood our instructions on how to seal a cedar planter box. By following the instructions provided, you can successfully secure your box planter.