WoodenuKnow.com is a participant in the Amazon Services LLC Associates Program, an affiliate advertising program designed to provide a means for sites to earn advertising fees by advertising and linking to Amazon.com and may earn from qualifying purchases.
Router bits are the cutting attachments used with a router and come in various shapes and sizes to suit different applications. As router bits age, they can become dull, making it harder to achieve a clean cut. A dull bit may also lead to burning and tear-out, making it hazardous.
Sharpening router bits is a relatively straightforward process that takes just a few minutes. With the appropriate tools and a little knowledge of how to sharpen a router bit, you’ll be able to keep your router bits sharp and in good condition.
We have compiled this article to provide you with all of the information you need to know about sharpening a router bit. We’ll cover the different types of tools you’ll need and the sharpening process itself.
How to Identify a Dull Router Bit?
A router is a powerful tool that can be used to create perfect cuts and finishes on a variety of materials. Router bits are essential for anyone working with wood, but they can quickly become dull with repeated use.
Fortunately, there are a few simple ways to tell when a bit is worn or damaged:
- One of the most obvious signs is a decrease in the quality of the cut. If the bit leaves behind ragged or uneven edges or chips, it is no longer as sharp as it once was.
- Another method to tell is by the sound the router makes when used. If you notice the bit starting to make a whining noise, it indicates that it is dull and needs to be replaced.
- In addition, dull router bits will produce more dust and debris than usual, and they may also cause the router to vibrate more than average. If you notice any of these signs, it’s time to replace the bit.
- Finally, if you have difficulty making cuts with the router or the cuts are coming out wavy or jagged, that is also a sign that the router bit needs to be replaced.
You can prevent damaging your materials by paying attention to these signs and improving your work quality by being aware of them. Keep sharp router bits on hand so that your woodworking projects always have a smooth, professional finish.
Steps Involved in How to Sharpen a Router Bit?
Router bits are extremely versatile tools in a woodworker’s arsenal, but they can also be frustrating. Dull router bits can cause tear-out, burning, and poor finishes.
There are a few different ways to sharpen router bits, but the most important thing is to use a sharpening diamond stone or a chisel designed explicitly for use with router bits.
Try to follow these steps for the best results:
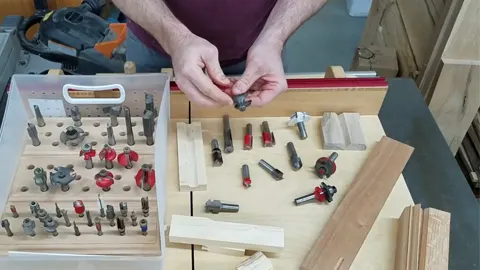
Step 01. Identify the Router Bit:
Any DIYer knows that having a sharp bit is essential for any woodworking project. The first step is to identify the router bit you need to sharpen. Router bits come in various sizes and shapes, so it’s essential to ensure that you have the right one for the job.
Step 02. Clean the Router Bit:
After selecting the right bit, you will need to clean it. Using a brush or cloth, remove any sawdust or debris accumulated on the bit. Determine the angle at which you need to sharpen the bit. This will vary depending on the type of bit (such as carbide tipped router bit or HSS bit).
Step 03. Remove the Pilot Bearing:
The pilot bearing is a small metal guide located at the end of the bit. To remove it, simply unscrew it with a screwdriver. Try to avoid touching the bit’s cutting edges with your fingers, as this can cut your finger.
Step 04. Secure the Bit:
Before sharpening the bit, securing it in a vise or clamp is essential. This will help to hold the bit in place while you work and will also help to prevent accidents. Make sure that the cutting edge is facing up to access it easily.
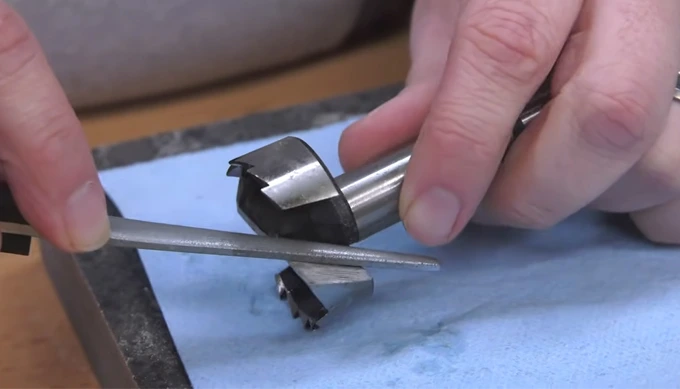
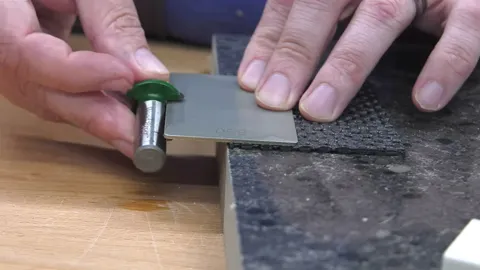
Step 05. Sharpen the Cutting Edge:
Use a file, angle grinder, or chisel to sharpen the cutting edges. Begin by applying light pressure and moving it across the cutting edge forward and backward. Be sure to maintain a consistent angle while you’re honing the bit. Work slowly and carefully until you have achieved a consistent, even edge.
Once the cutting outside edge is sharp, you can reinstall the bit in the router and get back to work. With just a little time and effort, it is possible to keep all your router bits performing at their best.
Tips for Keeping Your Router Bits Sharp

Anyone who has ever tried to cut wood knows that a dull blade is a frustrating obstacle. The same is true for straight bits, which are essential for woodworkers.
Sharp router bits make cleaner cuts, but they also help prevent kickback and minimize vibration. As a result, it is vital to regularly keep your router bits sharpened.
The following tips will help to ensure that the job is done right:
- Use a dedicated sharpening stone: Don’t try to sharpen your router bits on the same stone that you use for your other tools. A reliable sharpening stone will help you keep your carbide bits razor-sharp.
- Hone regularly: It is best to rub your bits after several uses. This will help keep them in great shape and minimize the need for major reconditioning jobs.
- Pay attention to the angle: When sharpening router bits, it is crucial to maintain the correct angle. Otherwise, you risk damaging the bit or ruining the cut.
- Use a guide: A sharpening guide can be a helpful tool when trying to achieve the perfect angle.
By following these simple tips, you can keep your bits in top condition and avoid frustrating delays in your work.
FAQs
The following are some frequently asked questions about honing router bit:
01. Is it Possible to Sharpen Router Bits?
It is conceivable to sharpen router bits, but it takes some effort and can be time-consuming. First, you need to remove the bit from the router. Next, using a file or specialty sharpening tool, carefully grind away any dull or damaged areas on the bit. Be sure not to overdo it.
02. How Many Times Can You Sharpen a Router Bit?
In general, you can expect to get at least 5-6 sharpening sessions out of a bit before it needs to be replaced. With proper care and maintenance, you can extend the life of your router bit and get even more use out of it.
03. Why is My Router Bit Leaving Burn Marks?
Burning while four different things can cause router routing:
- The router bit is spinning too fast,
- The bit is too dull,
- The workpiece is moving too fast,
- There is too much pressure on the bit.
These reasons will cause friction which will create heat and then burns. To fix this, you need to lower the speed of the spindle on your router.
04. Can Spiral Router Bits be Sharpened?
The answer to this question depends on the spiral bit you have. If you have a carbide-tipped bit, it can be sharpened using a diamond wheel or file. However, if your bit is made of high-speed steel, it cannot be pointed and must be replaced.
Conclusion
A router bit is a versatile tool suitable for various woodworking tasks, from shaping edges to creating intricate designs. However, like any other tool, it requires regular maintenance to keep it in top condition. One of the essential aspects of router bit maintenance is sharpening.
Sharpening your bit can be done with a Dremel tool or a special sharpening tool. It is paramount to take care when you sharpen router bits, as it is easy to damage them if you are not careful. If you keep your bits in good condition, you can maintain their performance.