WoodenuKnow.com is a participant in the Amazon Services LLC Associates Program, an affiliate advertising program designed to provide a means for sites to earn advertising fees by advertising and linking to Amazon.com and may earn from qualifying purchases.
Stain can be used on any type of red oak wood, so feel free to use stain on your hardwood floors or stain a bright new piece of furniture. Hope we are cover how you should properly staining maple, as well as some tips for applying darker stains so they’ll last longer on your wood floor or furniture.
Stain takes a while to dry and this is another reason it’s best to stain in thinner layers. Stain also tends to dry darker than its original colors, but don’t worry!
Stain can be easily sanded down to get the desired shade you want. Stain can be applied as many times as you like until you reach the perfect stain!
How Does a Wood Stain Work?
Stain isn’t just color. Stain is a wood preservative, that helps protect the wood from rotting or drying out. Therefore if you want to build decking, fences or timber structures that will be exposed to the elements you should check that any wood gel stain is also colored and not just colored.
A stain that’s purely colored is for inside surfaces like dye furniture etc. Before you know it, your wood will be dark and it’ll shine like the deep pool of water in a forest. Stain maple dark when using the following methods to completely transform the look of your hard work!
You Might Also Like: Simple Way to Stain Trim Already Installed
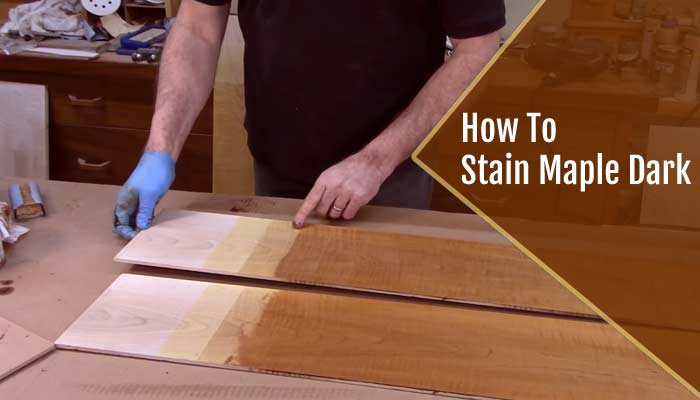
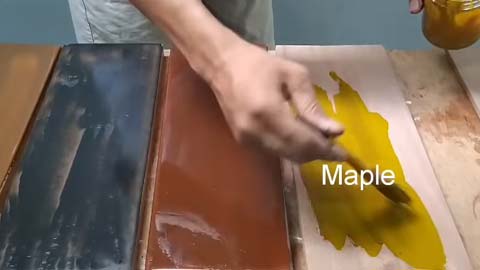
Please Find Below Some Instructions on How to Stain Maple Dark?
Step 01. Stain Maple Dark
First of all, you must sand the wood. Although you might think that doing this will remove some natural wood finish, in reality, the wood will look better and darker when you are done with it than before sanding. This is because the more stain you apply to the wood the lighter shade it gets. So if you sand the wood first, you will be able to apply more stain on it without making the wood turn out too dark.
Step 02. Sand the Wood Down to Make it Smoother
One of the steps to stain maple dark is to sand it down. You want to make sure that you do this evenly and thoroughly so you don’t miss any spots. Doing this will make your wood smooth, which will result in a more even finish with your stain this makes the whole process a lot easier!
Step 03. Remove All Dirt and Finishings with a Good Scrubbing
One important thing that you need to think about before you start putting the stain on is removing all of the dirt and finishings. Do this right before you start to put the stain on, and then you should be able to get a good, even layer of color that will last a long time.
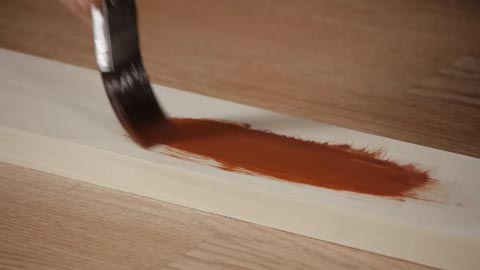
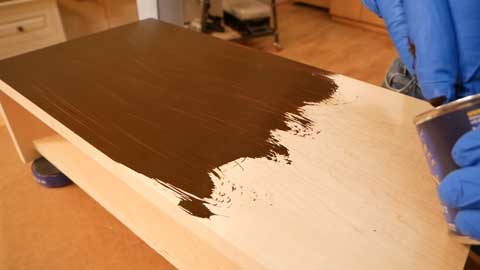
Step 04. Stain the Wood to Darken it, Covering All Surfaces
When staining wood to darken it, be sure to cover all surfaces. You don’t want to risk leaving any unpainted areas or allowing the stain to pool in them. The stain will start off looking darker on the surface but it will dry lighter, so it’s important not to miss any spots that you might think are too small for a coat of stain.
In addition, be sure not to use too many coats of stain this can actually create an uneven, blotchy effect. The fewer coats you use, the less chance there is of drips happening as well. A light layer of stain on each coat should work just fine, and may even give you better control over how dark the wood ends up being since you can apply a few layers if you wish.
Step 05. Allow Drying Overnight
After you finish applying the stain, make sure to allow it to dry overnight of your dye woodwork. Otherwise, you’re just going to be ruining your work. Stain is not like regular paint, it takes a lot longer to set, and can still end up in spots that you didn’t fully cover. When staining wood, it’s better to be safe than sorry!
Step 06. Stain Once More if Needed
If you’re still not satisfied with the dye color of your wood, you can always do one more coat of stain. Stain typically dries lighter than it looks on the surface, so don’t be afraid to go a bit darker. Just make sure that you start with a light layer first, and then add coats if desired. Doing this will make sure that your final product is completely even for when it’s finally done!
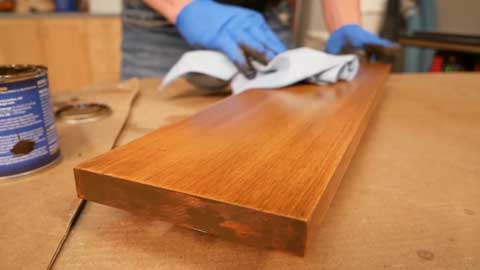
Enjoy your Dark Wood!
When you’re finished staining your wood, be sure to enjoy the final product! One thing to remember is that the color will darken once it’s dry. You’re done with the staining process so now you can sit back and relax, you’ll have brown maple wood but it will still look beautiful and natural.
Requirement Tools
There are two requirements tools for darkening maple stain
i) The First is Sandpaper
Which you use to grind the surface of the wood to remove any dirt and old finishes. You can also use a wire brush to do this step (just be sure not to get bristles in your eyes!).
Once the wood is textured, simply take a clean cloth and wipe the floor off before moving on to the next step. You should also cover your floor with plastic sheeting if you’re going to stain it so that your dye furniture doesn’t get stained.
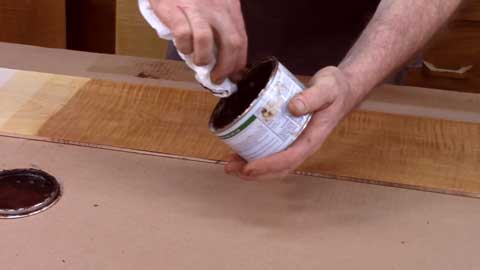
ii) The Second is Stain
Stain isn’t just one color there are tons of different colors ranging from light colors like white or beige to dark colors like cherry or mahogany. Wood sealer is applied to the wood as you normally would any paint, and can be bought at any home improvement store.
Requirement Materials
i) Power Sander
A power sander is a mechanical type of sanding which has been mounted on a stand. It is typically used by carpenters, transtint dye woodworkers, and cabinet makers. Using a power sander will significantly reduce the time it takes to get your floors ready for staining.
ii) Stain Bottle
A stain bottle is a plastic container with a built in nozzle that allows you to apply and control the amount of sealer being applied to wood. Stain bottles can be bought at any home improvement store, and are pretty cheap!
iii) Fine Grit Sanding Sponge
Fine grit sanding sponge is a type of sponge for sanding. It is typically used in dye woodworking, cabinet making, and in carpenter’s natural color on dye woodwork, dye furniture, flooring, and other items made from timber wood.
iv) Scrubbing Pad or Rag
A scrubbing pad is around a pliable pad that helps to remove dirt and old finishes from wood. It can be used with a drill attachment, wire brush, or sandpaper. Scrubbing pads are generally made of nylon but can also be made of rubber.
v) Dish Soap
Dish soap is also an important step in darkening the maple. Dish soap is used before you stain your wood and helps get dirt and old finishes off the surface of the wood. It makes it so that less of the dark stain goes on your wood and you can get a darker color with fewer coats needed!
The Benefits of Darkening Wood Stain
The benefits of a dark staining maple are numerous including the fact that it makes the wood look more actual.
Stain is a useful and cheap way to get a darker color than normal. It’s much cheaper than buying or renting an expensive sander.
Stain helps preserve the wood of its current colors and also provides a certain type of beauty that is unique to different types of wood.
Stain can also be used to deepen or lighten the color of the wood, so it’s versatile. Darkening your hard maple stain is an amazing way to get a dark color through just a couple of coats.
It also saves you the trouble of having to sand down the wood first because stain automatically sands the wood for you.
Darkening stain also feels much purer than painting on a dark color like black or navy blue, and it helps maintain the original beauty of your wood.
FAQs
What Wood Can I Stain?
Stain can be used on any type of wood species, so feel free to use stain on your hardwood staining maple floor or stain a bright new piece of dye furniture. Stain dries and sets very quickly, so it’s easy to get different colors on pieces of wood!
It’s important that you don’t use pigment stain over already stained wood, as this could make stains look strange or even make them fade away. Stain is also not meant to be used on finished wood, so you should sand your wood first before applying stain. Stain can be applied in thin layers or thick depending on how dark you want your wood to be!
What is the Best Way to Get the Right Stain Color?
When stain dries, it is easy to notice if you’ve missed a spot or have areas that are too concentrated with stain. It’s best to color in every area of the stain so that it covers the white oak wood evenly and completely!
Stain also tends to dry darker than its original colors, but don’t worry! Stain can be easily sanded down to get the desired shade you want. Stain can be applied as many times as you like until you reach the perfect stain!
What do I do About Woods Stain that has Been on Too Long?
If the wiping stain is left exposed for too long, you might notice that the stain turns white or chalky in color. To fix this problem, sand down your stain and stain again until the desired darkness is achieved. Stain takes a while to dry and this is another reason it’s best to stain in thinner layers!
How Can I Remove Blotches After Staining Softwoods?
The blotches on softwood stains usually depend on the type of wood gel stain being used. Dye stain can be drying to certain types of wood, so blotches could show up depending on your choice in the stain.
If you’re not pleased with how the stain looks when applied on softwood, try another stain or sanding it down after two weeks and stain again. Stain takes a while to dry, so be patient!
Can Stain be Used Outside?
Stain is meant for indoor use only, so it’s not waterproof and cannot be used outside or in areas with a lot of moisture. The stain will also fade in UV light, so dye stain needs to be used with care in sunlight. Gel stain only takes a few hours to dry, so the stain can be put on wood and left out overnight if necessary!
Conclusion
Maple wood is a beautiful hardwood that can be enhanced with the dark stain maple finish to highlight its natural grain and unique features. While sanding is a common method for darkening wood without using stain, applying a dark stain maple is a popular and effective alternative. Whether you are staining hardwood floors or a new piece of furniture, proper application and quick sealing can help protect and maintain the rich, dark color. With these tips, you can achieve the desired look and enjoy the beauty of maple wood for years to come.
Stain can be used on any type of red oak wood, so feel free to use stain on your hardwood floors or stain a bright new piece of furniture. Hope we are cover how you should properly staining maple, as well as some tips for applying darker stains so they’ll last longer on your wood floor or furniture.