WoodenuKnow.com is a participant in the Amazon Services LLC Associates Program, an affiliate advertising program designed to provide a means for sites to earn advertising fees by advertising and linking to Amazon.com and may earn from qualifying purchases.
Painting is a great way to spruce up your home, but it can be hard to remove paint from any exterior surface if you don’t know what you’re doing.
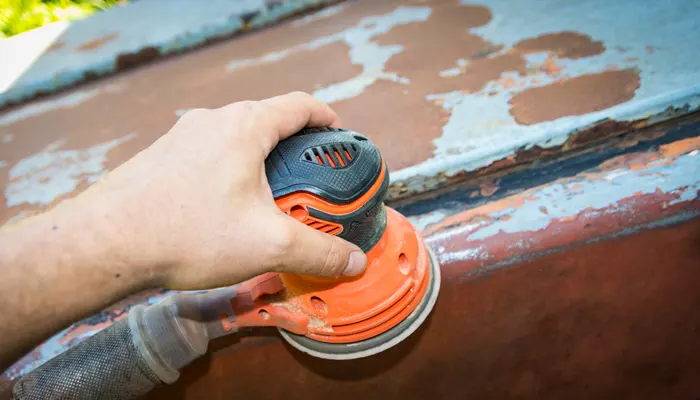
If you are looking to remove paint from a surface, using a sander is an effective way, then this article on how to use a sander to remove paint is for you.
However, there are a few steps you should keep in mind when sanding paint. This article will discuss using a sander to remove paint and provide some tips for getting the job done correctly.
What is a Sander?
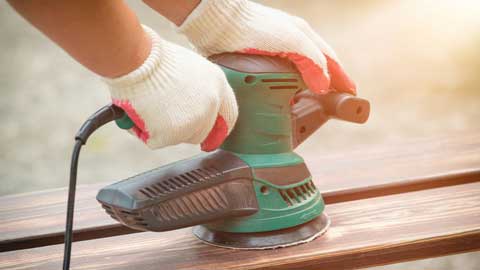
A sander is a power tool used to smooth out surfaces by rubbing them with an abrasive material. Sanders come in various shapes and sizes, but they all work in the same way.
Sanding uses an abrasive material to remove small amounts of material from the surface being sanded. This leaves a smooth surface behind.
Why Would You Use One to Remove Paint?
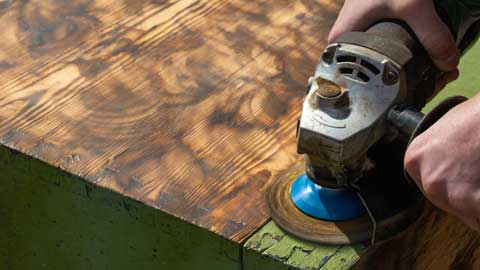
Paint can be challenging to remove from a surface, especially if it is not peeling or chipping. In those cases, using a sander for exterior paint removal can effectively work and leave the surface smooth.
Convenient Steps on How to Use a Sander to Remove Paint
To use a sander to remove paint, you will need the following tools:
- Sander
- A soft brush or tack cloth
- Dust mask and goggles
- Safety gloves
- Protective eye-wear
- A pencil or marker
There are a few convenient steps you can follow to use a sander to remove paint:
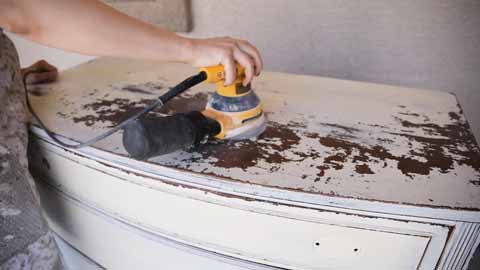
Step 01. Clean the Surface
Before sanding, you should always clean the surface to remove loose material, such as dirt and oil. Cleaning the surface also allows you to see clearly which areas have been painted and which have not.
Step 02. Remove Loose Material
Using a soft brush or tack cloth, remove all of the loose material from the area to smooth and free of anything that will prevent paint from adhering.
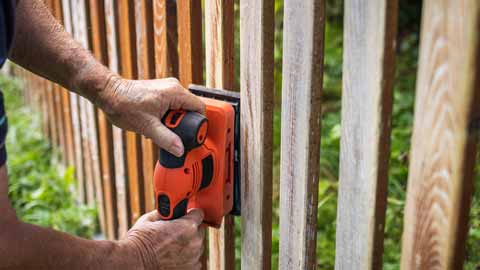
Step 03. Sand the Paint
Use a sander fitted with medium to fine-grade sandpaper and carefully distributes pressure as you move the tool over the paint. Sand in even, parallel lines, making sure not to stop or go back over an area that has already been sanded.
There are many types of sanders that you can use for removing paint, such as:
- Belt Sander: An electric-powered sander with a belt of sandpaper that moves in one direction.
- Orbital Sander: A small, handheld power sander with a motor and a head that contains two circular pads.
- Disc Sander: An electric or pneumatic sander uses oscillating discs to smooth surfaces.
- Detail Sanders: Small pneumatic or electric sander used in small, tight spaces.
Step 04. Clean Off Remaining Dust
After sanding, use a tack cloth or a soft brush to remove any remaining dust.
That is how you can use a sander to remove paint on any exterior surface you have. Before using the sander, make sure that you first clean the surface of all dirt and debris.
Tips for Using a Sander Properly for Removing Paint
There are a few tips you should keep in mind to use a sander to remove paint effectively:
- Use sandpaper with medium to fine grains.
- Sand in parallel lines, slowly and carefully so you don’t sand through the paint.
- Continue sanding until the entire area is smooth.
- When finished, clean the area with a tack cloth or soft brush.
- Use safety gear when sanding, such as a mask and goggles.
By following these tips, you will effectively eliminate any old or loose paint.
Safety and Precautions for This Job
When sanding paint, it is essential to take precautions to ensure your safety. Here are a few tips to keep in mind:
- Always wear safety gloves and goggles when sanding
- Make sure the area is well-ventilated
- Wear a dust mask while sanding
- Do not stop or go back over an area that has already been sanded
- Do not wear loose clothing or sleeves
- Sand in smooth, even lines for best results
Common Mistakes People Make While Using Sander
There are a few common mistakes that people make while using a sander:
- Not cleaning the surface before sanding. This can cause paint to chip and flake and makes it difficult to remove the paint evenly.
- Sanding too hard or too fast. This can cause the paint to chip and create an uneven surface and damage the surface being sanded.
- Not wearing safety gear. This can put you at risk of getting injured while sanding.
- Using a variety of grits in the wrong order. Unless you are sanding to expose bare wood, always sand with finer grits before moving on to coarser ones.
- Sanding in the wrong direction. This can cause the paint to chip and create an uneven surface.
- Not sanding enough. This can leave the surface with a rough finish and make it difficult for the new paint to adhere.
- Using too much pressure or not enough. You should use light pressure when sanding so that you can be sure not to damage the surface being worked on, but without wasting too much time and effort.
- Not using the right sandpaper for the job. Always use sandpaper explicitly made for a specific task, such as removing paint from a surface.
- Using the wrong tool to remove the paint. Different sanders are meant for other things, so make sure you use the right one for the job.
- Staying in one spot too long. If you’re using a belt sander, try to move the sander back and forth across an area instead of staying in one spot.
These common mistakes can result in damaged surfaces and wasted time and effort. Therefore it is best to be aware of these mistakes and avoid making them yourself. For more information about power tools you can visit True Tools Review.
Final Words
Using a sander to remove paint can be difficult if you don’t know how to do it properly. By following the tips we’ve provided and being aware of the common mistakes people make, you’ll be able to strip away old paint without damaging the surface underneath successfully.
Remember to use caution when working with power tools and always wear safety gear for protection. With a little bit of effort, you’ll have that old paint stripped away in no time!