WoodenuKnow.com is a participant in the Amazon Services LLC Associates Program, an affiliate advertising program designed to provide a means for sites to earn advertising fees by advertising and linking to Amazon.com and may earn from qualifying purchases.
DIY wooden furniture lets you furnish your home and show off your carpentry skills. It can also be a lot cheaper than buying furniture from a store. Customizing your furniture can give you a piece that is uniquely yours.
If you want to decorate your home with a unique style, we have some stylish DIY wooden furniture ideas like outdoor shelving, plant pot cubbies, and more. This furniture is often more durable than store-bought alternatives, so that you can use them for a long time.
We’ve put together a collection of DIY wooden furniture ideas to help you create a stylish look for your home on any budget.
Attractive and Unique DIY Wooden Furniture Ideas

Wooden furniture is a classic choice for any home. Perhaps it’s the warm, earthy tones of the wood grain or the simple elegance of a well-crafted piece. With a timeless look, you can customize it to fit any style.
You can find plenty of mass-produced options on the market, but something else is quite the same as DIY wooden furniture. Check out these stunning DIY wooden furniture Ideas that will add a touch of class to your home.
Outdoor Shelving:
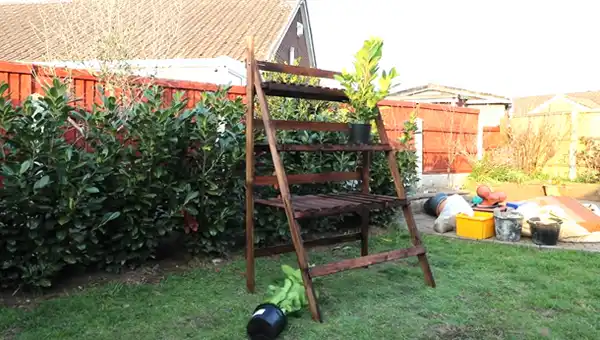
Outdoor shelving is a great way to add storage space to your home without taking up valuable floor space. There are many different styles of outdoor shelving available, so you can choose one that best fits your needs. Here are a few ideas to get you started:
DIY Hanging Table:
A wooden hanging table is a type of table supported by ropes or chains attached to the ceiling. The ropes or chains can be decorative or functional, depending on the table’s design.
Wooden hanging tables are common in loft apartments and small spaces where traditional tables won’t fit. They are also popular in outdoor areas such as patios or decks.
Instructions:
- To build this table, you will need wood (preferably pine or cedar), a drill, a saw, and sandpaper.
- Cut your wood to size after measuring it. Drill four holes into the bottom two pieces of wood. These should be slightly longer than the tabletop.
- Sand all of the pieces of wood to smooth out any rough edges.
- Assemble the table by attaching the legs to the holes in the bottom piece of wood.
- Hang the table on the wall using screws or nails. You can also add felt pads to the bottom of the legs to prevent scratching your wall.
Rolling Plant Shelf:
A rolling plant shelf is a gardening cart or shelf on wheels used to store and transport potted plants and flowers. Wood shelves with several shelves can hold pots of varying sizes.
The carts typically have four wheels that make them easy to move around. Rolling plant shelves are a great way to keep your plants organized and make it easy to move them around as needed.
Instructions:
- To build a basic rolling plant shelf, you’ll need some wooden boards, screws, caster wheels, and plants.
- Start by measuring the width of your plants and cutting the boards to size. Attach the caster wheels to the bottom of the boards using screws.
- Once the wheels are attached, stack the shelves on top of each other and fill them with plants.
- If you want to get creative, you can paint or stain the shelves before adding plants.
Plant Pot Cubbies:
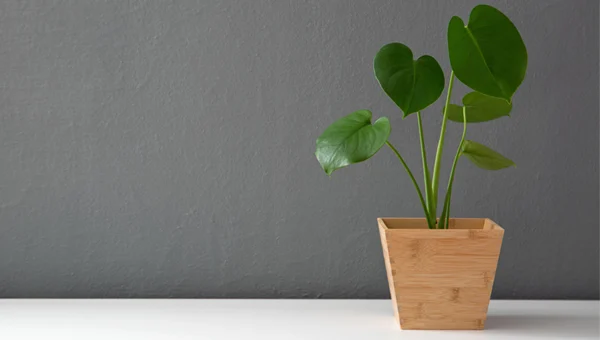
Wooden plant pot cubbies are small wooden boxes with multiple small pots. They are generally used to grow herbs or small flowers indoors. Making your own wooden plant pot cubbies is a relatively easy project that can be completed in the afternoon.
Instructions:
- You will need to choose the size and number of cubbies you want to make. Select a sturdy piece of wood that will not warp or bend under the weight of the pots.
- Sand it down and paint or stain it to match your existing decor.
- Cut the boards to size and assemble them using nails or screws.
- Use a drill to create holes in the wood for the pots. The holes should be slightly smaller than the diameter of the pots so that they fit snugly.
- Once the frame is complete, add a layer of rocks or gravel to the bottom of each cubby and then fill it with potting soil. Add your chosen plants and water the well.
Corner Seating:
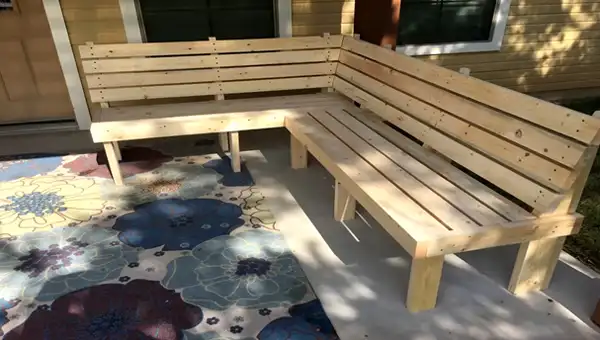
Home corner seating is an L-shaped sofa or seating arrangement often placed in the corner of a room or outdoors, such as on decks or patios.
You can transform it into a stylish and comfortable place to relax or entertain guests with a little creativity. Whether you have fake grass installed or a concrete patio, these furniture additions are sure to make your garden look great.
Outdoor Corner Bench with Storage:
This bench is built using 2x4s, plywood, and furring strips. It has two seats and a storage shelf underneath. You can store lawn games, pool toys, and garden tools here.
Instructions:
- Cut the 2x4s and plywood to size and assemble the frame using screws and nails.
- Attach the furring strips to the frame to create the seating surface.
- Add cushions and pillows to make it more comfortable.
Indoor Banquette Storage Bench:
Banquettes are essential furniture to add extra seating to your kitchen or dining room while also maximizing storage space. With a little bit of DIY ingenuity, you can easily transform a banquette into a storage bench.
Instructions:
- Begin with measuring the dimensions of the space where the bench will be located.
- Cut plywood panels to size and attach them to form the base of the bench.
- Add some cushions and throw pillows for comfort, then use screws and nails to attach trim around the edge of the bench.
- Consider painting or staining the wood to match your decor for added style.
Garden Coffee Table:
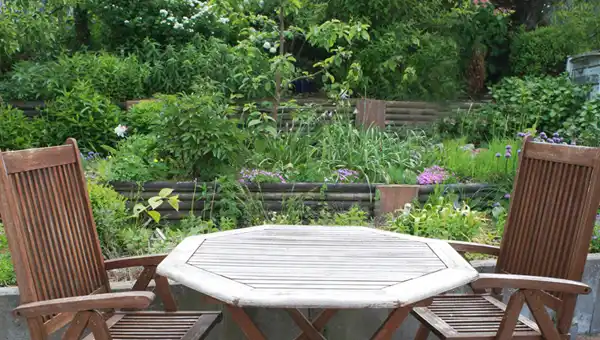
A garden coffee table is a great idea for those who want to add a touch of style to their garden. They are perfect for entertaining guests, enjoying morning coffee, and reading newspapers or magazines.
The wood you choose should be durable and weather-resistant. Cedar and redwood are good options. If you live in an area with extreme weather conditions, treat the wood properly, so it does not warp or crack. When finished, darker colors absorb more heat than lighter colors.
Instructions:
- Gather the following materials: four small wooden coffee table legs, one large wooden coffee table top, wood glue, metal brackets, a drill, and screws.
- Sand down all the rough edges of the wood, then use the drill to make pilot holes in the legs.
- Apply a generous amount of wood glue to the underside of the tabletop.
- Attach the legs, using the metal brackets to reinforce the joints if desired. Once the glue has dried completely, turn the table over and screw the legs into place.
- Add any final touches, such as painting or staining, and enjoy your new garden coffee table.
Pallet Seating:
When it comes to furnishing a home, every inch of space counts, that’s why savvy homeowners are always looking for pallet seating. Pallets are straw or hay beds. In pallet seating, hay or straw is stretched over linen or some other material sheet close to the ground.
Instructions:
- To make pallet seating, you will need four pallets, a saw, a drill, screws, sandpaper, paint or stain, and cushions.
- Cut the pallets into three equal pieces using the saw.
- Drill holes between two pieces and screw them together to form a bench.
- Sand down the edges of the bench to ensure no splinters.
- Paint or stain the bench and add cushions for comfort.
Is It Hard to Make Your Own Furniture?

It is easy to make your furniture. With DIY wooden furniture ideas, some basic guidelines, and carpentry skills, you can easily build your pieces of furniture. Many websites provide plans and instructions for making furniture.
You can also find kits that contain all the necessary materials to build specific pieces of furniture. It is always best to take proper power tools and safety precautions when working with wood.




Really nice and appreciated
Thanks. 🙂
https://karimmassimov.com/
[url=https://sekstelefon.info/zwariowana-aldona/#wait_approval]karimmassimov.com[/url] 5b7c598
Comment awaiting moderation.