WoodenuKnow.com is a participant in the Amazon Services LLC Associates Program, an affiliate advertising program designed to provide a means for sites to earn advertising fees by advertising and linking to Amazon.com and may earn from qualifying purchases.
One of the hardest parts of building a home is making sure all the details are perfect, especially trimming. You can add trim to your walls, but it can be an absolute nightmare if you don’t know how to do it.
For any home’s design, trim is an important component and you should have a plan beforehand on how you want everything to look. But how to attach trim without nails?
There is an easier way! By using an alternative method like construction adhesive you can easily get your trim attached without any of those pesky nail holes.
The best part about these alternative methods is that they are all easy enough for anyone with basic DIY skills (which means almost everyone) to use them on their own projects at home. Let’s dive right in!
How to Attach Trim without Nails : 6 Methods
Wood trimming is a very popular technique for home design. It can be used to decorate the entire house or just specific pieces of it.
In order to use this kind of decoration, one needs to attach the trim with no nails first so that it stays on and does not fall off. Some methods on how you can do this:
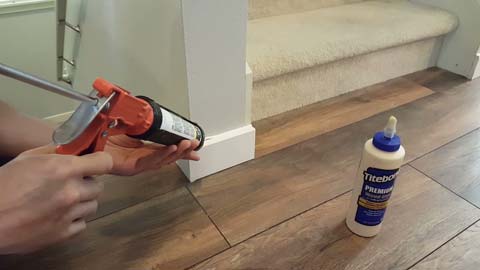
Method #1: Construction Adhesive
This adhesive is a very strong form of glue and it only takes about 30 minutes for the glue to dry and become secure.
This type of glue can be applied directly to the timber and won’t cause any damage to the surface. It will also create a bond that is even stronger than nails, making it perfect for attaching install door trim with no nails.
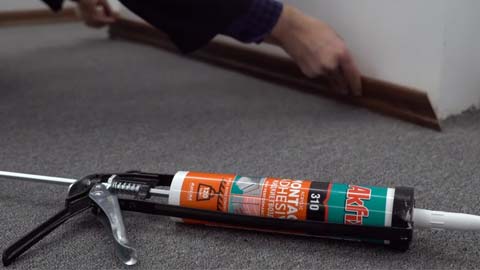
Method #2: Liquid Nails
Another way to secure trim with no nailing is by using Liquid Nails. This is a type of glue that can be used on a variety of surfaces, including wood.
It dries quickly and creates a very strong bond, making it the perfect choice for attaching trim. Just make sure that you use it in a well-ventilated area as the fumes can be harmful.
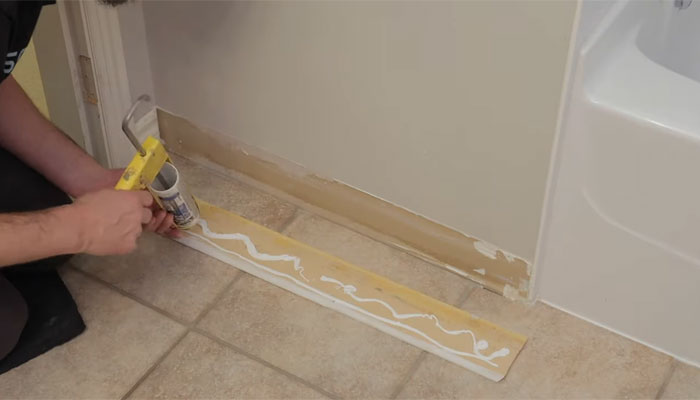
Method #3: Silicone Caulk
This is perhaps the easiest method for attaching install door trim with no nailing. All you have to do is fill a silicone caulk gun and then apply a thin bead of it on the areas where the trimming will go on.
The caulking can be used as a sealant and as an adhesive, making it perfect for adding detailed work to your trim. It is also very easy to use and doesn’t require any special skills.
Method #4: Epoxy
Epoxy is an extremely strong adhesive and it creates a bond that can last forever. This type of glue will give you the perfect results you are looking for if you want to fix trim without a nail gun.
Just apply it directly onto the surface and allow 4-24 hours for it to dry completely. It dries very quickly so don’t worry about having to wait too long.
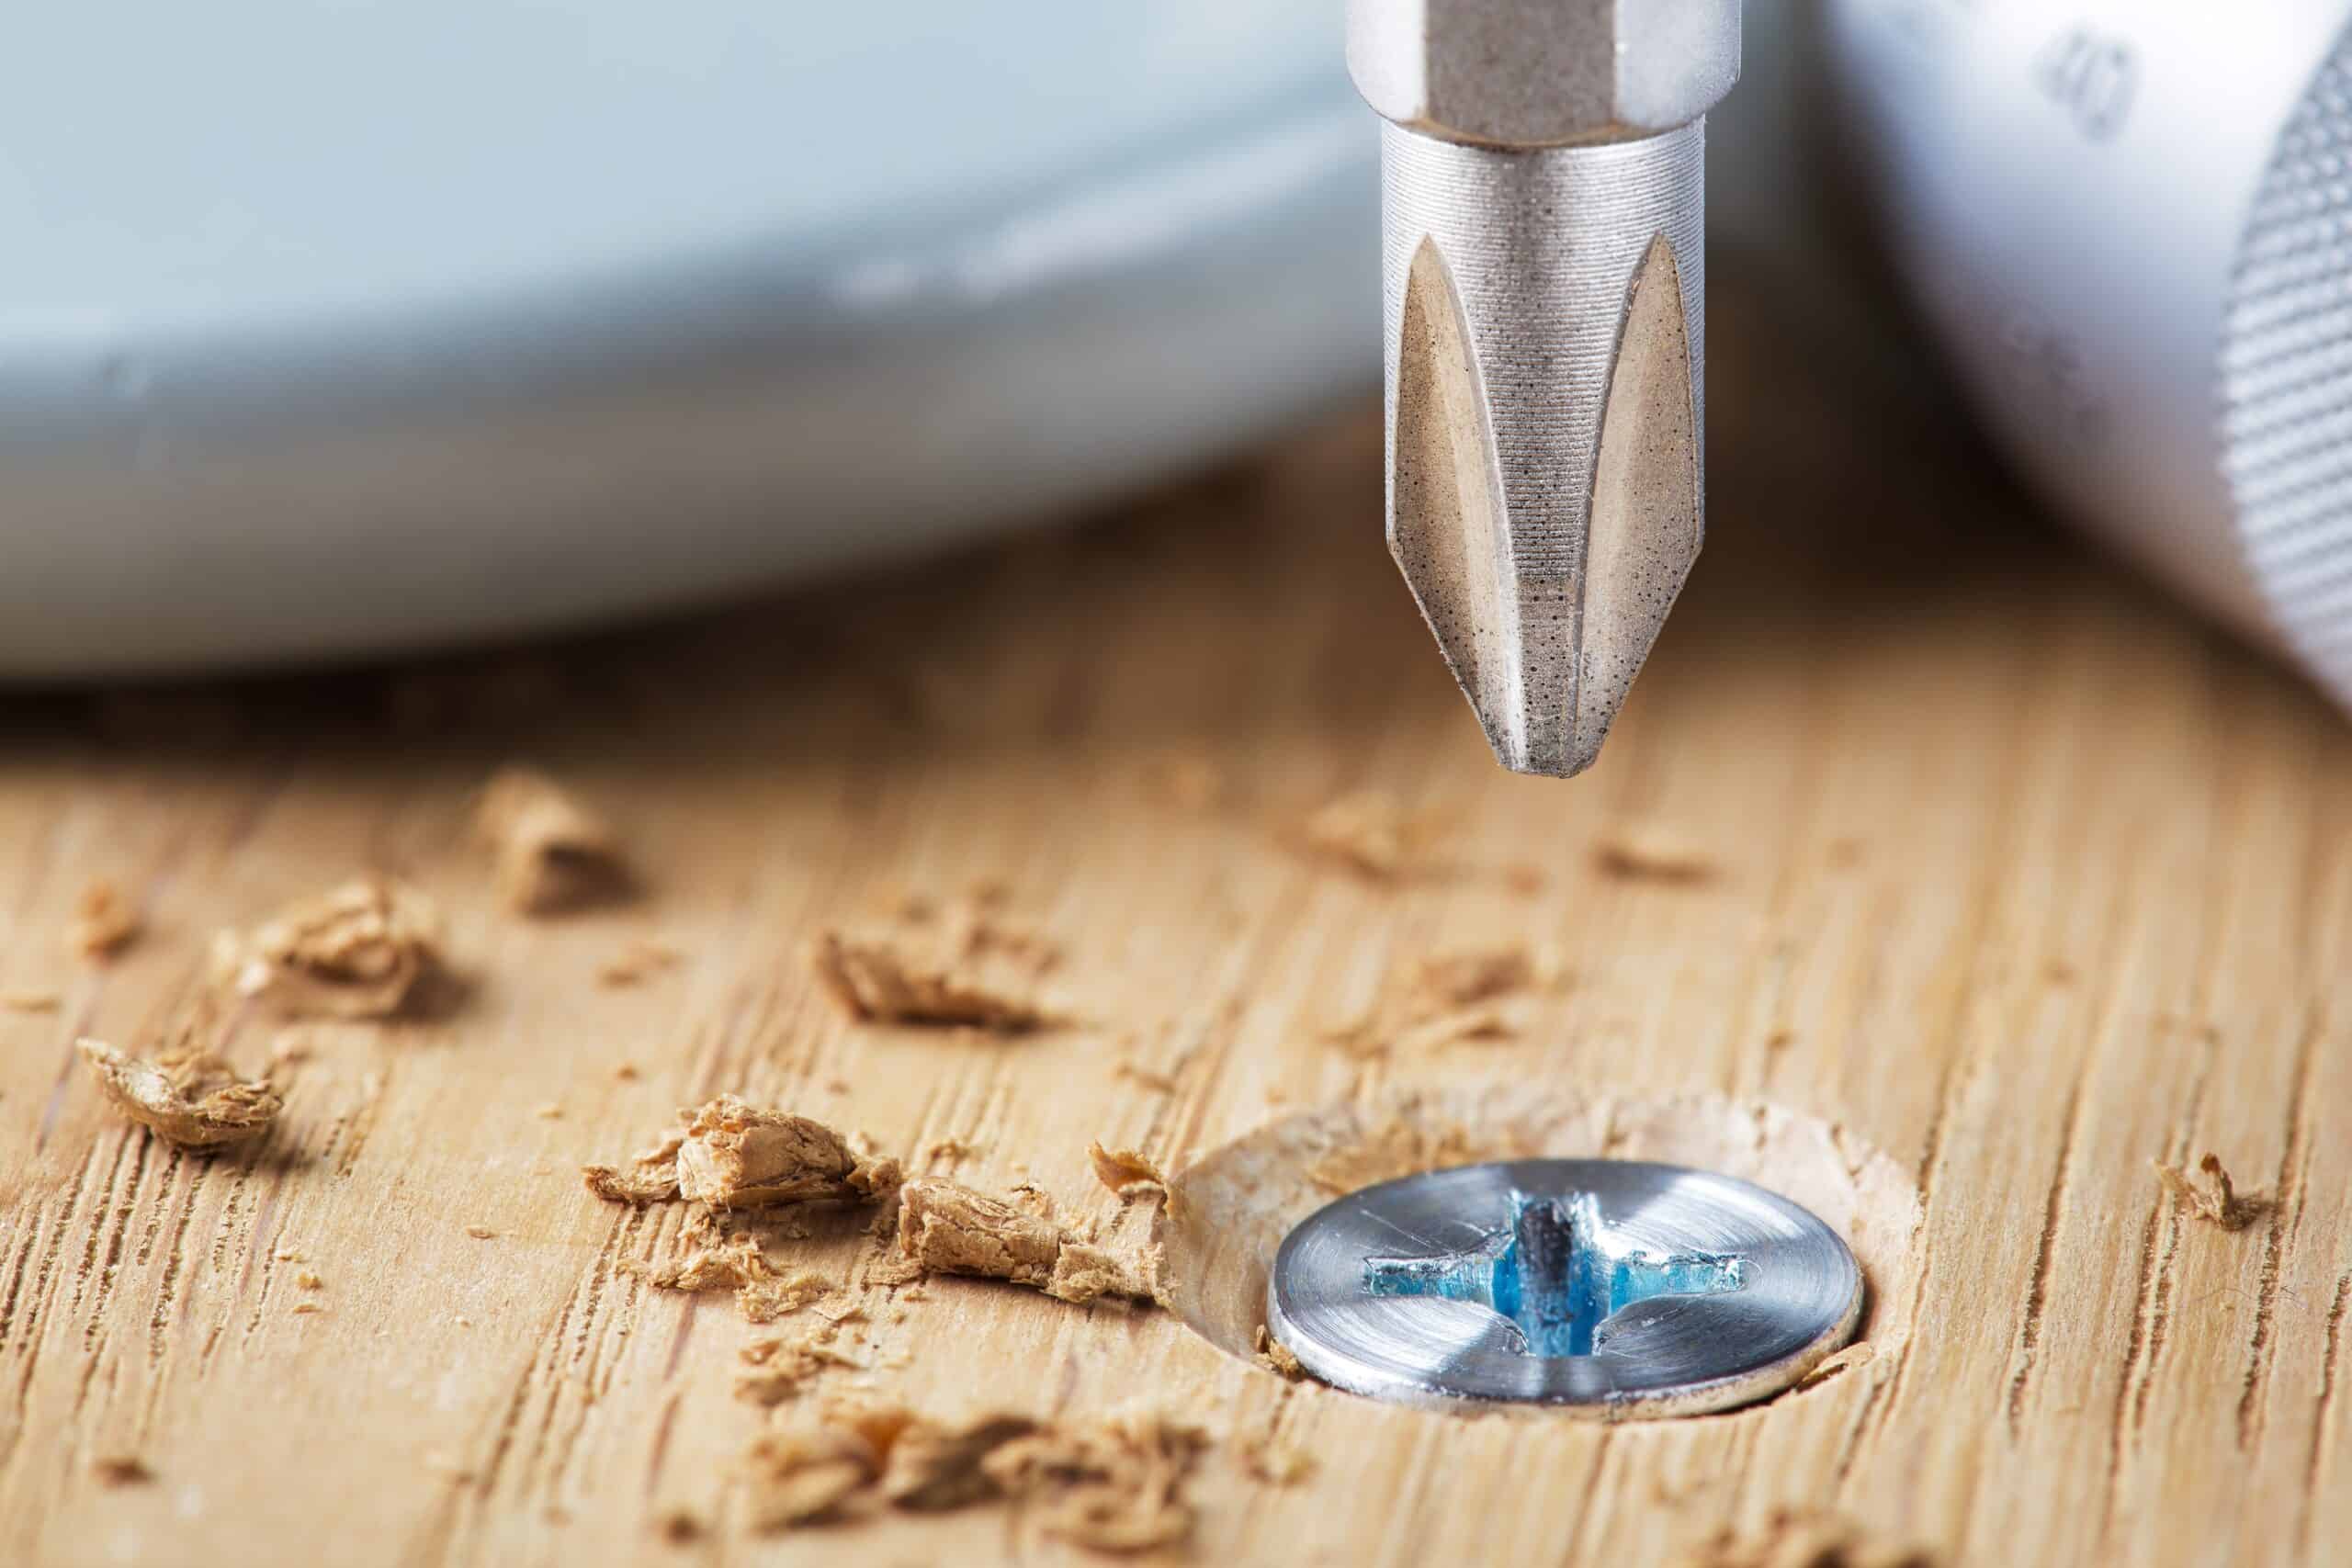
Method #5: Screws
If you want to attach trim without a nail gun, screws can be a great option. They are easy to use and create a very strong hold.
Just drill a pilot hole into the timber first and then screw the trimming in place. Make sure that the screws are long enough to go through the trimmed lumber.
Method #6: Double-Sided Tape
Double-sided tape is a great way to attach trimming instead of a nail because it is very strong and can hold up a lot of weight. It is also a very easy method to use and doesn’t require any special skills. But it’s not a permanent solution as the above methods are.
All you have to do is apply the double-sided tape onto the back of the edge and then stick it onto the surface where you want it to be. Make sure that the surface is clean and free of any dirt or dust before applying the tape.
These are some of the best methods for attaching trimming with no nail gun step. Choose the one that fits your needs the best and get started on adding some amazing detail work to your home.
What Wooden Trims can be Attached without Nails?

There are many different types of wooden trim that can be attached with no nails such as baseboard trim, door and window trim, crown molding, and chair rail trim.
All of these trims are usually the ones without any complex details or patterns on them. These trims can be easily attached without screws or other fasteners by using a strong adhesive, liquid nails, caulking, and wood glue.
Baseboard Trim
Baseboard trim is perhaps the easiest type of material to attach without a nail. All you need to do is fill a caulking gun with some caulk and then apply a thin bead of it on the areas where the trimming will go on.
The caulking can be used as a sealant and as an adhesive, making it perfect for adding detailed work to your trim. It is also very easy to use and doesn’t require any special skills.
Door and Window Trim
The door and window trim is also very easy to mount without a nail. You can either use a type of strong adhesive or heavy-duty formula glue to secure them together. Just make sure that the surfaces are clean and free of any dirt or dust before applying the good adhesive.
Crown Molding
It is a type of decoration that is usually used to add detail to the top of a wall. It can be attached without a nail by using either heavy-duty adhesive or furniture glue. Just make sure that you use a level when installing it to ensure that it is straight.
Chair Rail Trim
Chair rail trim is a type of decoration that is usually used to add detail to the top and bottom of a wall.
It can be attached using either carpenter’s adhesive or wooden glue without having to nail it down. Just make sure that you use a level when installing it to ensure that it is straight.
The Process of Attaching Trim without Nails
There are a few steps that you need to take in order to attach trim with no nails. The following steps will give you a general idea of what to do:
Step 01: Draw Guidelines
The first step that is needed for this process is to draw guidelines. You will need them in order to make sure that the trimming is straight and even. You can either use a pencil to do this or you can use chalk.
Step 02: Cut the Trim
Once you’re done with drawing guidelines, you will need to cut the edging in order for it to fit in place. You can choose any type of saw that you want and then cut them into your desired shape and size. A miter saw or a circular saw is usually used for this step.
Step 03: Sand the Edges of the Trim
You will need to sand the edges of your trimming in order to get rid of any sharp pieces that may be sticking out. All you have to do is attach an oscillating tool and you can get started. You can also get a handheld sander if you don’t have an oscillating tool.
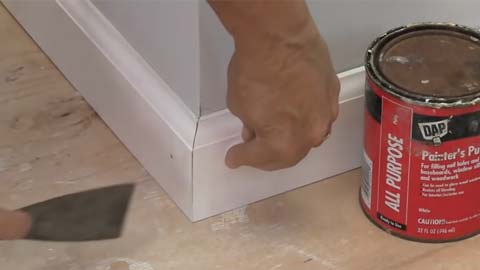
Step 04: Prepare the Surface
You will need to prepare the surface that you want to install the finishing onto. You can do this by applying a layer of carpenter’s adhesive or plywood glue on it and then wiping it clean with a cloth. Just make sure that you don’t leave any residue behind when wiping it clean.
Step 05: Apply the Trim
You will need to apply the trimming in its designated place and make sure that they line up properly with your guidelines. You can choose to nail them down or simply press them into place. Just make sure that you don’t use too much force when pressing them into place.
Step 06: Apply a Finish
Once you’re done attaching the trim, you will need to apply a finish to it. This can be done by using a brush, roller, or airless sprayer. You can also use a sealant if you want to protect the edge from any damage.
Benefits of Attaching Trim without Nails
The most obvious benefit is that you don’t have to worry about nail holes ruining the look of your trim. There are also other benefits that you may not have known about.
No #1: It Saves Time
One of the benefits of attaching trimming with no nails is that it saves you a lot of time. You don’t have to worry about drilling any finish nail hole or using brad nails. This process is very simple and easy to do.
No #2: It’s More Precise
Another benefit of attaching trimming with no nails is that it is more precise. You don’t have to worry about making any mistakes when lining up the edge with your guidelines. This can be a big plus if you’re looking for a more professional look.
No #3: It’s More Durable
One of the best benefits of attaching trim with no nails is that it is more durable. Nails tend to break after a period of time and they can also cause nail holes. This process is much more durable and will not ruin your woodwork or walls.
No #4: It’s Less Expensive
One of the additional benefits of attaching trimming with no nails is that it is less expensive. You don’t have to worry about buying nail guns, nail plates, or nail anchors if you want to attach the trimming with nails.
This process is much more cost-effective compared to using all of these products.
No #5: It’s Safer
The final benefit of attaching trimming with no nails is that it is much safer. You don’t have to worry about nail guns going off accidentally and hurting someone. This process is very safe to do and it will help you avoid any injuries.
When it comes to adding extra detail work to your home, there’s no better way to do it than with trim. The only thing that you need to worry about is properly attaching the trimmings and making sure that everything lines up properly.
Frequently Asked Questions
There are many questions that people may have when it comes to attaching trim with no nails. Here are some of the most common ones:
1. Can Nail Holes be Fixed After the Trim has been Attached?
Yes, nail holes can be fixed after the trimming has been attached. Wooden filler or spackling can be used to repair nail holes in your walls. This will help improve the look of them and it won’t affect what’s already there.
2. How Long Will It Take for the Trim to be Attached With Glue?
The trimming will last as long as the glue is applied to it. The longer the glue is left on the trim, the longer it will last. You just need to make sure that you apply a good amount of glue and that you let it dry completely before doing anything else with it. Approximately it takes 10 to 30 sec or even 15 minutes and it fully cures in 24 hours.
3. Can the Trim be Removed without Damaging the Walls?
Yes, the trimming can be removed without damaging the walls. You can use a pry bar or a putty knife to remove the edge without any damage. Just make sure that you’re careful when doing so and that you don’t apply too much pressure.
4. Can the Trim be Reused If It’s Removed?
Yes, the trimming can be reused if it’s removed. You will need to clean it off and make sure that there isn’t any damage to it. Once it’s been cleaned, you can reuse it in another location.
Conclusion
Attaching trim with no nails can be a great way to add detailed work to your home without having to worry about ruining them with nail holes.
There are many different methods that can be used, so choose the one that fits your needs the best and get started on adding some amazing detail work to your home. Hope now you know how to attach trim without nails.
So what are you waiting for? Start applying some of these tips and tricks to your homes today!