WoodenuKnow.com is a participant in the Amazon Services LLC Associates Program, an affiliate advertising program designed to provide a means for sites to earn advertising fees by advertising and linking to Amazon.com and may earn from qualifying purchases.
Cutting Hardie Board siding can be a difficult and potentially hazardous task if done incorrectly. The materials used in the manufacture of Hardie boards are dense and require specialized equipment to cut accurately.
Furthermore, the release of silica dust created while cutting poses a health risk if proper safety procedures are not followed. If you’re planning to install Hardie board siding on your home, it’s important to understand the tools and techniques needed to do so safely and with precision.
Below, we’ll walk you through the steps to ensure a precise, successful cut. Also, we’ll give you some tips on how to make sure your cuts are precise and flawless.
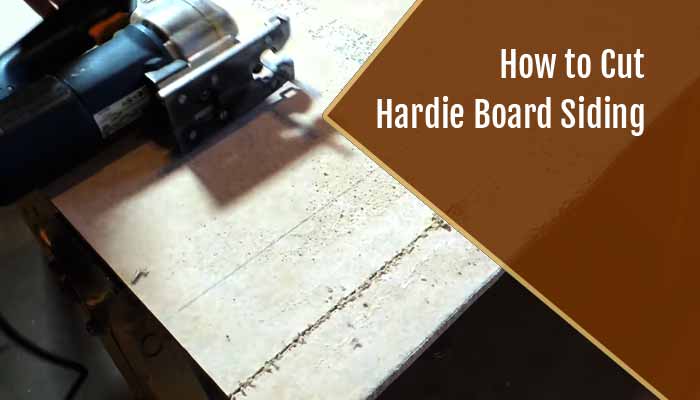
How to Cut Hardie Board Siding: Step-by-Step Instructions
The process of cutting and installing Hardie board siding is not overly complicated, but it does require some care and precision to ensure everything fits together properly. Here are the steps you should follow when cutting Hardie Board siding:
Items and tools you’ll need:
A. Safety Gear
- Eye Protection
- Work Gloves
- Breathing Mask/Respirator
B. Tools and Supplies
- Tape Measure or Ruler
- Marker or Pencil
- Carbide blade circular saw
- Angle Grinder with fiber cement saw blade
- Screws Designed for Hardie Board Siding
- Level
- Ladder or Platform for Safe Working Height
- Debris Container/Bucket
- Protective Sheeting (if necessary)
Now, let’s get started:
Step 1: Preparing the Area for Cutting
When cutting Hardie Board siding, it is important to begin by properly preparing the area in which the siding will be cut in. To begin, clear away any debris or obstructions from the area where you will be cutting, including furniture, plants, and other items which could interfere with your work.
Aside from that, ensure that the space is well-lit so you can clearly see what you are doing. If necessary, place a tarp under your work area to protect it from any mess that may occur when cutting.
It is also important to ensure that you have access to an electrical outlet for power tools that may be used for cutting, such as a jigsaw or circular saw. Also, always wear safety glasses and protective gloves when preparing for and cutting Hardie Board siding.
Step 2: Measuring and Marking the Pieces of Hardie Board Siding
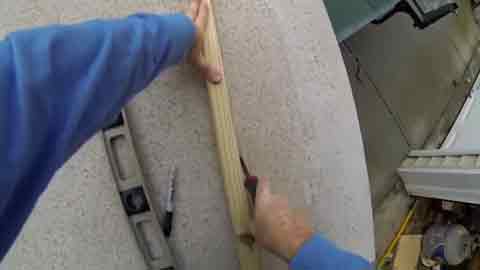
Once the area has been prepared, then measure the pieces of Hardie Board siding that need to be cut to fit correctly into place. Before attempting to measure and mark pieces of Hardie board siding for cutting, select a piece large enough for your project so it can remain intact after being cut into smaller pieces as needed.
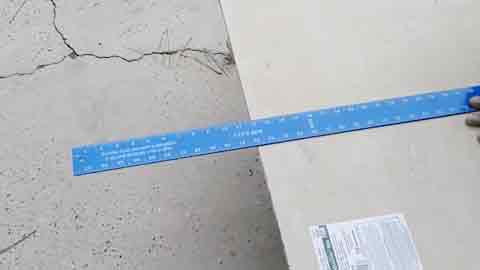
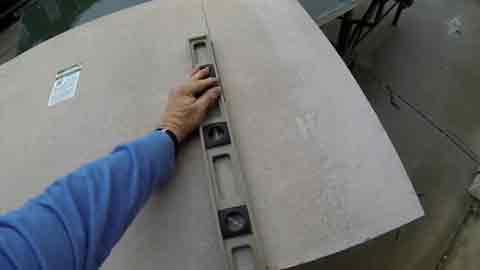
Begin by measuring each side of the panel with a tape measure or ruler to determine how large of an area needs to be covered by this one piece. After taking measurements, use those measurements as reference points when marking out where each cut should begin and end on the siding panel using a pencil or chalk marker.
Measure twice before making any cuts by using a tape measure or ruler and making sure you have accurate measurements taken directly from where you are going to install the siding pieces.
Step 3: Cutting the Hardie Board Siding
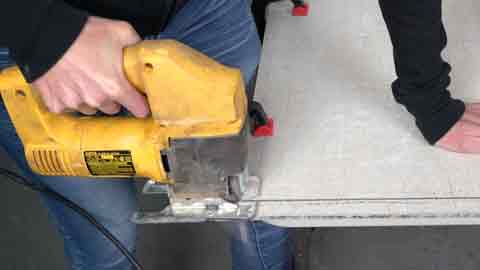
Once all pieces have been measured and marked, select a suitable tool for cutting out each piece accurately according to your measurements and markings (a jigsaw or circular saw is preferable). Try to use a circular saw with a carbide blade that is specially designed for cutting Hardie Board siding.
Check that all settings on the power tool are suitable before beginning with any cuts. This includes setting up a guide rail if needed (e.g., if using a jigsaw) or double checking the blade depth, speed settings etc., so as not to overcut it and damage other areas of the board like edges, etc.
Begin by setting up a miter saw and attaching it firmly onto a level surface such as a workbench or table, do not attempt freehand cuts. Position your first Hardie board section directly against the saw blade so that your markers align perfectly with it before turning it on.
Hands should be kept at least six feet away from blades at all times during cutting operations. When ready, slowly lower the saw blade onto the Hardie board until the desired depth is reached (make sure the switch is turned off prior), then raise up again before turning on the saw blade.
Repeat this process until all necessary cuts have been made along marked lines using steady force throughout motion while maintaining consistent speed across blades and try not to rush through this step.
Step 4: Finishing Up And Inspecting All Seams And Joints
Once all pieces have been cut according to size preference and marked dimensions, complete the finishing touches by ensuring all seams and joints connect smoothly with no gaps in between them.
To do this properly, inspect each joint closely by hand, looking out for any inconsistencies that may appear prior to installation, before applying sealant along edges, if need be with a caulking gun (depending on the type of installation).
For an even more accurate idea of how your project will look once installed, try setting up one side panel first using proper techniques (e.g., battering). This will give you an opportunity for further inspection of every detail before continuing with installation on other panels nearby.
Ensuring uniformity throughout multiple sections at once instead of having to make adjustments after several panels have already been secured in place, which could mean extra time wasted ripping out unsatisfactory pieces.
Then, sand down any rough edges coming off the sides due to incorrect sizing of blades when performing earlier cuts using sandpaper. Double-check the entire surface once more for any remaining rough patches before continuing.
Important Tips when Cutting Hardie Board Siding
When it comes to cutting Hardie Board siding, safety is of utmost importance. It’s a cinch to install, but it takes some finesse and additional tools to get the job done right. The following tips will help you cut Hardie Board siding:
- Always wear protective gear while cutting Hardie Board siding.
- Electrical tools should be grounded properly.
- Measure and accurately mark the Hardie Board siding pieces.
- Set up a safe work area with plenty of room to maneuver the board.
- Have an assistant to help you with the task or supervise your work for safety.
- Securely clamp down your workpiece before starting any cutting process.
- Sweep away any excess dust created by sawing or grinding.
- Inspect all tools after use to ensure they remain in good condition.
- Make sure to choose the right saw for the job.
- Don’t cut too deeply into the material with a circular saw.
With careful planning and attention to detail, you’ll have beautiful siding that will stand the test of time. Cut your Hardie board vinyl siding correctly by following these steps, and you’ll have a job well done.
Do You Need a Special Blade to Cut Hardie Board Siding?
Cutting Hardie board siding requires the use of special saw blades or other devices. The most popular choice is a Polycrystalline diamond-tipped (PCD) blade, as this type of blade is specially designed to make cuts in fiber cement backer board.
Aside from that, carbide-tipped blades with a diamond-tipped count can be used to get clean and precise cuts. When using either type of saw blade, it’s important to adjust the speed on the saw for the best results. Too slow and it will cause chipping or cracking, while too fast could result in an inaccurate cut.
Circular saws are generally more powerful than other types of saws, giving them an advantage in cutting through thicker materials like Hardie board siding. Using a regular wood-cutting blade on this type of material can lead to chipping and splintering, and the blade may not be suitable for the job.
So, if you need to cut Hardie siding, use the correct saw and blade. This will ensure that your cuts are precise and clean and the project will be completed safely and quickly.
A Few Recommendations for Fiber Cement Saw Blades
As a general rule, when it comes to cutting Hardie Board siding, one should use a carbide blade rated for cement products. Below are some fiber cement saw blade types that can help make the job easier:
4 Teeth Polycrystalline Diamond-Tipped Blade: It is designed for smooth, fast, and efficient cutting through a variety of materials with ease. This diamond-tipped blade is made from ultra-tough polycrystalline diamonds. Its cutting-edge is engineered to deliver superior performance in precise and consistent cuts, even when tackling the toughest jobs.
TCG Hardie Fiber Cement Saw Blade: Designed for making precision cuts in various construction materials. Due to its high-quality tungsten carbide teeth, the blade makes light work of cutting through Hardie fiber cement board and other tough materials. Its laser-cut body ensures an accurate cut every time, ensuring a smooth finish.
4-Tooth Diamond-Tipped (PCD) Professional Circular Saw Blade: The blade can be used by professionals or amateurs in all types of carpentry projects. This premium-grade saw blade features diamond-tipped teeth that are designed to cut through hard materials like tile, brick, concrete, and Hardie cement board.
8 Tooth Polycrystalline Diamond Tipped (PCD) Hardie Fiber Cement Saw Blade: This blade is a must-have for anyone needing to cut hard fiber cement materials in the most efficient manner possible. With its eight teeth and diamond-tipped construction, this saw blade is designed to quickly and efficiently cut through tough material.
You can use one of these blades to cut fiber cement siding to ensure your job is completed safely and with the best possible results.
Is a Razor Knife Capable of Cutting Hardie Board?
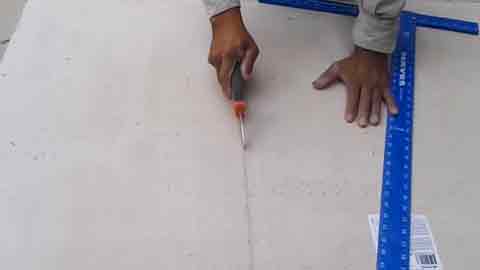
A razor knife can be used to cut Hardie boards, but it may require more precision and effort. Generally, it is best to use carbide-tipped circular saws to cut the Hardie board. This is because the saw will make a cleaner cut and keep the edges of the Hardie board smooth. A razor knife may be used in small areas where a saw cannot fit, and it can be used for cutting straight lines.
When using a razor knife to cut a Hardie board, you should score the surface before applying pressure while making multiple passes with the blade, increasing your chances of making an even cut without cracking or chipping the material. Be sure to use a sharp blade and take your time, as rushing can lead to inaccurate cuts.
Does It Make Sense to Cut Hardie Board Siding?
The Hardie board siding does make sense to cut. Cutting the material is safer and more accurate when using the appropriate saw, as mentioned above. It also ensures that the edges of the boards are smooth and even.
So, now that you know the basics of how to cut Hardie board siding, you’ll be able to complete your project safely and quickly. You can achieve professional-looking results every time with the right tool and techniques.