WoodenuKnow.com is a participant in the Amazon Services LLC Associates Program, an affiliate advertising program designed to provide a means for sites to earn advertising fees by advertising and linking to Amazon.com and may earn from qualifying purchases.
The deck is an excellent addition to your property. It can be used for many purposes, a place to eat and talk, just relax, or even exercise. However, if the deck has been built without proper bracing or is only poorly built, the deck will be susceptible to swaying in the wind. V bracing is one type of bracing technique commonly used for decks.
Bracing prevents outward movement (side to side) of an architectural component, such as a deck, and serves as a preventative measure for a structure’s outward (side-to-side) motion. It can be used on its own or in conjunction with other support systems like posts, beams, etc. Properly bracing your deck, including using V bracing where necessary, ensures its stability and enhances its durability in various weather conditions.
In this article, we’ll discuss just precisely how your platform can be made almost as robust as possible.
Why Does Brace Matter?
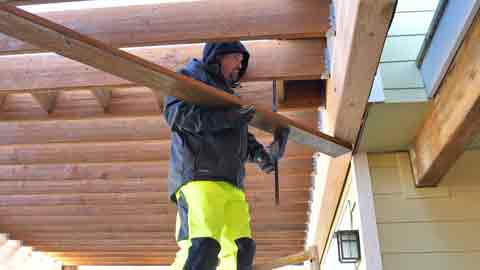
The goal of the deck brace is to help a deck from swaying.
It is installed parallel to the house or another solid structure (e.g., chimney) with a fastener on either side of the brace connecting it to the house.
You Might Like: Easy Guide to Putting a Roof Over an Existing Deck
Steps to Brace Your Deck from Swaying
To brace your deck from swaying, you are going to need the following materials:
- one 2×4; cut into three pieces @ 4 ft in length
- one 1×2; cut into two pieces @ 3 ft in length
- a drill and bits for drilling pilot holes
- a square or other straight edge (if you don’t have a miter saw available)
- a cordless power drill
- Position the first 2×4 along with the house, with one of its ends touching the house.
- Place the other 2×4 on top of it, perpendicular to it, and running at right angles to the face of your house.
- Drill two pilot holes through both 2x4s and into the house. Repeat Step 2 until you have a total of 4 braces installed to make sure all four sides support your deck post.
- Measure 2 ft (or other length depending on the depth of your deck) from one end of the 1×2 and make a mark.
- At the mark, drill a pilot hole
- Repeat Step 4 along with each bracing until you have eight holes drilled into each brace for attaching the 1x2s
- Run a 1×2 across each bracing and through each pilot hole.
- Use a screw as needed to nail the 1x2s into the protruding stub of wood that was left after drilling out your pilot holes. Repeat until all four sides are completed. Use lag screw if needed.
- If you have any gaps between the rim joist and the house, use framing lumber and nails to secure all open gaps.
You can brace your deck using anchor bolts or reinforcement plates and fasteners. The process of adding either is usually fairly straightforward if you already have a ledger board, but you will need a professional’s help for a new deck.
Anchor bolts are bolted directly into the posts and have reinforced washers to increase resistance to swaying.
Reinforcement plates screw through a metal plate on top of each wooden post before being screwed into place on top of the deck.
Both will give your new or existing deck more support against the wind, but you need a professional to help you decide which one is right for your property and needs.
You Can Also Check: Easy Methods for Removing Finishing Nails
Tips to Brace Your Deck from Swaying
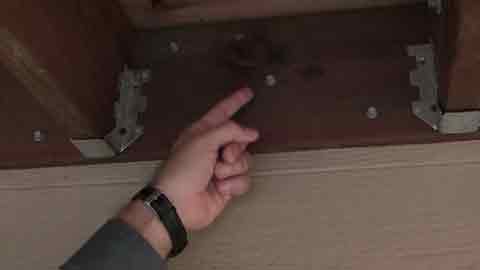
The first thing to do for deck bracing is to make sure that an engineer inspects the timber joists and posts supporting the deck. If any of them are compromised or weakened by rot, they should be replaced before carrying on.
Make sure that the posts supporting your deck are made of pressure-treated wood. It’s worth spending the extra money on pressure-treated wood because it will last longer outside than untreated wood.
Additional support will be required for your deck’s ledger board – this piece sits flush against the wall. You should contact an engineer to see if the ledger board requires additional support, e.g., rim joist, which might mean that you’ll have to use another joist or post.
Safety Concerns When Building a Brace on a Deck
Safety is always a concern when doing any construction work, especially projects like this that require climbing around on ladders and drilling holes into your home! That is why we recommend getting some help when you are doing any sort of deck construction project.
Examples of Poorly-Built Decks with No Braces or Poorly-Built Braces
The deck in the picture below does not use braces. As a result, the top of the deck is not level, which causes it to sway. To be structurally sound, floors must be level.
Here is an example of poorly constructed braces. This brace was drilled through only one eye into the house at a slight angle, which will cause the deck to sag, or worse, collapse, and will need to be replaced. For maximum strength, drill both eyes with wood.
Types of Braces
There are many different types of braces to be used to stiffen up a deck. The most common braces for decks are the below:
Post to Post
This type of brace is attached to two posts on opposite sides and then attached in the middle. The advantage to using this type of brace is that it can be used within any shape or size deck because you can insert additional support pieces as needed.
Box Beam
This type of brace is made from a flat piece of lumber. The beam is placed across two posts with the help of blocking fragments to prevent it from twisting.
Cantilever
They are also known as a projecting braces and can be added in order to help support any part of the deck that is at risk for swaying.
Horizontal Brace
With a Horizontal Brace, you will most likely have to give up the idea of attaching lattice panels or railings to your deck.
Horizontal Braces are installed between the top and bottom floor joists, just under or right at 2′ from the ground.
It’s a good idea to install them to counteract horizontal force before attaching anything onto your deck.
Strap Mounted Brace
One type of brace is a strap mounted to the bottom of the deck and then stretched across the top. These straps are then fastened for extra stability.
Walking Brace
Walking braces are another brace constructed from steel pipe or angle iron that runs underneath the deck and then back up to connect at each end.
Diagonal Brace
A diagonal brace is one of the most common types of brace because it is easy to install and relatively inexpensive. You can use diagonal bracing for decks with composite or treated wood.
Corner Bracket Bracing
Another type of brace is called a corner bracket. This type of brace works best on decks with solid wood boards on top of each other instead of one longboard laid lengthwise from end to end.
The Importance of Bracing for Windy Areas
Most of us probably know that winds are windy, but they vary in strength from area to area across the country.
Before installing any deck braces on a newly built or old deck, homeowners should check with their local authorities to see how strong the winds usually are in their neck of the woods.
Why Should You Contact a Professional if Your Deck Needs Bracing?
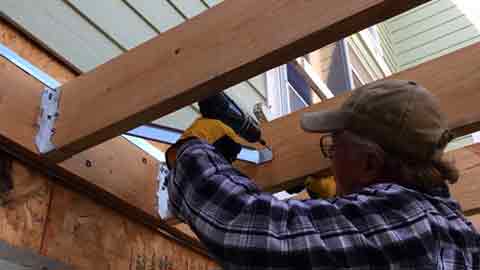
This issue can be seen as a matter of asking for help without being afraid of it. As another viewpoint, if you ask for help, you shouldn’t be scared of being rejected. In real life, some qualified people will help you with a smile on their faces.
“When we have difficulty reaching out for assistance, we have an opportunity for growth.”
The next time you need a professional’s assistance, make sure that you contact one as soon as possible. Unless they are busy tending to someone else, the professional will be happy to assist you with whatever problem has arisen.
Conclusion:
In the United States, many people live in windy areas, so knowing how to brace a deck from swaying or any other structure is extremely important. V bracing is one technique that can be employed to prevent the swaying of a deck. You can brace a deck from swinging by following these steps. However, it’s worth noting that not all decks necessarily require braces, as it depends on various factors such as location, deck design, and materials used. If you’re unsure about the specific requirements for your deck’s side support, it’s always a good idea to consult an expert who can provide guidance and ensure the proper materials are utilized. Taking the necessary measures to brace your deck effectively will not only enhance its stability but also contribute to the safety and longevity of your outdoor space.

