WoodenuKnow.com is a participant in the Amazon Services LLC Associates Program, an affiliate advertising program designed to provide a means for sites to earn advertising fees by advertising and linking to Amazon.com and may earn from qualifying purchases.
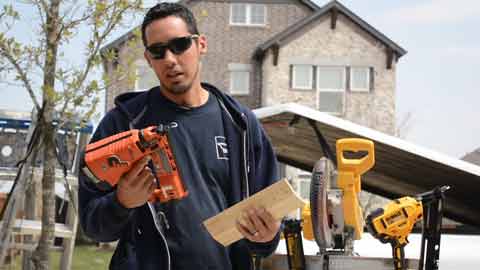
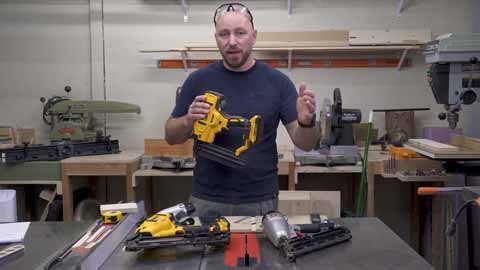
Nailers are essential tools in completing carpentry projects. They help speed up the process of nailing and provide accuracy in how nails are placed.
Nailers are available in different sizes and types. Each type of nailer is suited for a particular project, depending on the thickness and strength of the material to be nailed.
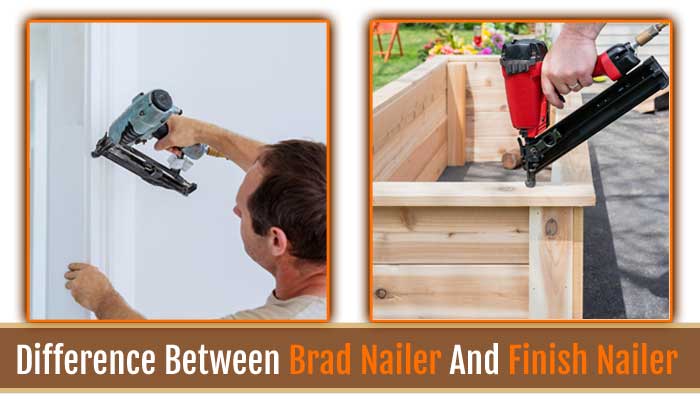
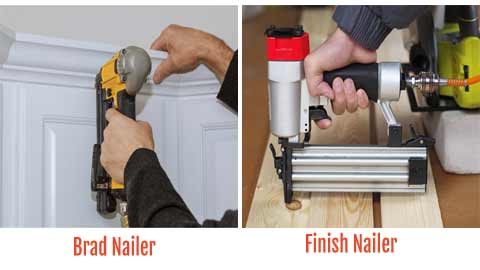
On the market, you can find brad nailer, finish nailer, framing nailer, pin nailer, etc. The brad nailer and the finish nail gun are two of the most commonly used pneumatic nailers in woodworking.
Both have specific uses depending on the material being nailed down. In this article, we are going to talk about the difference between brad nailer vs finish nailer.
Difference Between Brad Nailer And Finish Nailer
The following are some of the main differences between a brad nailer vs finish nailer that separate a brad nailgun from a finish nailer:
1. Hole Size
One of the main differences between brad nailer vs finish nailer for trim is that brad nail guns sleave smaller holes than finish nailers do. Brad nailer holes measure approximately 0.0475 inches and finish nailer holes measure up to 0.0720 inches. The finish nail sizes are typically 16 to 10 gauge and much stronger than the brad nailguns.
2. Nail Gauge
The nail gauge also differentiates between finish nailers vs brad nailers. The gauge in a brad nailgun is 18, while the gauge in a finish nailer ranges between 16 to 15. This means the nails of the finish nailer are thicker and stronger compared to a brad nailgun.
3. Nail Length
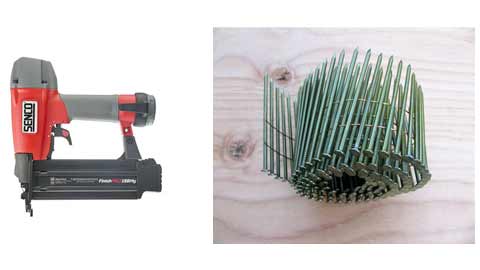
Finish vs brad nailer also differs in the length of their nails. The length of a brad nail varies from 1/2 inch to 2 1/2 inches.
A finishing nail can range in length from one to three inches; some may even exceed three inches in length.
4. Work Surfaces
Work surfaces differ for brad nailer vs finish nailer. Brad nailers are usually used on thin work surfaces, delicate wood materials that are less than an inch thick.
On the other hand, a finish nailer is best suited for working with thicker material on surfaces greater than an inch in thickness.
5. Power Level
This is one of the differences between brad nailer vs finish nailer. Brad nailers have a lower power level compared to finish nailguns. This is because brad nailers can accommodate thinner nails and less powerful materials. A finish nailgun has a higher power level for working with thicker and sturdier items.
6. Uses
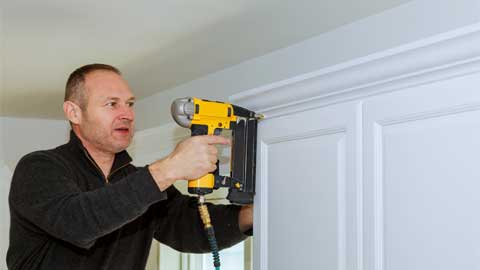
Furthermore, brad vs finish nailer differs in their uses. brad nail guns are best suited for nailing delicate materials. Typical projects where a brad nailer can be used include attaching wall or crown molding, installing wainscoting, and working on woodworking projects such as making picture frames, chair rails, window trims, door casings, etc.
A finish nail gun has more power than a brad nail gun. This allows the finish nails to wield thick and sturdy items. Typically, a finish nail gun is used for precision nailing or fastening large pieces of wood material together because it can drive nails into hard surfaces.
Also, since the thicker nail, the finish nailer can also attach heavy objects such as floorboards. Putty is not necessary to attach thin wood trim and crown molding when you have a brad nailer. For most carpentry and woodworking projects, you’ll use a finishing nailer, but you’ll have to wood glue the holes.
Which is Better – Brad Nailer or Finish Nail Gun?

People always ask which is better between brad nailer versus finish nailer, but it’s hard to say. Many people prefer brad pneumatic nailers because they don’t leave noticeable holes in the wood surface. Finish nailers are more visible so you’d need putty for these kinds of projects.
But finish nailgun can hold much stronger than brad nailer so it is up to you which one to use. Generally, a brad nailer is best for small projects, and a finish nailer is best for larger projects requiring more stability. You can choose the right one for your needs by knowing the difference between brad nailer vs finish nailer.
Benefits of Brad Nailers
Here are the benefits of using a brad nailer:
1. Faster: Brad nailers are faster than finish nailers because they require less power to drive the nails through lighter materials. Faster results are possible when you use a brad nailer.
2. Great For Trim Work: They are great for decorative trim and decorative molding, where finish nails make it difficult to use wood putty on the holes left behind by the fasteners used.
3. Versatility: Many brad nail guns can also be used for finish work since they have a higher power level than regular brad nails.
4. Small Nails Leave Small Holes: They are less intrusive so you won’t have to deal with large putty spots all over the place after your project is finished.
5. Easy to Use: This nailer is easier to use than the finish nailer because you get to choose the depth and pressure of the fastener, which makes it more versatile.
6. Do Not Require Putty: They are also more convenient to use because you don’t need to use wood putty when using a brad nailer. This saves you time and effort since the holes will already be small enough for minor repairs if needed.
The Drawback of Brad Nail
Some of the disadvantages associated with the use of brad nailers include:
1. Less Power: Although brad nailers have a higher power level than regular nail guns, they’re still weaker than finish nailers because of their smaller size and thin nail.
2. More Delicate Material Needs More Care: Since they are less powerful, you must be careful using a brad nailgun on more delicate trims.
3. Less Stability: They are less sturdier than finishing nailers, which means you need to apply more force before the fastener goes in.
4. More Likely To Split: This can be especially problematic since smaller fasteners are less forgiving when workpieces are made of delicate materials.
5. Less Bearing Capacity Per Nail: The nail used in this kind of nailer has a lower bearing capacity, making the finished product weaker and more prone to damage over time.
Benefits of Using a Finish Nailer

If you’re looking for a way to fasten wood pieces together, choose a finishing nailer over any other nail guns because these tools can handle larger and sturdier materials. The following are some of the benefits of using a finishing nail gun.
1. Holds Stronger Objects Together: Finish nailer has thicker nails and they can hold wood pieces together stronger than brad nailers would be able to do the same task.
2. You’ll Need Fewer Nails: Finish nailers can, with one shot, fasten two pieces of wood together more strongly and soundly than brad nailers would do in several shots.
3. More Visible Holes: Driving nails in with a finish nail gun leaves more visible nail holes in the wood surface, but they can easily be filled up with putty or spackle since these are bigger nails hole.
4. More Versatile: Finish nailer is used with various wood pieces and materials, even if they’re thinner than the minimum length that brad nailers use.
The Disadvantage of Finish Nailer
Finish nailers have several drawbacks that you’ll have to consider before choosing this tool over others.
1. Higher Price: Finish nailer is more expensive than all other options, and you’ll need a compressor to run them.
2. You’ll Need a Heavy Duty Compressor: If the compressor can’t handle the finish nailer’s power demands, it will shut down during tool operation.
3. Need Putty To Cover The Holes: Driving nails in with a finish nail gun leaves more visible holes in the wood surface, but filling them will require putty or spackle that you’ll have to buy separately.
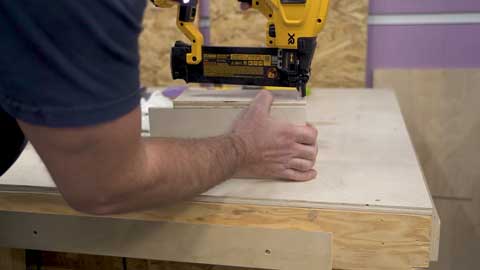
How to Use a Brad Nailer?
Listed below are the steps you need to follow to use a Brad Nailer effectively:
Step 01: Make sure the air compressor is turned on and adjusted to the correct pressure.
Step 02: Insert the brad nailer into the opening of the nailer. This should be easy because it fits correctly due to its thin size.
The brad nailer will only go into the appropriate opening, so there is no chance of inserting it incorrectly into another slot.
Step 03: Pull the trigger on the nailer and make sure it is locked in place. This will prevent any accidents while you are working.
Continue to hold the trigger down until you hear a clicking noise, which means that your electric brad nailer has been successfully fired. You can lower your finger off of the trigger once you have heard this noise.
Step 04: Push the brad nailer slightly forward toward your target piece of wood. This will cause the nail to leave the gun and attach to the piece that you are working on.
Continue applying pressure until you hear a clicking noise, which means that it has successfully attached to your material. If there is no clicking noise, then the nail is not attached and you will need to try again.
Step 05: Pull out the brad nail gun by holding onto both sides of the opening where the nails come out.
This will pull it back into its original position. Make sure your hand is away from this area because there could be another brad nailer coming through at any time.
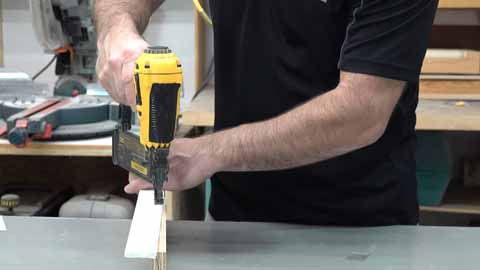
How to Use a Finish Nailer?
Following are the steps you need to follow in order to use the Finish Nailer:
Step 01: Set the air compressor to the right pressure by turning it on and adjusting it appropriately.
Step 02: Insert a finished nail into one of the holes in your Finish Nailer. These nails will fit only in their appropriate nail hole in the finish nailer, which means they cannot be inserted incorrectly in another slot. Continue pressing down until you hear a click, which means it has been fired.
Step 03: Pull back the trigger on your finish pneumatic nailer. Continue to hold the force of the finish nailer until you hear a click, which means that it has successfully attached to your material.
Step 04: Push forward slightly towards your target piece of wood with the energy from your Finish Nailer.
Continue applying pressure until you hear a click. If there is no click, then the nail has not attached itself properly to your material. This means you will need to try again.
Step 05: Pull back on your finish nailer until you hear a click. Continue pulling it back until the old nail falls out of the nail hole you are working with. Ensure that no nails are coming through to hit you, as this could cause an injury.
Tips for Maintaining a Nailer
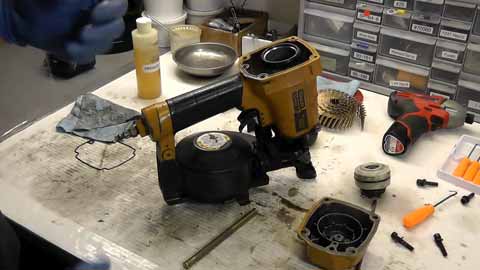
Just like any other tool, it is important to maintain your nailer. Cleaning the finish nailer or brad nail gun before and after you use it will ensure that the quality of the nailer lasts for a long time. You should also try to keep your nails sharp to don’t bend or break off during use. This is another aspect that will ensure that your finish nailer or brad nail gun lasts.
You should also oil your nailer with machine oil every few months to prevent the metal from rusting and the rubber components from becoming stiff and brittle. You can oil your nailer by placing a few drops on the gun and working it in with a cloth.
While you are cleaning your finish nailer and brad nailer, it is important to make sure that you push any jammed nails through the gun’s head. This will allow oil to reach the parts that require lubrication and prevent the jammed nails from rusting and causing trouble later on.
Finally, always remember that regular maintenance can help extend the life of your tools, so be sure to use these tips in conjunction with owning and operating your nailer safely and correctly for best results.
FAQs:
The following list contains some of the most frequently asked questions that you will want to know.
1. Can a Brad Nailer Be Used for Baseboards?
You can use an 18 gauge nail gun for installing baseboards, but 16 gauge is better for thicker baseboards. 18GA nails are suitable for trimmings up to half inches in width. We recommend using 16 gauge nails for baseboards that are thicker than 1/2 inch.
2. Is It Possible to Use Finish Nails in a Brad Nailer?
A brad nailer is unsuitable for finishing nails because they are thicker gauges and won’t fit inside or shoot nails out of it. Getting the right size nails for your nail gun is always best.
3. Is It Possible to Use Brad Nails for Trimming?
Yes, brad nails are a good choice for making lightweight trims and molds, since they are very strong and durable.
4. Are 16 Gauge Nails Compatible With 18 Gauge Nailers?
No, since there is a possibility of nail jamming, the 16 gauge nails are larger. This may not be shot with a finish pneumatic nailer that has a narrow hole at the tip of the nose of an 18 gauge finish nailer. If you use a larger-sized nail, it can interfere with the accuracy of the brad nail and could cause damage to the tool.
5. What Nailer Should I Use for Crown Molding?
Generally, a brad nailer will suffice since molds are lightweight. A crown molding that is too wide is usually heavy, and brads cannot hold it. To hold it we recommend using finish nails of 16 gauge.
Conclusion
As you can see, each type of nailer serves its specific purpose. Both of these tools are valuable to the construction of your home. By knowing the differences between brad nails vs finishing nails, you can work with them correctly to do your job more quickly and efficiently.
Knowing the differences between finish nailer vs brad nailer makes them easier to choose. We hope that this information will help you better understand each specific nailer and use the right one for your job.