WoodenuKnow.com is a participant in the Amazon Services LLC Associates Program, an affiliate advertising program designed to provide a means for sites to earn advertising fees by advertising and linking to Amazon.com and may earn from qualifying purchases.
Gluing leather to wood is not difficult if you know how to do it and the types of leather and wood glue you should use. If you use the right type of leather and wood glue for your project, such as when gluing leather to wood, you can achieve a strong bond between the two materials that will also look professional.
If you are unaware of the proper technique for gluing leather to wood, do not worry. In this article, we provide a step-by-step guide on how to adhere leather to wood, including tips on selecting the right glue and leather type for your specific project.
What Materials Are Required to Glue Leather to Wood?
Wood: Wood can be any type of wood. The type of wood does not matter when gluing leather to it.
Leather: When gluing a leather piece to the wooden surface, make sure the glue is only used on the piece of leather surface and not on the whole surface of it because it will seep through and could damage the other perspective surfaces.
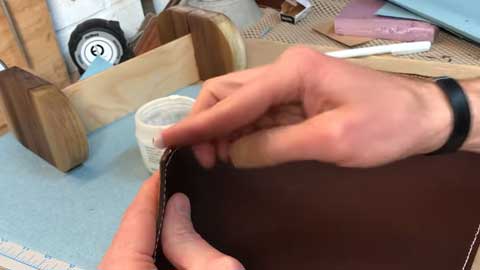
Glue: You can use either leather glue that is specially formulated to work with leather or you could also use a good quality carpenter’s glue. The glue can be stored in a glue pot.
Tools: Some tools would be required to complete this project such as a pencil, scissors, gloves, rubber mallet, putty knife, pencil, scissors, and safety goggles.
A rubber mallet and putty knife will also come in handy when mixing up your adhesive. You will need these tools to adhere to the leather smoothly.
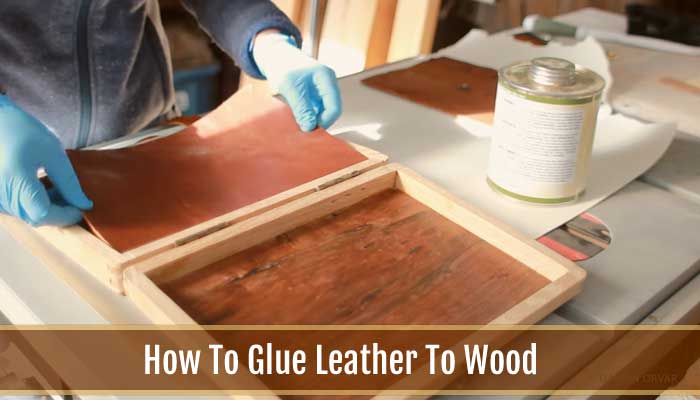
How to Glue Leather to Wood : Easy Guide
Step 01: Clean and Dry the Wood
Before leather glue to wood, it’s important to clean and dry the surface. Make sure any dirt is removed from the area where you are going to attach your leather. When applying contact cement to the wood, you need a clean surface for it to adhere properly. If there are waxes or oils on the wood, the adhesive will not bond. You can clean your wood by wiping it down with a dry cloth or using a solvent such as acetone to remove any oils that may be present.
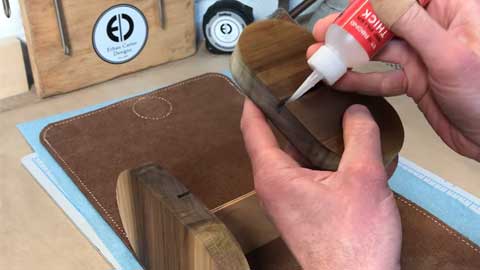
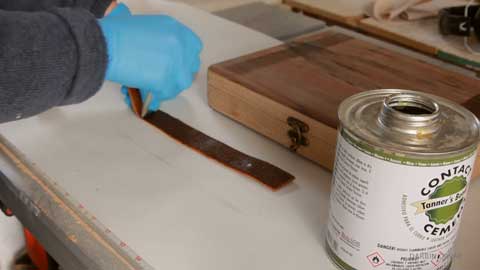
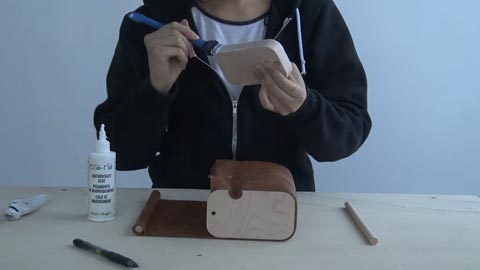
Step 02: Apply Contact Cement and Attach the Leather
After making sure your project is completely clean and dry. If the wood is unfinished, like on a piece of furniture, use contact cement to attach the leather to the project. Apply the contact cement using an old paintbrush or foam brush evenly onto both your wood and leather pieces. Make sure you don’t miss any spots by brushing over all areas that will be adhered together until it is completely coated. Let dry for an hour and then press the two pieces together firmly. Make sure to wear a glove on one hand for this step as you need a hand free to smooth out your leather onto your wood.
Step 03: Use a Rubber Mallet to Smooth Leather
Rubber mallets come in different shapes and sizes depending on your project. Using a flat or slightly rounded surface, smooth out the leather against your wood. Be careful not to over-hammer the piece as it could cause damage, especially if you’re using a metal hammer. It is advisable to use porous materials. The purpose of using a porous material is to enhance the strength and cohesion of the materials being glued together. The pores will allow some glue from one surface to flow into the other for faster, stronger adhesion.
Step 04: Use a Putty Knife to Smooth Leather
Using the rubber mallet, you can also use a flat putty knife to smooth out your leather. Smooth out any wrinkles or creases that may have occurred during the previous step.
Step 05: Trim Away Excess Leather
The excess pieces of leather can be cut off with a sharp knife. Make sure to use gloves while using the knives to protect your hands from cuts.
Step 06: Sand down Any Rough Edges
After using a knife to trim away the excess leather, take your sandpaper and use it to smooth out any rough edges.
Step 07: Apply Acrylic Sealant to Protect the Project
The last step is to complete the project by applying an acrylic sealant over all glued areas. This will add extra protection and give your project a polished look when
Step 08: Clean Up Your Work Area
When completing the project, make sure to clean up your work area and discard any solvents or materials that you do not need. If you’re working indoors, open the windows to air out the room and use a fan to speed up this process. You can also wear gloves and safety goggles while completing this project for extra protection.
What to Consider When Choosing the Best Glue for Leather to Wood?
When you are gluing leather to wood, the type of project you are undertaking will largely determine which leather glue is best for your particular needs. There are several types of glue available, including hot glue, PVA glue, suede glue, cyanoacrylate adhesive, epoxy glue, spray adhesive.
Carpenters glue should be used if you are looking to attach the leather to finished furniture. Contact cement works well for attaching pieces of leather onto unfinished wood to make unique-looking coasters or picture frames.
If you are looking to attach the leather to a finished piece of furniture, then carpenters glue is your best choice. They both have good tack and strong adhesion, so they will hold well once set.
Carpenter’s glue also has the benefit of being water-resistant and therefore durable. The downside is that the carpenter’s glue does not dry completely clear, so it may leave a slightly cloudy finish on the leather.
If you are planning to attach your leather pieces onto an unfinished piece of wood, then contact cement is the best option.
Contact cement has one surface that holds moisture and once this moistened surface adheres to the other piece of wood, it becomes permanently stuck.
You can attach your leather pieces with contact cement by painting one side of the leather with waterproof leather glue and sticking that wet side to the wood surface.
Tips for Extending the Lifespan of Glue Leather to Wood

Here are a few tips for extending the lifespan of leather glued to wood:
01. Be sure that your leather is clean, dry, and free from impurities.
02. Use the strongest glue on unfinished furniture if you want it to look nice. If not, use contact cement for strong adhesive qualities.
03. If you want to use nails, make sure to drill pilot holes before gluing the leather to wood.
04. Be sure to leave time for the glue on your project to dry completely.
These tips will ensure that you get a strong bond between your leather and your wooden furniture or another project while it’s durable enough to last through years of wear and tear.
Safety Considerations When Gluing Leather to Wood
Leather has natural oils that may affect the integrity of some leather glue, such as rubber cement. There’s no problem with making a bonded joint like this, but you need to make sure the leather glue will hold up over time.
You can test out your materials by doing a quick spot test on scrap pieces of leather and wood before using the leather glue to make sure it will work.
Leather also has a tendency to absorb acids, making it susceptible to acid damage. If you are planning on gluing your leather onto other materials, make sure there aren’t any acidic materials in contact with the leather that could affect it over time.
Make sure the room is well ventilated. You want to make sure that any solvent-based leather glue is used in a well-ventilated area, otherwise, you risk getting sick from fumes.
Make sure there is adequate lighting. If you’re working with solvents or other chemicals, you don’t want to do it in bad lighting since that can lead to accidents.
Wear protective gloves when working with solvent-based leather glue, such as contact cement.
If you’re doing this project outside, make sure to use solvents in well-ventilated areas where there is no risk of fumes getting into your eyes.
Make sure you are using contact cement correctly or else it may damage your leather. You don’t want to get any adhesive on the sides of the leather because it will prevent the top layer from adhering to it. You also don’t want any of the cement getting on your fingers.
Use paper towels or a rag to wipe off the excess adhesive from leather. It may look clean, but there can still be a residue that you need to remove before applying another coat of cement if needed.
If your leather is dyed, make sure to test the dye on a small area before using the contact cement. That way, if there is any reaction between the dye and the adhesive, you can find out beforehand and fix it.
Be careful if using rubber cement with leather. The solvents may remove dye or other finishes on your leather.
Make sure to read the instructions for any other types of leather glue such as hide glue you are using before applying it to ensure proper safety precautions are followed.
Use rubber cement with good ventilation. The fumes can be hazardous to your lungs if breathed in for too long.
Make sure you don’t spill it or get any on your skin. If you do, make sure to wash it off immediately and thoroughly.
Protect your leather from the solvents by making sure there is no rubber cement on the edges.
FAQs
Why is Contact Cement So Much Better?
The reason that contact cement is so strong for sticking leather to wood has to do with the way it works. When you apply contact cement, you have about 2-3 minutes before it starts to dry, and stick your pieces together permanently. That’s why you want to be sure you have your pieces lined up the way you want them before it dries.
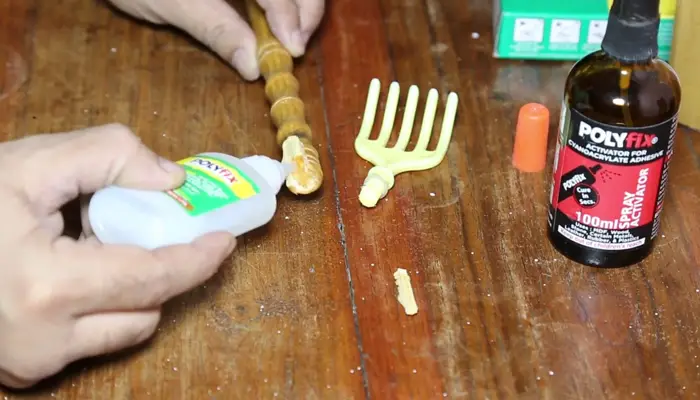
Can You Use Gorilla Superglue on Leather?
You can use gorilla glue on leather products because it is water-resistant. Gorilla super glue dries quickly, provides a stronghold, and can be sanded or painted when dry. One of the benefits of gorilla super glue is that it dries clear and sets in seconds.
Conclusion
Glue is a very useful tool for attaching leather and wood, including when you need to glue leather to wood for your project. It is necessary to use the right glue for a strong and durable bond. Whether you are working with leather or wood, there are many different types of leather adhesive available on the market today that are specifically designed for this purpose.
Choosing the right type of adhesive will depend largely on the materials you are working with and the properties you desire in your final product. With the assistance of this article and its step-by-step guide on how to glue leather to wood, we hope you now have the knowledge and confidence to achieve a successful bond between these two materials for your projects.