WoodenuKnow.com is a participant in the Amazon Services LLC Associates Program, an affiliate advertising program designed to provide a means for sites to earn advertising fees by advertising and linking to Amazon.com and may earn from qualifying purchases.
A common feature for homes to often have wood decks as an exterior addition, allowing families to enjoy the outdoors in more space. But, how to stagger deck boards? It is a question that many people ask themselves when they are in the process of building or renovating their backyard.
Installing a deck board in a staggered pattern is economical and provides an attractive appearance to your deck. It can be a daunting task to find the right way to do it, but there are several ways you can stagger your deck boards for an eye-catching look!
In this blog, we will discuss different methods of staggering and how to plan your deck layout for the angled boards, the benefits to stagger your decking boards, and then offer some helpful tips on how to install them in a stacked pattern. You should understand why a deck plank should be stacked by the end of the reading.
Why Do We Stagger Deck Boards?

- The aligned design looks aesthetically pleasing. It offers a unique look to any deck board by creating a zig-zag effect.
- A deck is not complete without decking boards. Everybody sees them. They are the things people stroll on. The Decking board is the identifiable feature of the support and dressing of the framework. How to layout decking boards involve staggering or butting the seams or joints where the panels meet.
- Straggled boards offer more space between each board, which can prevent rain or melting snow from collecting in crevices and running through your entire deck. This process will help to avoid rotting wood where wetness accumulates over time.
- Staggering your boards can help to avoid a monochromatic look for the deck, It will appear homier this way and comfortable with different shades of wood being utilized in between each board spacing.
- Laying out deck boards in a spaced model means there will be breaks between each board, which reduces the risk of tripping on an edge when walking across it.
Patterns of Staggered Deck Boards
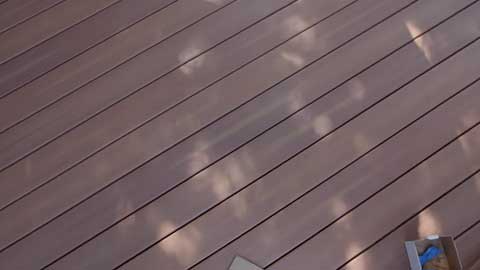
When considering what type of pattern you would like, just remember that there is no right or wrong way to do so; however, there are some different patterns to consider.
Deck boards are typically installed in a pattern that is either square or rectangular. Square patterns are the most common and can be found on many decks across the country.
Rectangular patterns offer more pattern flexibility than square patterns, but they require more material to complete
Board and Batten Pattern: This type of standard is the most traditional, where there would be two boards in between a batten.
T and B Pattern: This type of pattern is where the boards are arranged in a “T” shape, and then there is a batten in between the “T” shape.
The most popular pattern is to stagger the boards in a herringbone or chevron pattern. Herringbone Pattern is a type of pattern is where two boards are laid out parallel to one another, but at an angle with one board being directly over the other. Then, you would place your following two boards at a diagonal across those first two and continue alternating.
- You can also arrange them along the outer edge of your deck to make it look like a fence.
- You can position them outward to add an artistic effect to your deck.
- You can place them as rows to make it easier for people with disabilities.
- You can align them inwards to make your deck look wider.
- You can group them to create a walkway for easier access if you are dealing with stairs.
You Might Also Like: What blade do you need to cut Hardie Board siding?
How to Plan Your Deck Layout for Staggered Boards
Planning the deck layout beforehand is essential and will make your installation process much smoother. When planning ahead of time, keep these tips in mind:
- Draw an outline on the ground or floor that is uneven, and then measure how long it will take until you reach the next board.
- Keep in mind the size of your deck, and plan ahead to make sure that you have enough boards for each row.
- Take into account where any stairs are located on the deck layout so they can be taken care of quickly without requiring extra materials or workforce necessary.
- Consider the size of your boards and make sure that they are long enough for each row.
- Consider the height of your deck and how many rows you are wanting.
- Make sure to plan for any curves on the deck or other unique features that you might want.
- Consider the spacing of your boards, and make sure that they are consistent throughout.
The Process to Stagger Deck Boards

It is essential to decide how to align the joints when using deck boards to protect the joist structure. In order to layout a conventional pattern, start at the rim joist’s outer edge and contemplate applying any multiplier and doubling joists by that size and creating a design consisting of a variety of sizes. Using even sizes of planks will always guarantee the joint will be between a double joist.
It is possible to use composite decking in the same manner as wooden decking. Nevertheless, you must follow the instruction manual when assembling composite decking. It is vital to consider joint spacing with decking because of the sensitivity to temperature changes.
In some cases, companies recommend using concealed metal or plastic screws rather than wood screws when installing composite decking. Wood screws often form a ring surrounding the screw head when holed in plastic. Inverted thread screws can be inserted similarly to regular screws through the plank surface, but do not produce a mushroom shape.
An invisible clip is screwed into a slot in the board edge and attached via the joist structure. As the temperature changes, a flexible system enables planks to bulge and shrink without hitting the joist, snapping them, or warping them.
It is possible to clamp two clips together at the intersection, but a double joist should be used when gaps exist. Plank ends should not be more than an inch from clips, and boards should be spaced no more than 1/8″ apart at their corners.
If you are employing clips, it is recommended not to secure the screws before the subsequent piece is positioned. This process allows the clip to be more easily inserted into the following timber slot. As soon as the second set of partial clips is attached, the screw can be adjusted.
Ensure the boards are flat and straight before attaching them so that the ends stay straight. Apply a self-sticking rubber sheet or adhesive to protect the joist framework from damp penetration.
Tips on How to Refinish Your Deck Boards
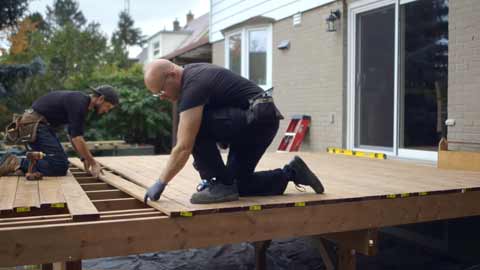
- When planning your deck layout, you should measure the length of one board and divide that number by two (ex: a 12″ plank would be cut into halves).
- Be aware of where you are placing notches.
- Always stagger the boards in a pattern, either square or rectangular. Never put two boards next to each other that are of the same thickness and width.
- Make sure you have an even amount of decking for each row, as well as enough material left over after cutting all your pieces so they can be cut to the needed widths.
- Always cut your boards into two pieces and then align them. This process will create an aesthetically pleasing chevron pattern, prevent water from collecting in the decking crevices, and make it easier for people with disabilities who need access to walkways through stairs or other obstacles without breaking their stride.
- It is essential when staggering your decking that you check for any cracks or other damage in each board before installation occurs, so take time and care when evaluating each piece before it goes into place on your deck plan.
- Keep in mind the thickness, width, and measurements of each board when cutting; they should all be uniform throughout.
- Make sure that you stagger your boards so there are breaks between them to prevent people from tripping on an edge as they walk across it.
- Keep in mind the spacing between each board and imagine how they will look completed.
Benefits of Staggering Deck Boards
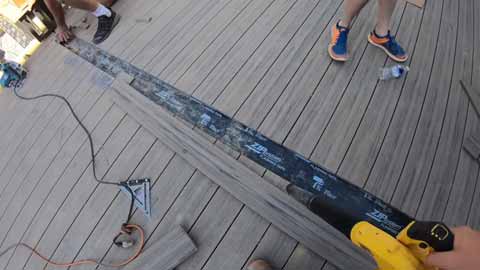
There are many benefits to staggering deck boards, but the three most prominent ones include:
- An attractive appearance for your outdoor space that will make it more enjoyable.
- Increased room between each board which can help to avoid rain or snow from gathering in crevices and running through the boards.
- Easier accessibility for people who need to use the deck and use wheelchairs, scooters, or other mobility devices that make it difficult to walk on a flat surface.
Conclusion
You can use various techniques to arrange your deck boards, but the most important thing is to have them in different lengths. This process will allow for more space between the gaps and make it easier for those walking across your deck. We hope this article has helped!

