WoodenuKnow.com is a participant in the Amazon Services LLC Associates Program, an affiliate advertising program designed to provide a means for sites to earn advertising fees by advertising and linking to Amazon.com and may earn from qualifying purchases.
The staircase is one of the most important features of your home. It’s where you greet guests, and it’s how they access your different levels.
And if you have children, their bedrooms are likely on a higher level than their living spaces. So, while many homeowners focus on ensuring their staircase is well lit and clean, few think about what else can be done to improve its appearance and functionality, such as adding a hardwood stair runner.
Stair runners make the stairs more comfortable to walk up or down by providing better traction for shoes.
Keep them cleaner because dirt falls through gaps in the material instead of ground into the carpeting below. In addition, they add another decorative element that will bring color and texture to your home.
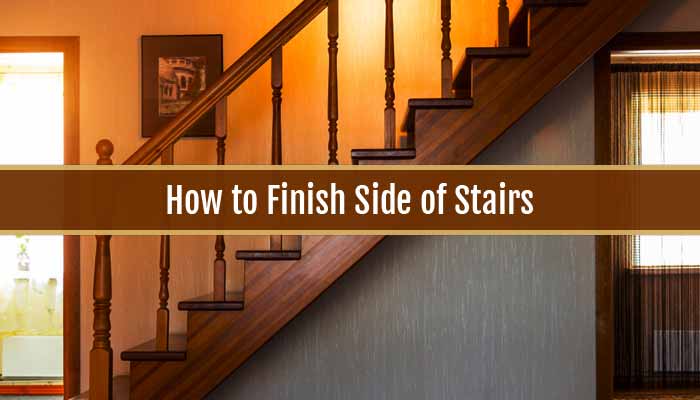
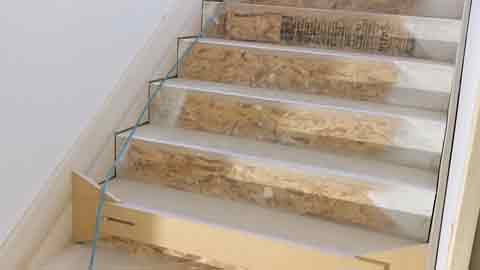
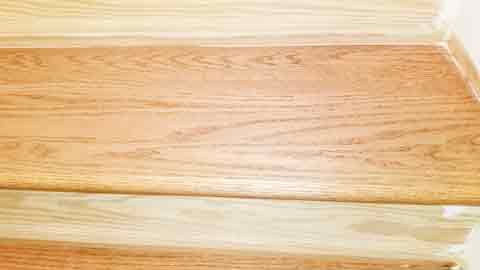
In this article, you will learn how to finish side of stairs. Initially you must finish the side of the carpet on the stairs and open the side of the riser for doing your project successfully.
How to Finish Side of Stairs in 12 Steps?
Finishing the side of a carpet on stairs is as easy as it sounds. You just follow the basic procedure with any other staircase, but due to the unique shape of a staircase, they do require some additional accessories.
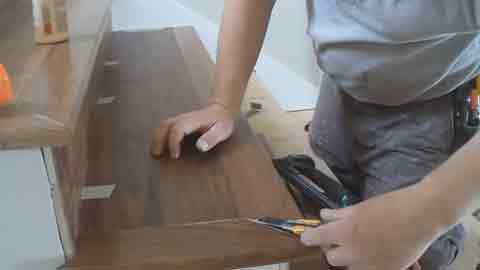
We’re using a hand-held rotary cutter with stair nose attachment and strips that are ¼” thick by 18″-wide for this installment. So let’s start installing.
Step One: Calculate The Number of Stair Treads You’ll Need
If your stairs are less than 40″ wide, you only need to run a short runner up to the first landing (ie. 25 steps). If it is more than 40″, then you will have an additional piece on each side (making 5 in all) that will go up to the second or third landing.
You’ll need to measure this carefully because you’re installing these on an angle and, due to the width of your strip material, they’ll have to be one continuous piece. So for each set of stairs, decide how many extra pieces (which will form a straight line with your corner piece) you’ll need to purchase.
Step Two: Mark the Width of Your Steps
Next, mark out how far apart each stair tread is on the top and bottom of the staircase. On an angle, this comes out to a measurement equal to 7″ for every tread.
Step Three: Rip Your First Row of Stair-Nosing Strips
Take the chalk line and position it at the top of each stage, overlapping where the next piece will go.
Then take your rotary cutter and rip a strip from your material that is 7″ wide (if you’re using ¼” material as we do, make it ¼” less).
Step Four: Stair Nosing in the Right Way
Once you have your first strip ripped out, take it to the corner of the staircase and position it against the wall. If you have a landing between each set of stairs, then cut to length and cut off the corners.
Step Five: Glue Your First Stair Treads and Landing Strip
Apply glue to the back of your first piece of tread material, and then place it in position on top of your chalk line. Work into corners with a small putty knife.
Then, once you have it appropriately placed, place a few pieces of scrap wood along it to help hold it in place while the glue dries.
Continue doing this for each row, overlapping your next piece by about 1″.
Step Six: Cut and Attach Stair Nosing Strips
When you get to the bottom or top of your staircase, cut off the corner and butt your tread against the wall to finish off.
Step Seven: Keep Using Stair Nosing Strips for Each Successive Step
As you continue up the stairs, keep gluing on your material one piece at a time until you get to the width of your landing (if applicable).
Remember that if you are making a corner tread, this will be a little wider than the rest of your stair treads.
Step Eight: Make Your Landing Strips
If you have a landing in between each set of stairs, you’ll need to cut off the corner and a ¾” wide strip that will run along with all 5 landings.
You will have different angles for each step in a set of stairs, so you’ll need to make your first angle strip with a miter saw.
Once it’s ready, place it along the backside of your first piece of tread material and determine where you need to cut off the excess.
Place a few pieces of scrap wood along it to help hold it while the glue dries. Then continue working up the stairs until all 5 landings are finished.
Step Nine: Use Stair Nosing Strips to Finish Off the Top of Your Staircase
To finish off the top step, cut a strip of stair nosing material to length and attach it at the back corner of your last piece of tread material.
Then cut a 45º angle on one side and put it in place at the end of the landing.
Step Ten: Caulk to Finish Off Your Stair Nosing
Once you have your stair nosing in place, you can go over the seams with caulk or wood filler to hide them. You’ll want to use a paintable caulk so that the finish on your stair nosing will be less visible.
Step Eleven: Remove Excess Material with Caulk
Once you’re done caulking, take your Detail sander and remove any excess material. Then touch up any areas where caulk has been applied. If you need to apply a second coat of caulk, always sand the previous coat.
Step Twelve: Remove Your Stair Nosing and Paint the Side of Your Stairs
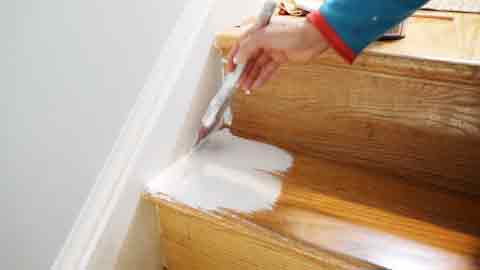
Now for the best part: paint your staircase. Using a paint sprayer is the best way to go, but you can also paint it by hand if you don’t have a sprayer available.
How to Finish Open Side of Riser?
Finishing the open side of the stair riser is important to add beauty to your house. So you have to follow all the steps properly to get a perfect result. The steps are as under:
Step 1: Measure the Height of Your Stairs
You have to make sure that the risers are smooth and level for the perfect finish. If you have uneven risers, then follow the instructions below.
Step 2: Prepare and Mark the Base of Your Stairs
Firstly, you have to find the base of your stairs. Use a tape measure to find the length of all sides of the landing and then draw these lines on the basement stairs. Then use a pencil to mark these heights on each side of the tread.
Step 3: Use Miter Saw

You can also take help from a miter saw to mark the angle of each side. Then, use scrap wood to place your tape at the right angle. But don’t forget to make sure that your lines are ideally located on the wall and other sides of the stairs.
Step 4: Cut the Top Part of the Risers
If you have a miter, saw then use it for cutting. If not, use a hand or power saw to cut the top wood pieces into 45 degrees angle. But make sure that the edges are sharp enough to give a perfect fit for your treads.
Step 5: Sand Polyethylene and Then Use an Adhesive
Once you have cut all the top pieces of risers, sand them properly to smooth on each side. Then apply some adhesive and place over your riser pieces. After that, press them with the help of a block or something else.
Step 6: Sand Again
Once you placed the adhesive, it will take some time to get dry and stick properly. So you have to sand it again for better smoothness. Follow the same process on all 4 sides of the stairs. Make sure that each piece is perfectly placed on the other one.
Step 7: Attach Treads to Risers
The last part of finishing the open side of the stairs is attaching all your tread pieces over risers. You have to make sure that you are not creating any gaps between the pieces and glue them using some adhesive. Let it dry for few hours before placing furniture or anything on it.
Step 8: Use Paint or Stain to Get the Best Result
When you have finished all the steps mentioned above properly then use either paint or stain to finish your staircase railing in a perfect way.
It will be better if you apply some clear coat of polyurethane over it so that stains, dusts and scratches can easily be removed.
So, these are the complete steps to finish the open side of stairs with wood or other materials. Make sure that every step is performed perfectly so that you may not face any problems in the future.
If you have used polyethylene then make sure that it should be thick enough to support all your furniture pieces and people walking up and down the stairs.
Steps to Finish Open Side of Risers
It is a very simple one if you do it in a proper way. You can also add grace by painting them beautifully with some bright colors or even wood stains. Choose your paint carefully as they may not be able to hold well because there is more load on them than usual.
If you have an open-finished staircase, then you need to make sure that they are wide enough to hold the proper weight of your family members or friends.
This is why we always suggest painting them rather than covering them with a runner as the paint will give strength to your stairs and allow normal use.
Also, do not forget to balance the design with your handrail on both sides.
How do You Cover the Sides of The Stairs?
Many of us are not aware that there are different ways to cover the sides of stairs. In fact, any other way except for painting them will save you a lot of time, effort, and money. We have listed these 6 popular ways to cover the sides of your stairway without having to paint the side of the handrail in this article below:
1. Use Runner
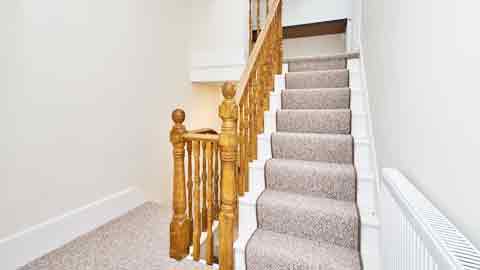
The easiest way to get a finished look on your stairs is by using stair runners. These are available in all kinds of materials and come in many decorative patterns as well.
The basic idea here is to attach the material to the riser and apply it to the sides of your staircase with double-sided tape or something similar.
It is one of the easiest ways to make your staircase look finished. The material you can use varies and includes carpet, vinyl, leather, or fabric. In addition, you may choose either a solid color or patterned material.
2. Add Trim around It
If you want more height on the sides of your stairway, then molding is an excellent way to do it.
Trim moldings are designed to fit tightly around the opening of a stairway and provide an attractive finished look that can be painted or stained easily.
3. Add Molding on Sides
Another option is to add a different type of wood trim around your stairs, such as quarter round or bullnose.
These are not as expensive or time-consuming as adding stairs to the sides of your stairway, and they can make a dramatic difference in how your staircase looks.
4. Add Wallpaper

Wallpaper is an excellent option for covering the sides of a staircase. It adds color and design that will make you want to look at your stairs every day.
You will find a huge variety of wallpaper that you can use on the sides of your stairway. There are several different kinds, ranging from floral patterns to geometric designs.
Select a type and color scheme that fits in with your overall decorating theme.
5. Trim out the Risers
If you have an open staircase or a staircase that is open on the sides and you want to cover the riser instead of covering the whole staircase, then adding trim around them will give you a finished look.
You can use molding or other bare wood trim to do this. Be sure to match your materials with those used in the rest of your home so that it blends in nicely.
6. Color the Riser

A great option for covering an open or unfinished concrete staircase is to use paint. The risers on a set of stairs are fairly easy to reach, and you can easily add color to them without any problem at all.
Choose paint that coordinates with your decorating scheme already in place, and if it’s not matching, add a little bit of paint.
In most cases, you’ll be able to do this without making your staircase seem out of place in the rest of your home.
FAQs
1. Is Solid Wood Better than Plywood for the Finish?
Answer: Solid wood floors are indeed more expensive than laminate and plywood, but they will last longer, have better sound isolation, and look much nicer.
2. What is the Molding on the Side of Stairs Called?
Answer: The molding on the side of the stairs is known as the baseboard. It can be made of a wide variety of materials, including wood, vinyl, and plastic.
Conclusion
Your staircase is an important part of your home and takes up more than just a few square feet in a room that might have other things going on it as well. Therefore, you’ll want to select your trim carefully because it will change how the staircase looks. If you follow the above steps properly then I think you won’t have any confusion on how to finish side of stairs properly.