WoodenuKnow.com is a participant in the Amazon Services LLC Associates Program, an affiliate advertising program designed to provide a means for sites to earn advertising fees by advertising and linking to Amazon.com and may earn from qualifying purchases.
Joining beams to posts is a technique for joining two pieces of wood together in such a way that the grain patterns on both pieces match up.
The most common reason people would use this technique is to avoid having an ugly seam show on the outside of their project, or when they need to join two lengths of wood that are mismatched in some way, such as different thicknesses or lengths.
But many beginners are not sure how exactly they go about joining beams together in order to create a strong joint.
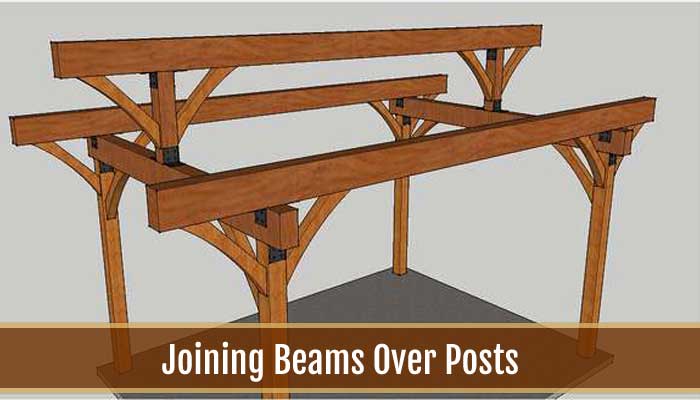
Methods of Joining Beams over Posts

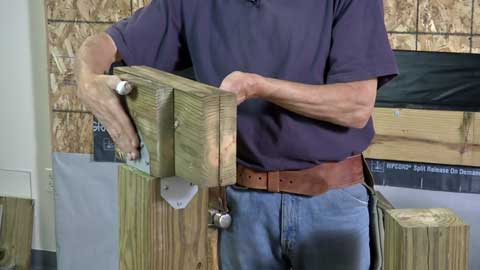
Method 01: Face-to-Face Joining
This is done by ensuring that the beams and posts are precisely face-to-face.
This is a very effective way of matching up the grain patterns, although it can be time-consuming; you need to make sure that both faces are perfectly flat and smooth before joining them together.
Method 02: Dado and Rabbet Joining
This joinery did by creating a rabbet on the side of one timber frame, which is then filled with a dado on the other beam. You’ll need to ensure that you have them cut at exactly the same thickness, and once again this will create a perfect match between both beams.
Method 03: Splining Joining
This is done by creating splines that will be inserted into mortises. The advantage to this approach is that it’s incredibly easy to use, and you can get extremely accurate results.
You also don’t even need two beams that are the same thickness. The only downside to this method is the fact that you do have to make sure your beam span is straight.
Method 04: Hammer Joining
This method is done by using a hammer to force the beams together. This might not be as effective as some of the other techniques, but it can still create very strong connections between your beams and posts, and it’s also much easier to make sure that both pieces are exactly face-to-face.
Method 05: Slotted Joining
This can be done by placing dowels into slots that are cut into the posts. To ensure that both pieces stay together, you need to make sure the beams have both been hammered onto the posts or slotted in so it’s secure.
Method 06: Tenon and Cope Joining
To use this method, simply cut a mortise starting at the end of one beam and stopping just before the other.
Creating tenon joinery is surprisingly quick, and it’s actually stronger than some of the other methods because you don’t have to worry about having any dowels or splines placed correctly.
This method also has another advantage in that you get a nice appearance from both sides of the beams.
Method 07: Dovetail Joining
This method is done by creating a dovetail at each end of one beam, and then inserting those into corresponding holes on the posts.
This method not only ensures that both faces will line up perfectly, but it also creates a very strong connection between your beams and posts as well.
Method 08: Lapped Joint Joining
To do this kind of join, simply place one beam on top of the other and ensure that the bottom piece has a mortise cut into it. You can then attach both pieces by inserting dowels or using glue to hold it all together.
Method 09: Butt Joint Joining
To do this kind of join, simply place beams on top of each other and ensure they’re flush at the ends. You can then create a dowel in both pieces and use glue to hold them together in place.
This method is fairly quick and easy, but it’s also not going to be as strong as some of the other options.
Method 10: Mitered Joint Joining
This can be done by simply miter cutting each corner of the beam and inserting it into a corresponding slot on the post. You’ll need to make sure they line up perfectly, and you’ll also want to use glue to ensure the two pieces stay together tightly.
This is a quick way to ensure both grains match up, but it’s important to note that this method is fairly weak because the pieces are held together with glue alone.
A Related Topic: The Complete Guide to Bracing a Deck from Swaying
Safety Precautions during Joining Beams
01. Have a bucket of water nearby, as well as rags and other tools for cleaning up any glue that may drip down the posts.
02. Make sure you wear protective goggles or some other eyewear during this process to avoid getting wood chips or splinters in your eyes.
03. Tie your hair back to prevent it from getting caught in the beams or posts.
04. Ensure you use strong gloves during this process, as some of these techniques can be difficult on your hands.
05. Always make sure both pieces are completely dry before any gluing is done, otherwise you’ll never get them apart again.
06. And most importantly: always follow the instructions on the glue you’re using, and make sure the materials you’re using are designed to work together.
Why Should Beams Be Joined Perfectly?
When beams are joined imperfectly, one of the most common side effects is that it can create gaps between them. This might seem like a small issue, but over time it will be easier for water to get inside and cause the wood to rot or warp.
Another reason you want both beams to line up perfectly is because it provides your project with a much more professional appearance.
It’s amazing how much it will improve the look of your beams, and you can also use this to hide any small mistakes you might make during the process.
For example, say you made one beam out of quarter-inch lumber while the other was cut using three-quarter-inch materials.
If they’re not placed perfectly, you might be able to cover it up by using a different technique to join them together.
Joining beams to posts can also help you avoid having any gaps between boards that run horizontally along your beams.
This is especially important when the wood piece is going to be used outside or somewhere where there’s a lot of moisture around, since this will help protect the wood from rotting.
FAQs
01. How to Join Beams over Posts in a Raised Garden Bed?
To join beams over posts in a raised garden bed, simply create tilts on each end of your beam. You can then use joist hangers to secure the pieces into place with joists that match up perfectly.
Pergola kits are also an ideal choice for this kind of project, as they have big beams that are already pre-cut to fit over posts.
02. Are Joist Hangers a Good Way to Join Beams?
Joist hangers are a good way to join beams because they provide a very stronghold. You can also use joist hangers to make custom joists, which is a great way to ensure everything lines up perfectly. Rim joist hangers can also be used to help secure the beams together if you want.
03. How to Join Beams over Posts in a Hidden Way?
To join beams over posts in a hidden way, the simplest thing you can do is to miter cut one end of each beam and then insert them into corresponding holes in your post. You’ll need to use glue along with deck screws to secure the pieces together tightly.
04. How to Make a Deck Beam?
To make a deck beam, start by creating your joists on the ground and spacing them far enough apart for you to work comfortably. You’ll then use deck screws to attach them together tightly with decking screws that mesh perfectly.
To lay deck boards without joists, start by adding your decking material at the edge of your deck.
05. How to Fix Deck Boards That Are Coming Loose?
One way to fix deck boards that are coming loose is to add a joist hanger to each deck board. These can be used when there’s a deck post underneath, or you can simply run the deck board across the top of beams that have been secured over posts.
Summary
It’s important to remember that you can use whatever method you prefer when joining beams to posts in order to make them join together tightly. Each of these methods is equally effective, and they’re all much simpler than one might expect.
Just be sure to follow the instructions as carefully as possible and you’ll find that the entire process runs smoothly as well.
A Related Topic